Affiliate Disclaimer: This post may contain affiliate links. This means that I may earn a commission if you make a purchase through these links. I only recommend products and services that I personally use and believe will add value to my readers. Your support helps keep this blog running and is greatly appreciated. Thank you!
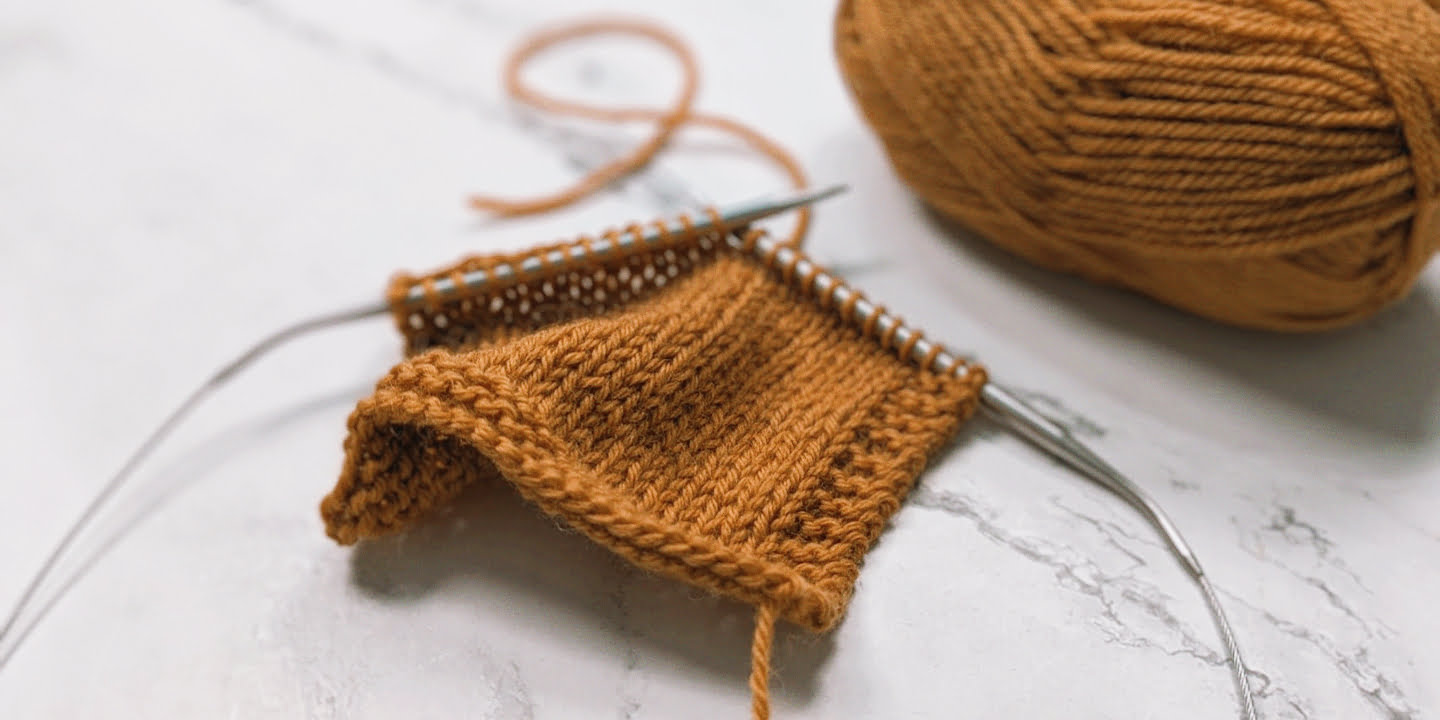
Wouldn’t it be lovely if we could just buy a ball of yarn that magically came with unlimited yardage and just grew and grew and grew as to our heart’s content? Sadly, this just isn’t so – sigh. The truth of the matter is, if you’re knitting up a large-ish project, at some point joining a new ball of yarn to your work is going to come into play.
Why not just tie a knot, you ask? Well, besides the fact that it looks rather ghastly when it inevitably finds its way through to the front side of your project, knots are risky and often unreliable. That is, they often don’t. stay. put.
Besides, why tie a knot when there are far more sleek and effective methods to choose from out there? In this article, I’ll show you what I consider to be some of the best methods of joining a new ball of yarn to your knitting. We’ll go in order from easiest to most complex. Some of these methods I typically use far more than others, and some I don’t use at all but I leave them here just in case you end up finding them useful. So grab your project and let’s get this thing started!
THE DOUBLE STRANDED JOIN
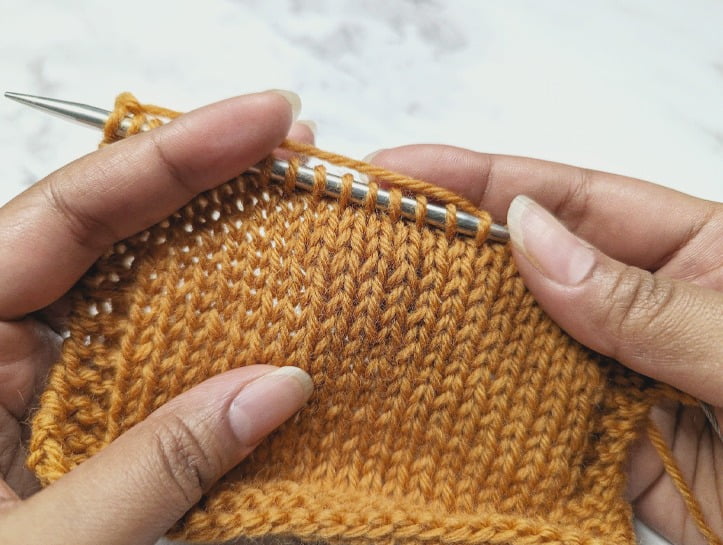
The Double Stranded Join is a method of joining a new ball of yarn to your work without having to weave in ends at a later time. I list this one first because not only is it very popular, but it’s also quite easy to execute. In order to work this join, all you really need to do is lay the yarn strand connected to your new ball of yarn over the strand connected to your old ball in opposite directions. From here, you just work a few stitches with the two strands held together.
Let’s take a closer look at how it’s done:
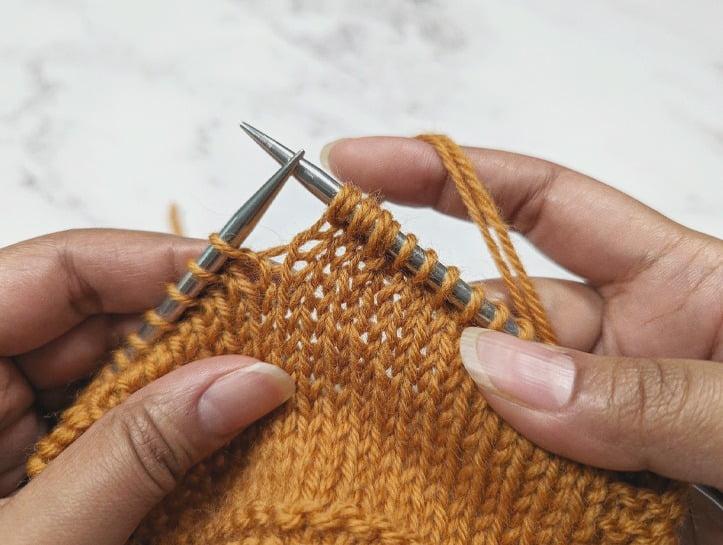
Step #1:
Work to the point where you want to join a new ball of yarn. Leave a tail long enough to be able to work a few more stitches.
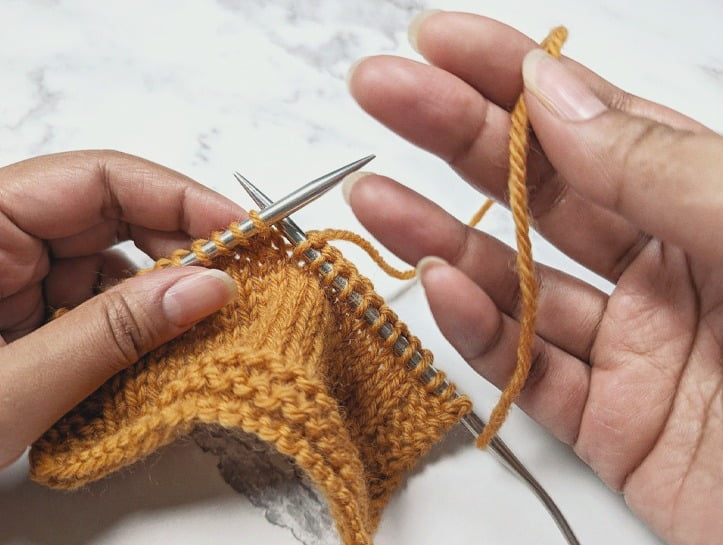
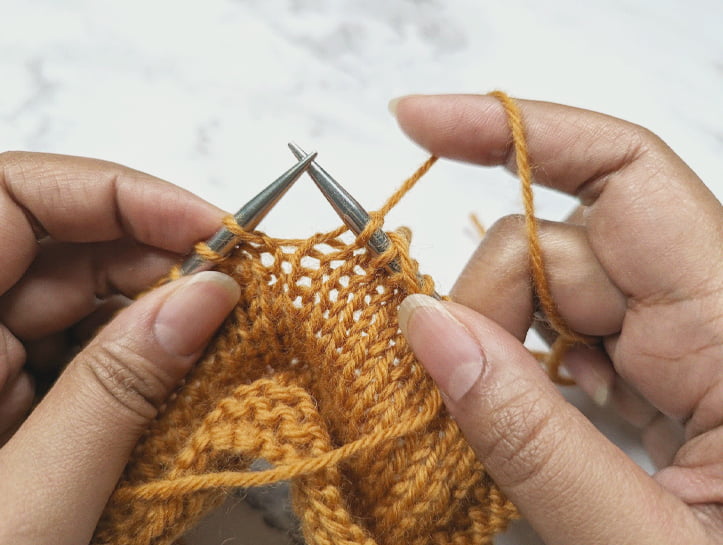
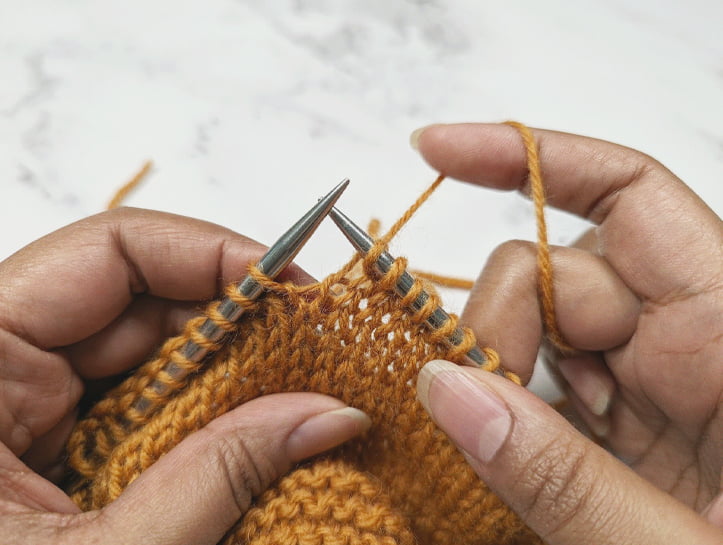
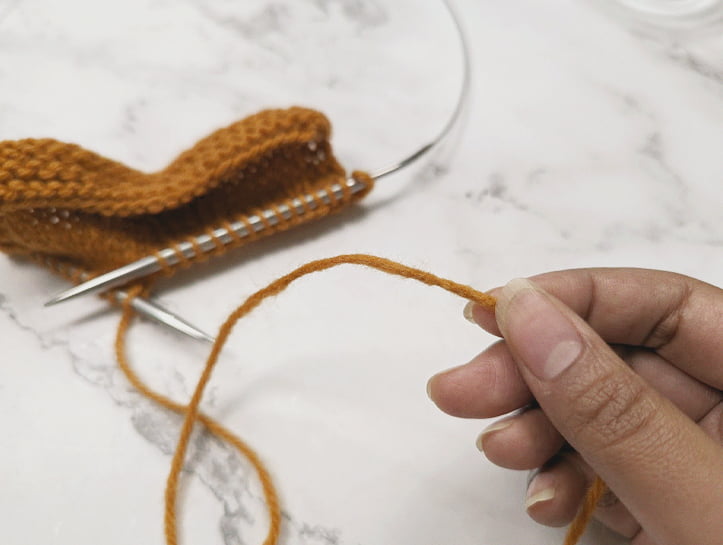
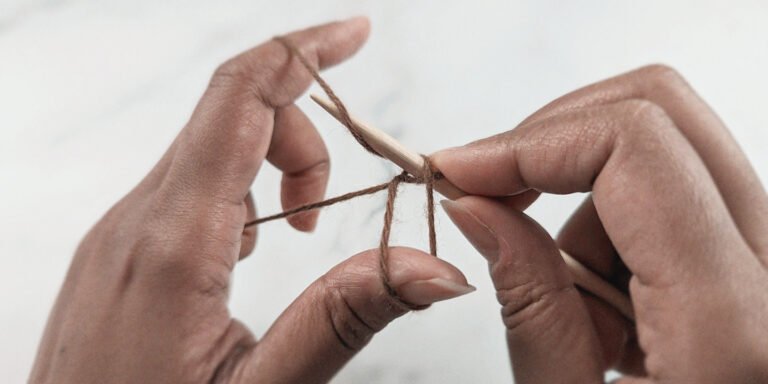
Step #2:
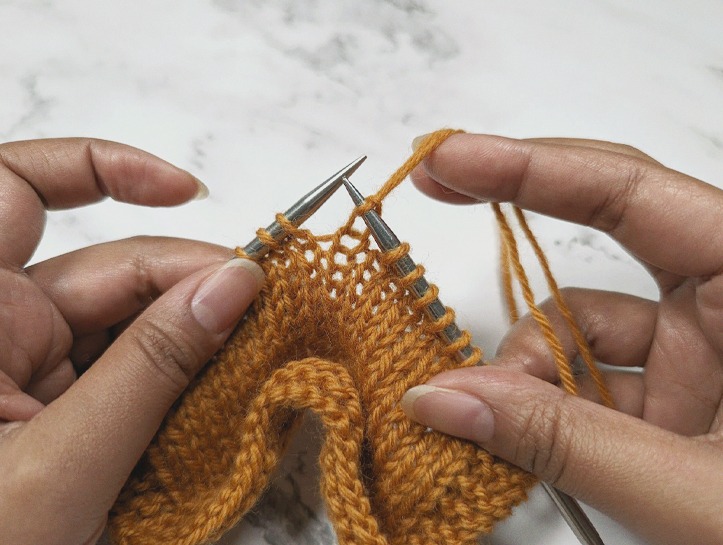
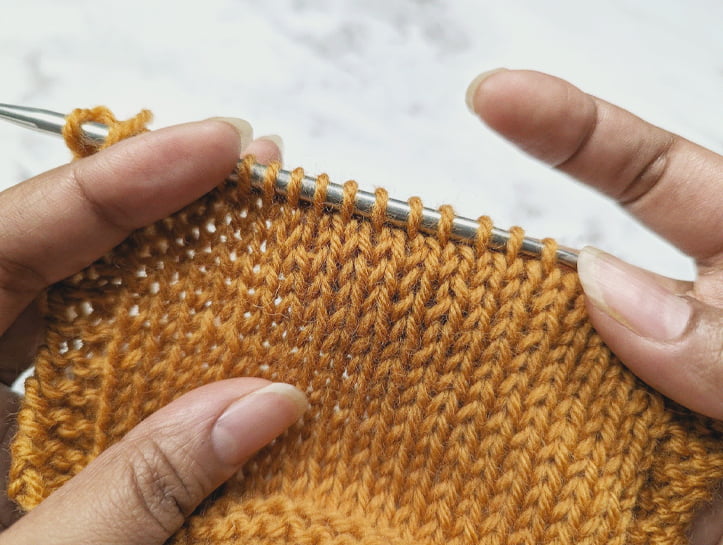
Grab the tail of your new ball of yarn, and lay it on top of your old tail in opposite directions, as shown above.
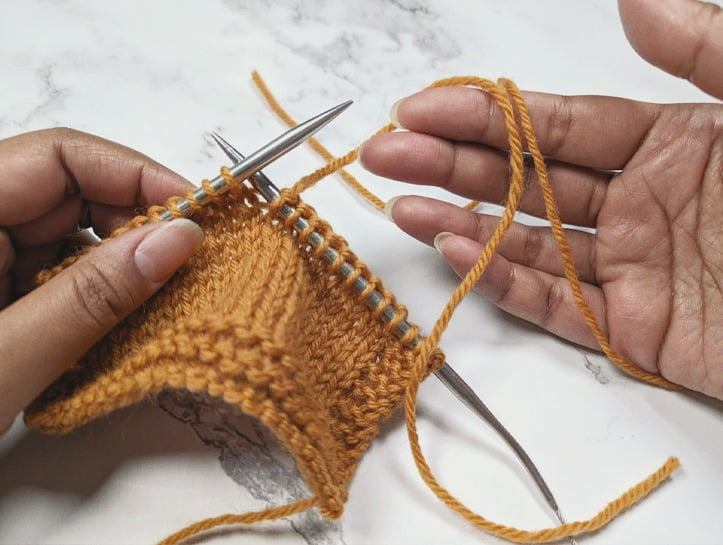
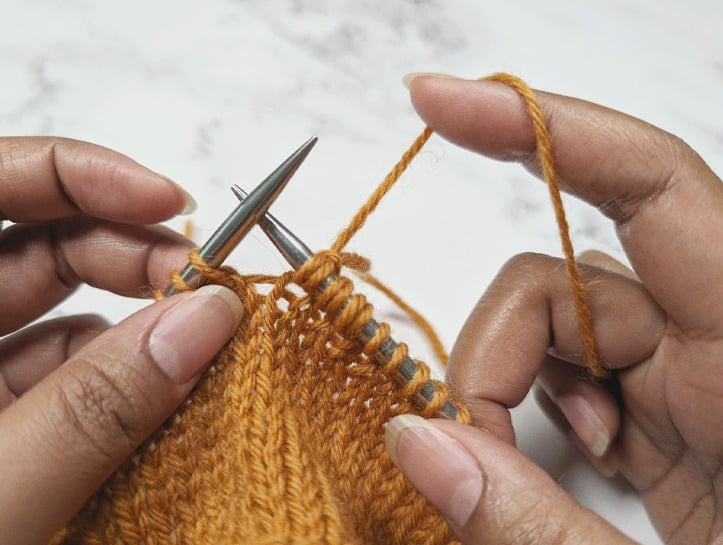
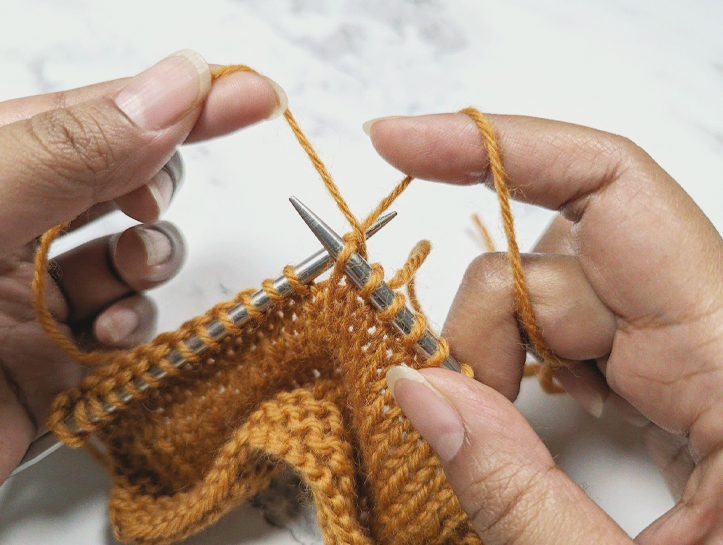
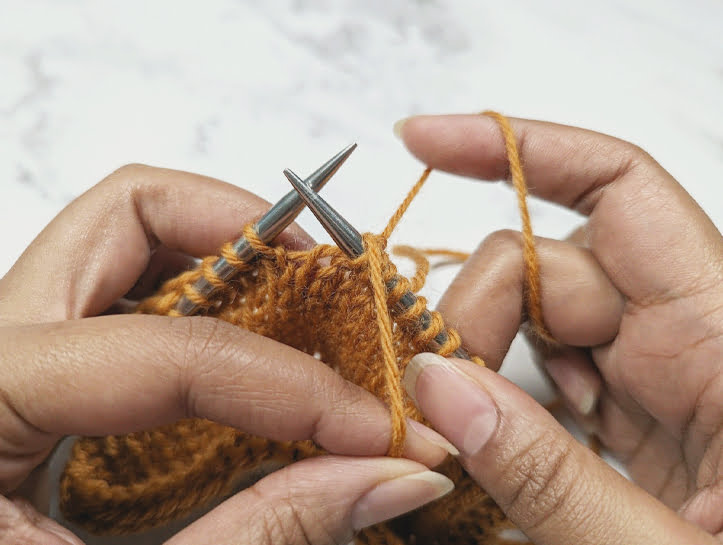
Step #3
Holding the two tails together, work the next stitch double stranded.
Step #4:
Continue working a few more stitches double stranded, to secure the join.
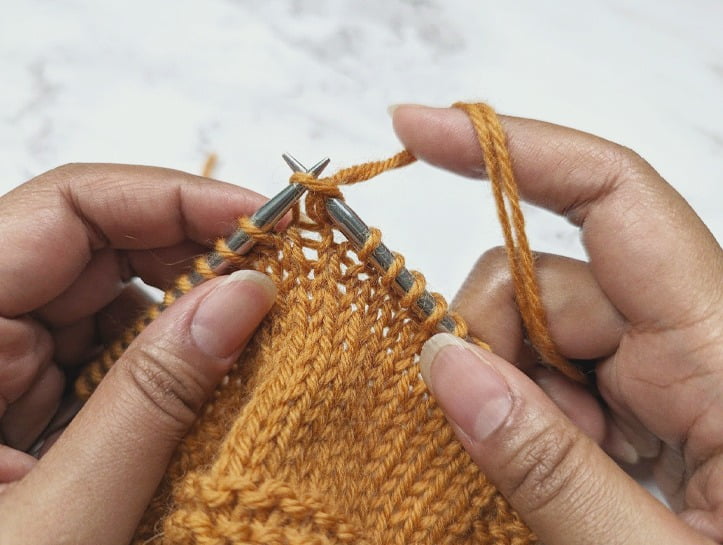
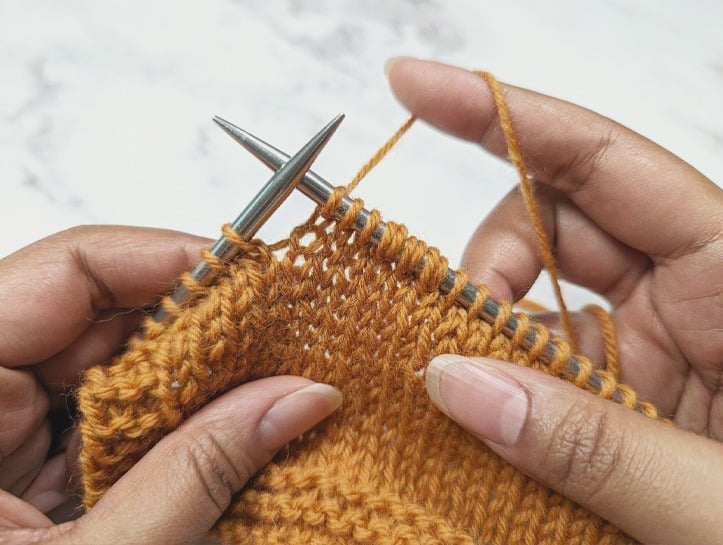
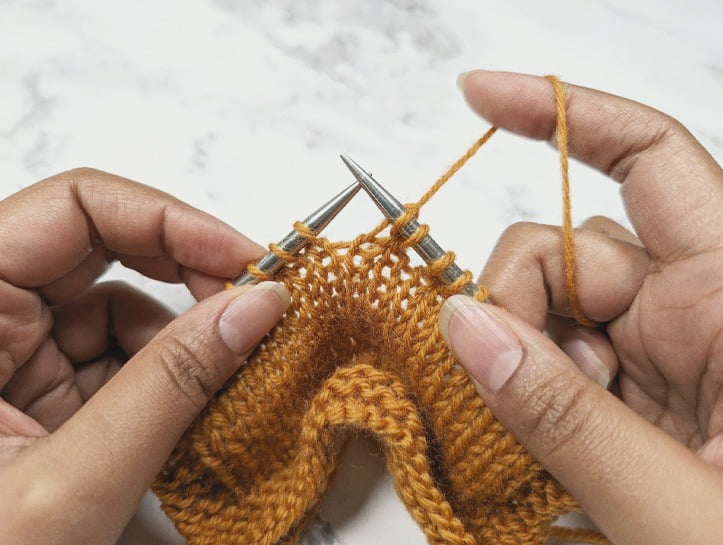
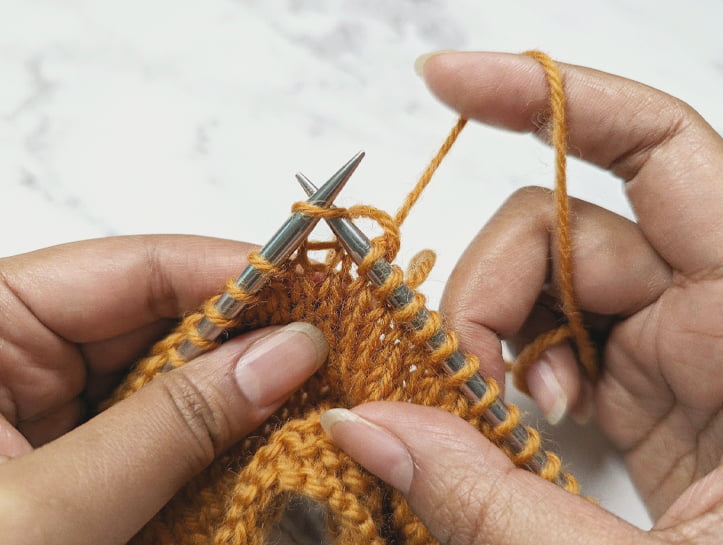
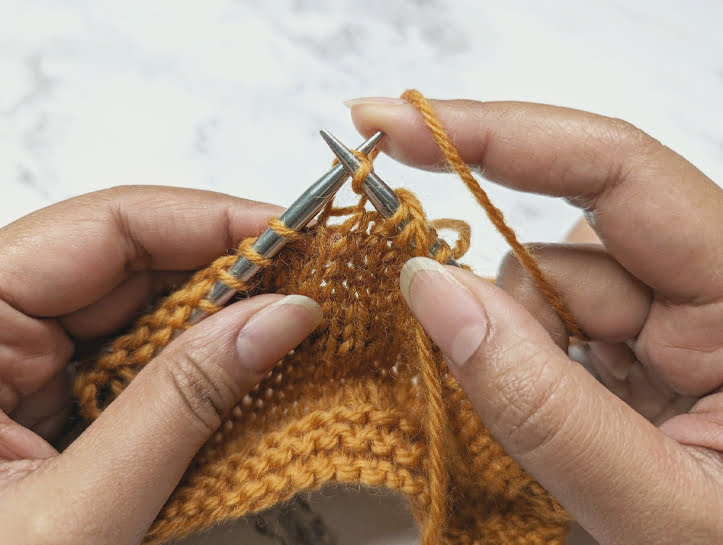
Step #5:
Drop the old strand of yarn, and grab the strand connected to your new yarn ball.
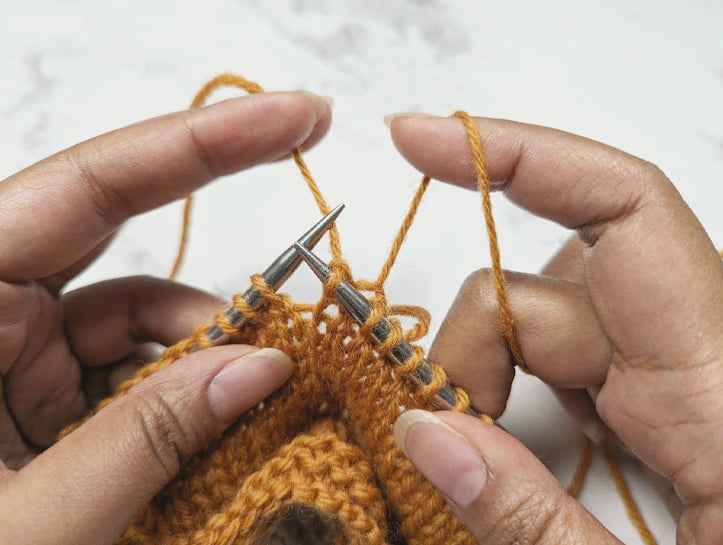
Step #6:
Continue knitting, this time only working with the new strand.
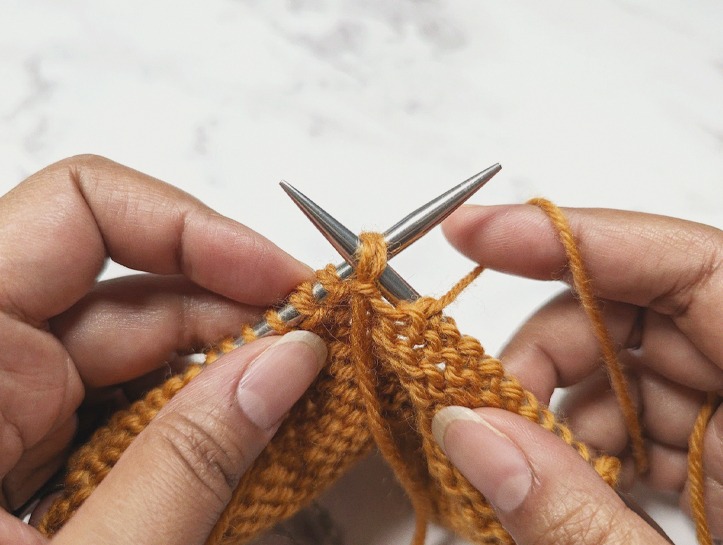
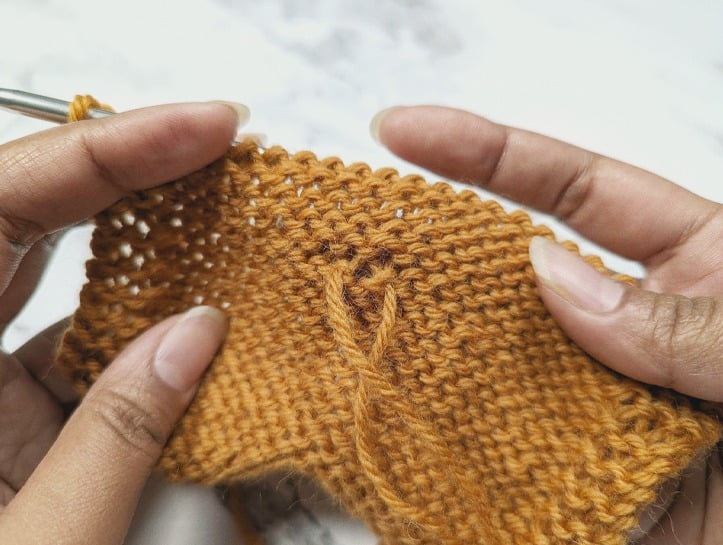
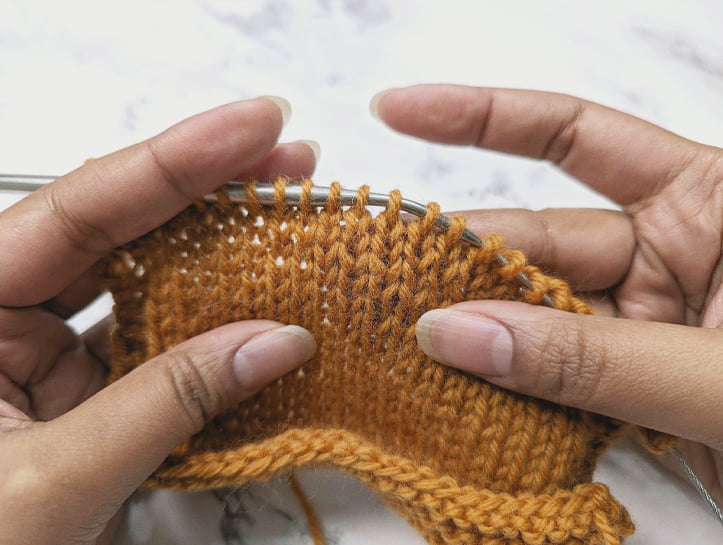
Step #7:
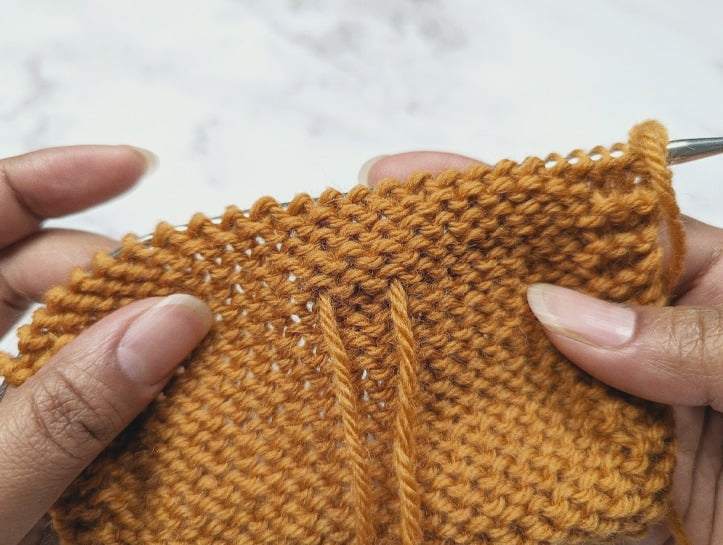
When you arrive at your double stranded stitches on the wrong side of your work, remember to work them together as a single stitch.
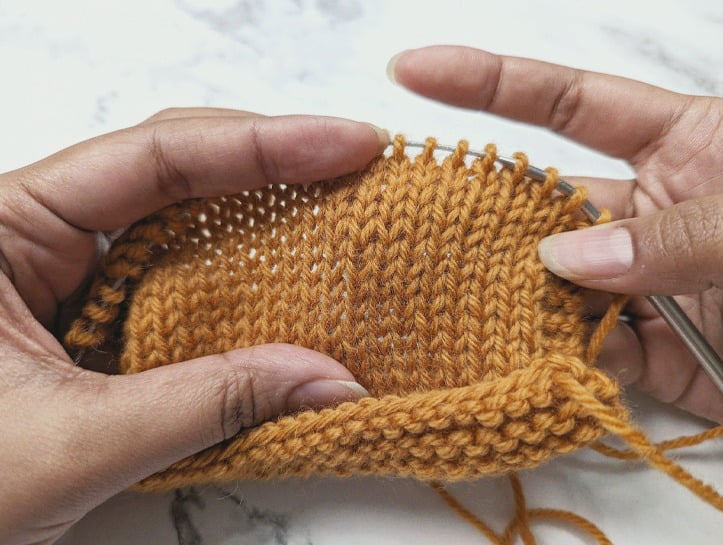
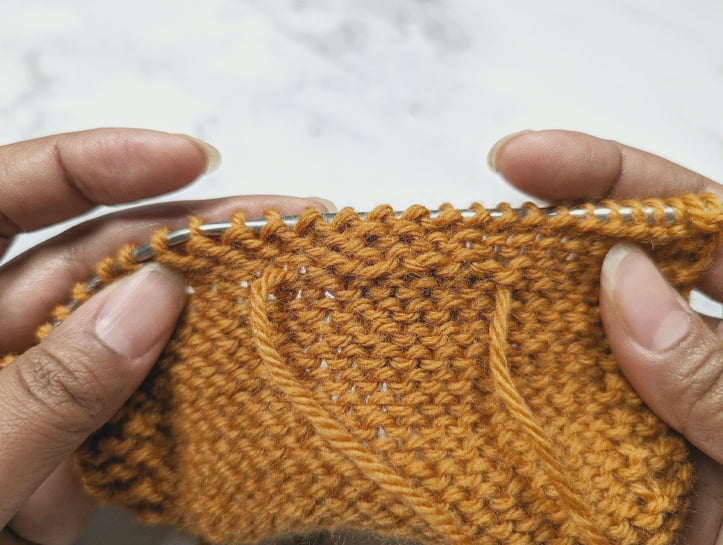
The Double Stranded Join - Right Side
The Double Stranded Join - Wrong Side
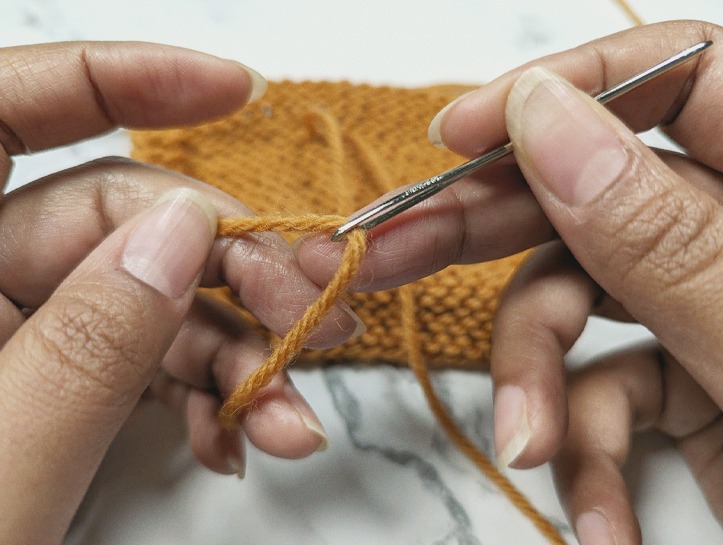
Although this method of joining is very easy to get a handle on, I must admit I don’t typically opt to use it. There’s just something about the doubled up stitches that always seem to stand out and grab my attention – especially in a sea of stockinette. BUT, for many of us, this method offers a greater appeal of not having to weave in any ends! And of course, this means when you’re done knitting your project, you’re actually DONE. All that’s left to do is block. For this reason, I leave this here for you anyway – it may just become your preferred method of joining new yarn.
DROP & JOIN
This method of joining is undoubtedly the quickest in all of knitting – as far as the initial execution goes. All it requires you to do is simply drop your old yarn and continue working your row (or round) using the new yarn.
I use this method the vast majority of the time when I need to join a new ball to my knitting, but I must say its simplicity comes with a caveat – you’ll end up with an unsightly hole which you’ll have to patch up later by carefully weaving in those ends in order to close the gap. Which is why I’ve listed this one second – although it is the quickest to get going, you’ll have to do a little work to get it to look neat at the end.
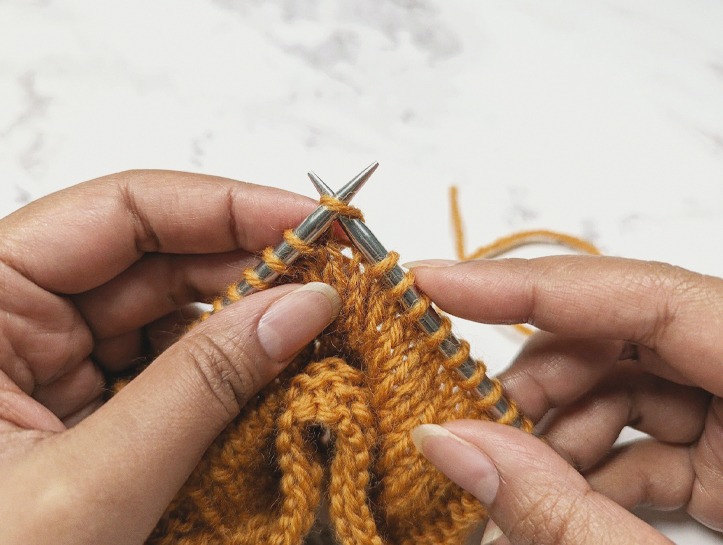
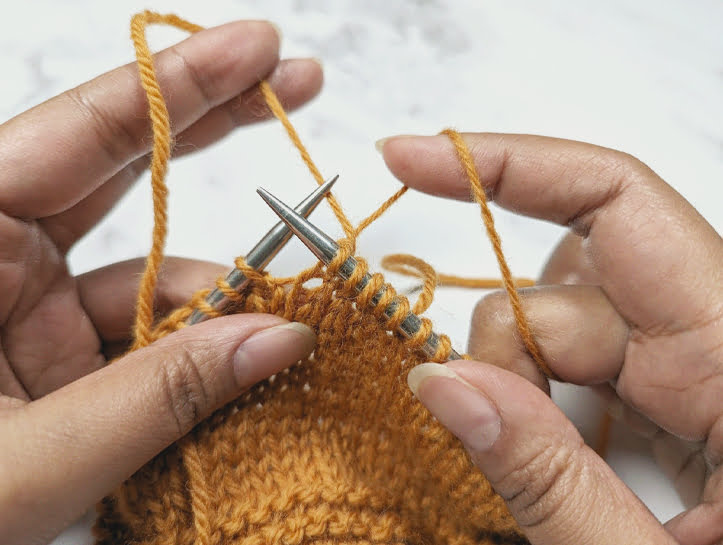
Step #1:
Leaving a tail at least 6 inches long, drop your old yarn and insert your needle into the next stitch.
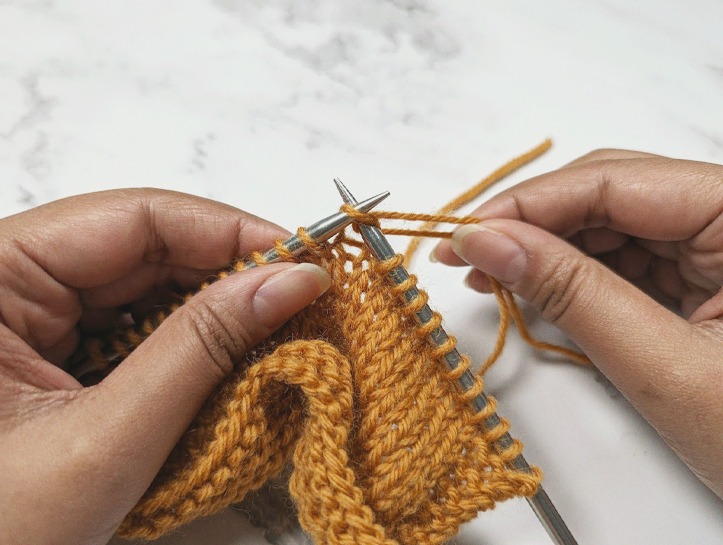
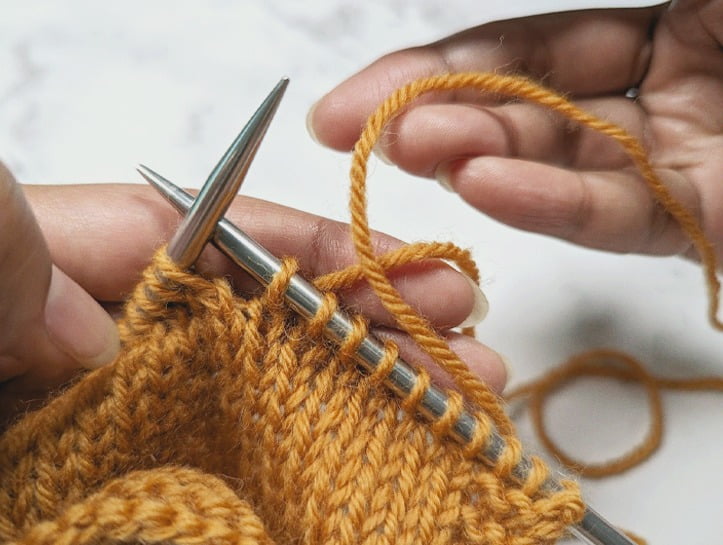
Step #2:
Grab your new yarn, creating a small loop with the tail end facing away from you, and the working end toward you.
Step #3:
Place this loop on your right hand needle.
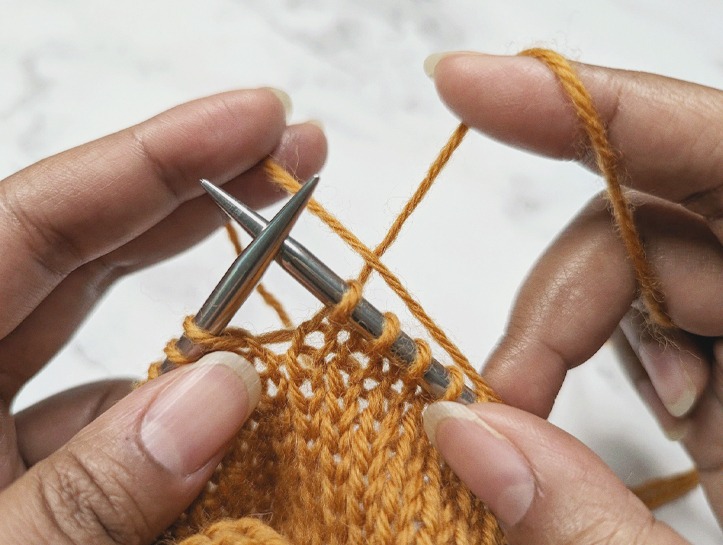
Step #4:
Pull the loop through.
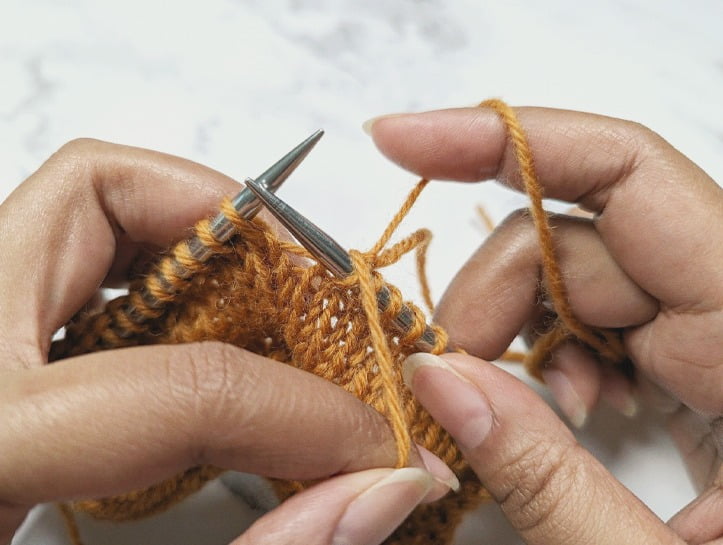
Step #5:
Continue working in pattern with the working end of the new yarn ball.
Drop & Join - Right Side
Drop & Join - Wrong Side
At this point you’ll notice a very noticeable hole surrounded by a couple of loose stitches where you’ve joined your new ball of yarn. Don’t panic! This is easily fixed by flipping your work over to its wrong side, and weaving in those ends. You’ll have to work several rows before you can do this effectively, though. So to avoid those stitches getting any looser as you continue merrily knitting away, you can tie those two ends together as you work and simply untie them when you’re ready to weave them in.
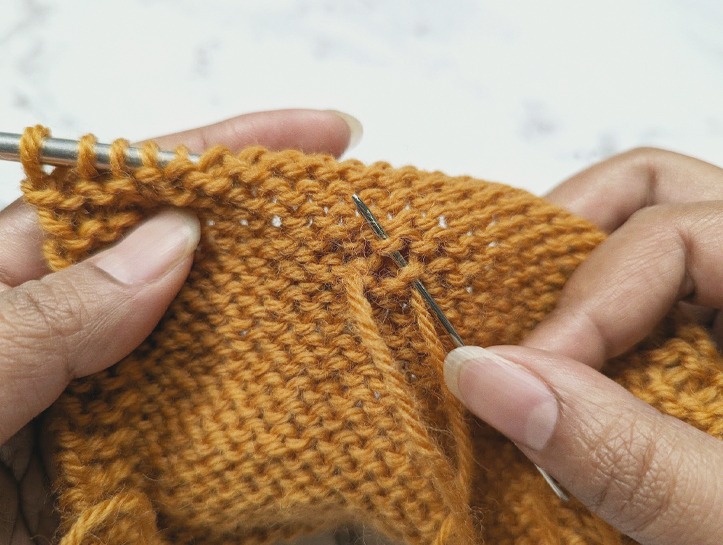
After you’ve worked enough rows (or when you’ve finished your project), follow the steps below to ensure that you weave in those ends in a way that makes the join look absolutely flawless when viewed from the right side of your work.
Step #6:
Grab one of the two ends and thread it through a tapestry needle.
Step #7a:
Begin weaving the end in, following the path of the yarn strand. Take care to maintain even tension.
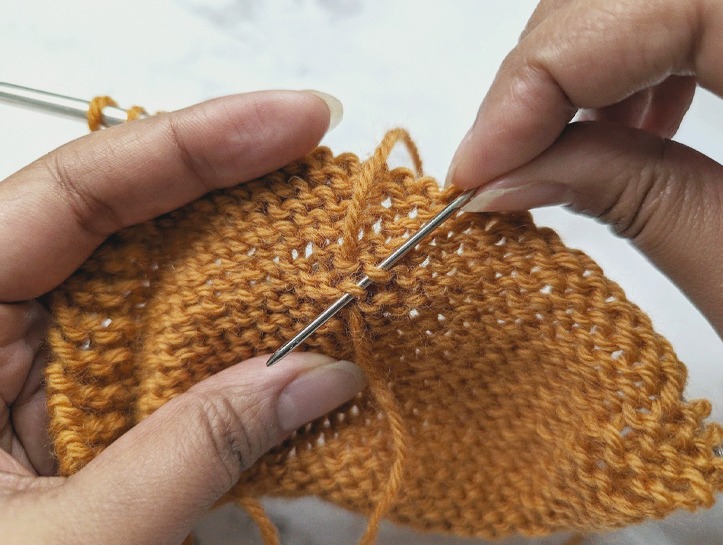
Step #7b:
Continue weaving in your end over a couple more stitches.
Step #8:
Grab the other end and thread it through a tapestry needle.
Step #9:
In the opposite direction, weave in the end, once again – following the path of the yarn strand.
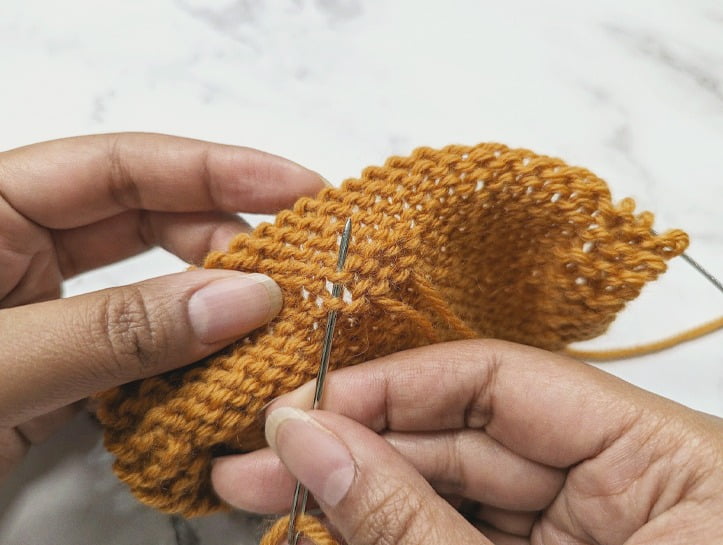
Before Weaving In Ends
After Weaving In Ends
And there you have it! A flawless finish. I’ve demonstrated how to work this joining method to completion using stockinette stitch for simplicity’s sake, but I feel it’s important to note that you can do this with any stitch pattern. Some will be far more complicated than others but the principles are the same. When you’re weaving in your ends, the most important thing you’ll need to remember is to follow the path of the yarn strand. And this, of course, is going to look different depending on the stitch pattern you’re using.
As I mentioned in my post about weaving in ends, I will typically use a variation of duplicate stitch where I will ‘follow the path of the yarn strand’, but take liberties in order to keep my ends on the wrong side of my work. This way, there won’t be any unnecessary bulk added to the right side of my work.
WEAVE IN AS YOU GO
Weaving in as you go is a method of joining your yarn that, well – has you weaving in your ends as you go. I love this method because unlike the Double Stranded Join, you absolutely cannot see it on the right side of your work. On the wrong side, however, I must say it can be blatantly obvious. But to be honest, I’m not bothered by this in the slightest. After all, I only ever use this method when I know the wrong side of my fabric won’t be seen – which happens to include the majority of garment knitting.
Weaving in as you go is essentially the exact same method as ‘catching floats’ – a technique you’ll certainly need to learn if you’re planning on knitting any colourwork projects. It can feel a little awkward and annoying at first, but I think you’ll like the results enough to be ok with enduring the short-lived discomfort (at least I hope!). After all, it’s really only for a few stitches!
So, let’s see how it’s done!
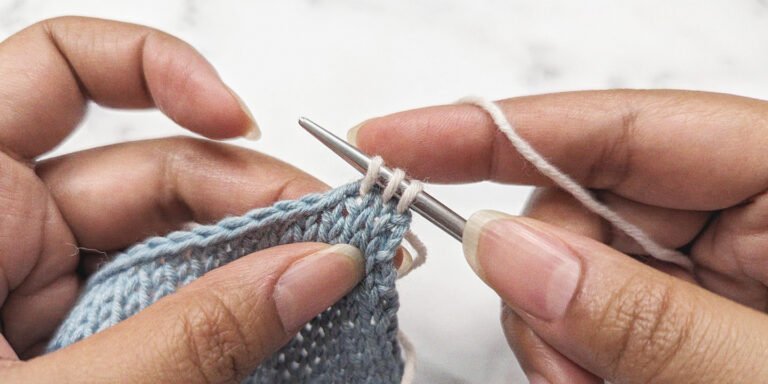
Step #1:
Grab the tail of your new yarn ball and lay it over the old strand.
Step #2a:
With the new tail over the old strand, prepare to work the next stitch with the old strand.
Step #2b:
Knit the next stitch.
Step #3:
Grab the working end of the new strand and bring it forward, over the stitch you just knit.
Step #4:
Knit the next stitch (still with the old strand).
Step #5:
Once again, grab the working end of the new strand, and bring it toward the back, over the stitch you just knit.
Step #6:
Knit the next stitch. Continue working Steps 3 to 6 for a couple more stitches.
Step #7:
Grab the working end of the new strand, and release the old strand. (In the image above, the old strand is the one on the left, while the new one is on the right.)
Step #8:
Work the next stitch with the new strand.
Step #9:
Grab the tail of the old strand and bring it forward, over the stitch you just knit.
Step #10:
Knit the next stitch (again, with the new strand).
Step #11:
Once again, grab the tail end of the old strand, and bring it toward the back, over the stitch you just knit. Repeat Steps 8 to 11 for a couple more stitches. Drop the old yarn and continue knitting with the new strand.
Weaving As You Go - Right Side
Weaving As You Go - Wrong Side
And that’s all there is to it! I really love the results I typically get using this method of joining, and not to mention – there’s the added benefit of the fact that you won’t have any ends to weave in once you’ve finished knitting your project. It may take a little extra work than the above two methods to get it going, but it offers the best of both worlds – no ends to weave in, AND everything stays put on the wrong side of the fabric. What’s not to like?
THE fELTED JOIN (AKA SPIT SPLICE)
The Felted Join (aka Split Splice Join) is a method of joining a new ball of yarn by felting the end of your old yarn with the end of your new yarn. You’re basically using moisture and the heat created by friction in order to meld the two ends together. This joining method is a fantastic option particularly for when you’re working up a reversible project and don’t want to go through the trouble of meticulously weaving in end after end at a later time.
One important thing to note, however, is that you can only use the Felted Join when working with fibers that can actually felt – i.e., animal fibers that are not superwash treated. In the example below, I’m using a yarn that is made up of 100% Peruvian Highland Wool – KnitPicks Wool of the Andes Worsted.
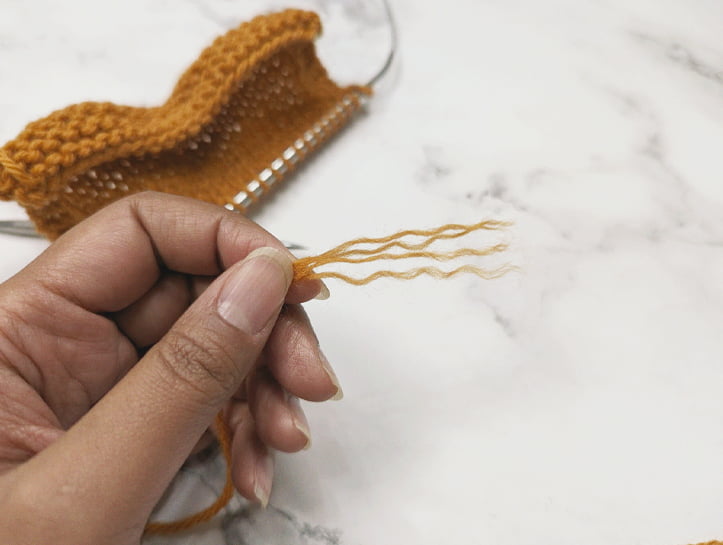
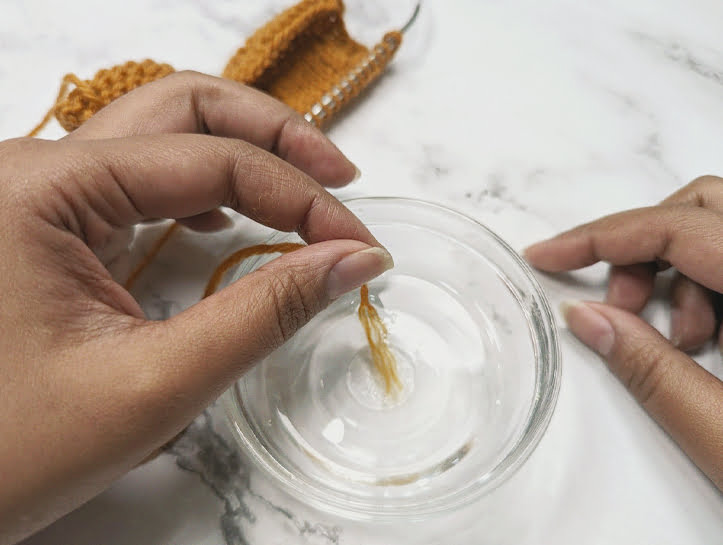
Step #1:
Grab your old yarn strand, and split the plies for approximately an inch or two at the end.
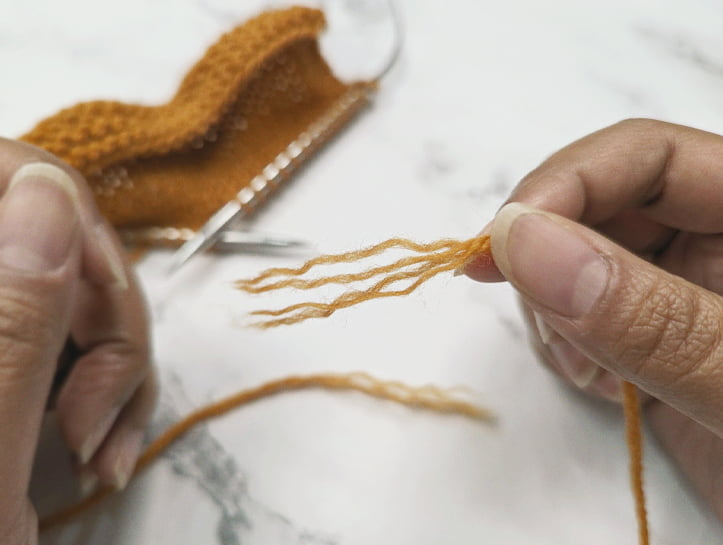
Step #2:
Repeat Step 1 with the tail of the new ball you want to join.
Step #3:
Dip one of the ends into a small bowl of warm water.
*Alternatively, you can use your own spit (hence the name, ‘Spit Splice’)
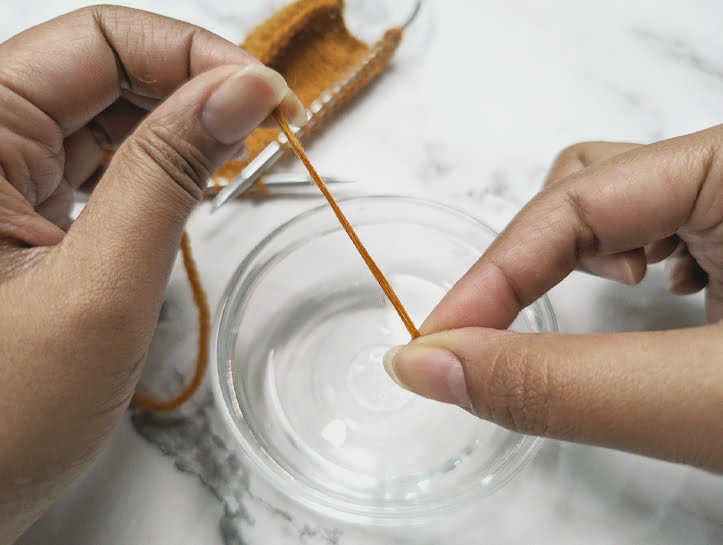
Step #4:
Squeeze out any excess water. Repeat Steps 3 & 4 with the other end.
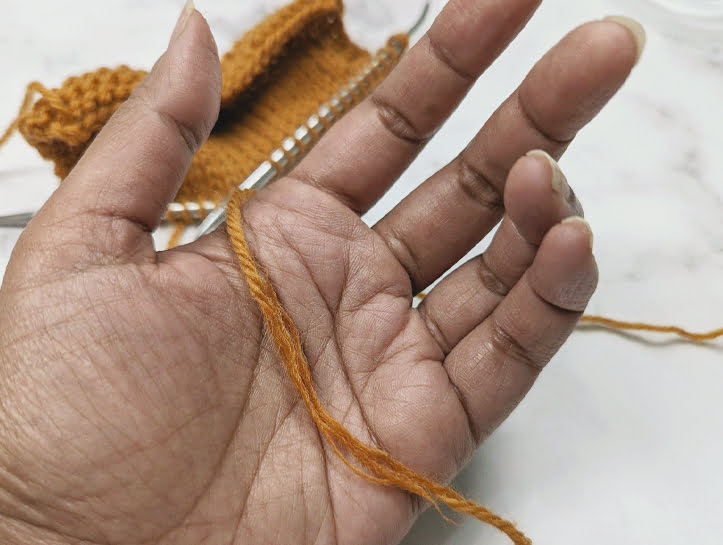
Step #5:
Lay both ends on top of one another in the palm of your hand.
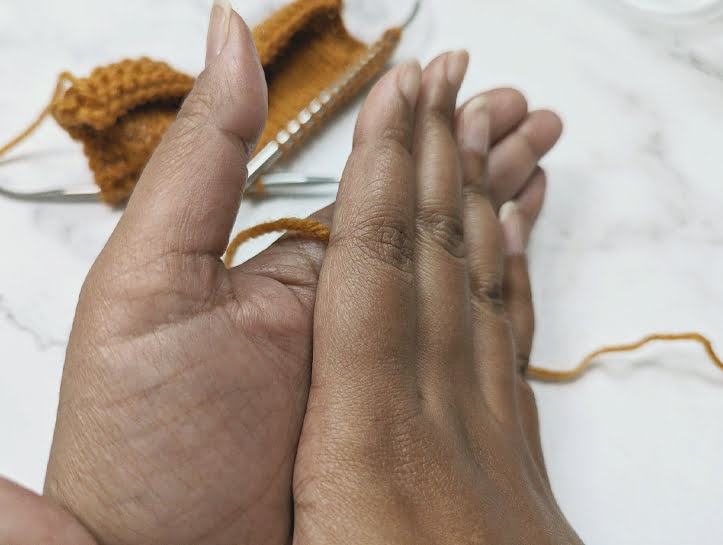
Step #6:
Vigorously rub the two ends together between the palms of your hand, until the join is thoroughly felted together.
Step #7:
The resulting join. At this point, you can test the strength of your join by giving it a firm tug.
Step #8:
Continue knitting as normal.
Not too shabby, huh? When I first came across this method, I thought it looked intimidating, so I put off trying it for some time until one day I decided to bite the bullet and do the thing – and I’m so glad I did!
It can take a bit to get the join to look neat enough to work with, and sometimes it does end up looking a bit bulkier than the rest of the yarn strand. If you’re finding this is the case for you, try snipping off a couple plies from both ends before felting them together. This trick is usually enough to get the thickness of your join to look more consistent with the rest of the strand of yarn.
Although I must admit I don’t tend to use this method unless I am working a reversible knit, this is a great one to have in your knitting arsenal. If you haven’t tried it, I really encourage you to give it a go – it may just end up being your go to joining method!
SOME THINGS TO CONSIDER...
If you’re knitting a garment flat, in pieces, it’s always best to join a new ball of yarn at the beginning of a new row. Since you’ll be seaming those pieces together at a later time anyway, you can easily use that seam to hide those ends.
But of course, you can’t do this when you’re seamlessly working in the round, so use your discretion when weighing out your options, and pick the best joining method for your project. All of the joining methods that I have covered in this post work well with circular knitting. So, pick the one you feel is best for the task at hand!
I hope you guys have found this post helpful! As always, if you have any questions or comments, let me know in the comments section below. Until next time, happy knitting!