Affiliate Disclaimer: This post may contain affiliate links. This means that I may earn a commission if you make a purchase through these links. I only recommend products and services that I personally use and believe will add value to my readers. Your support helps keep this blog running and is greatly appreciated. Thank you!
So you went and did the thing – after all those hours, maybe days (or perhaps even weeks!) of hard work, tirelessly knitting away – you’ve finally come to the end of your knitting project (phew!). Give yourself a pat on the back – really – you deserve it! You may be asking now – what comes next? How exactly do I get these stitches off my needles? Well, you’ve come to the right place!
In this article, I’ll be diving into all the essentials about ‘binding off’ (aka ‘casting off’). Why is it important to bind off your knitting, you ask? The answer is probably obvious, I know, but I’ll say it here anyway – binding off your stitches is the very thing that keeps your project together. Without it, you run the risk of watching all those hours of hard work literally unravel, right before your eyes.
Just as there are many cast on’s to choose from to kick off your knitting project, you’ve got plenty of options with bind off’s, too. A carefully selected bind off can make all the difference in how polished and professional your project ends up looking. As this is an article written for the beginner in mind, below are some of the most common beginner-friendly bind off methods you’ll find in the wonderful world of knitting. Enjoy!
the standard bind off
If you ask virtually any knitter which bind off method they learned first, I’d say 99% of the time they’ll probably tell you it’s this one. In fact, the Standard (or Traditional) Bind Off is quite often the only bind off some knitters will ever use – it’s just that versatile.
The Standard Bind Off is also probably the easiest to learn – at least in the way it’s worked. The only thing that you may find a bit tricky here, is learning how to keep things loose – especially if your knitting tends to be on the tighter side. And keeping things loose here is actually really important, as the Standard Bind Off tends to yield a very firm edge that won’t offer you much stretch.
In order to remedy this minor hiccup, the best recommendation I’ve seen is to bind off using a needle size one or two sizes larger than the one you’ve used for the rest of your project. I like this technique because it keeps your bind off loose enough, while at the same time remaining consistent in tension.
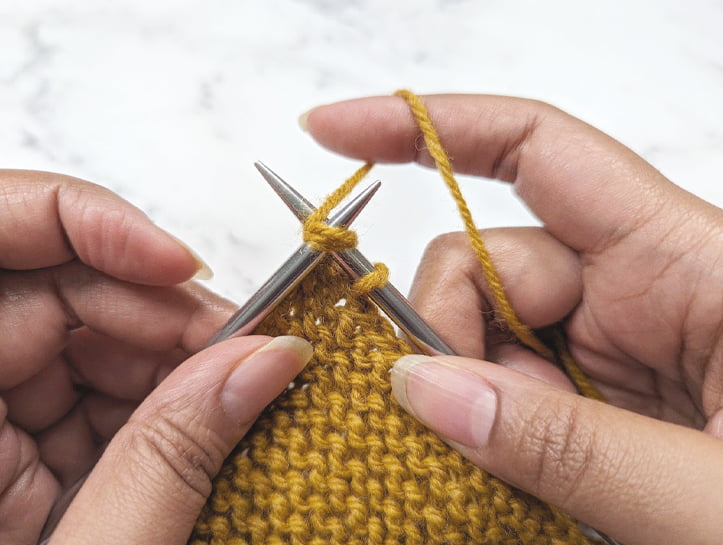
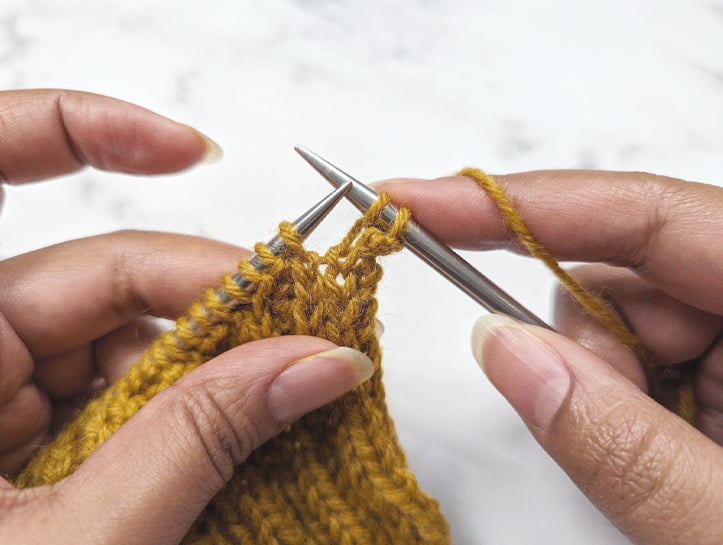
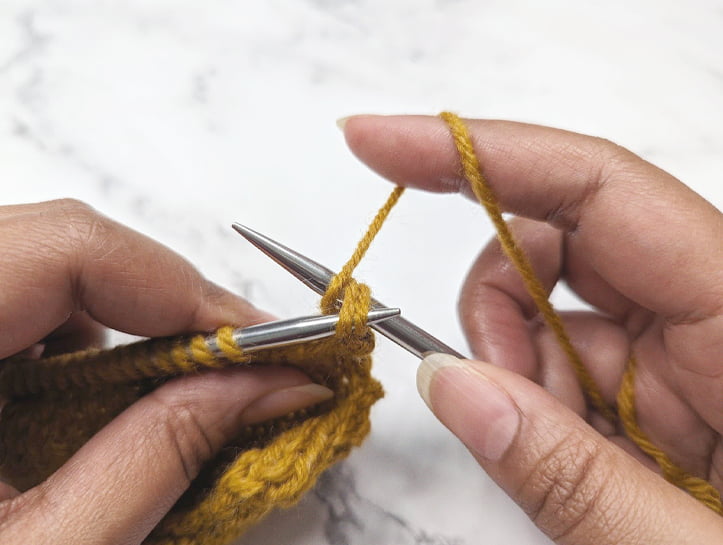
When working the Standard Bind Off, it’s important to remember that you should only ever have a maximum of 2 stitches on your right hand needle. If you ever have more, you’ve done something wrong. Now, let’s see how it’s done!
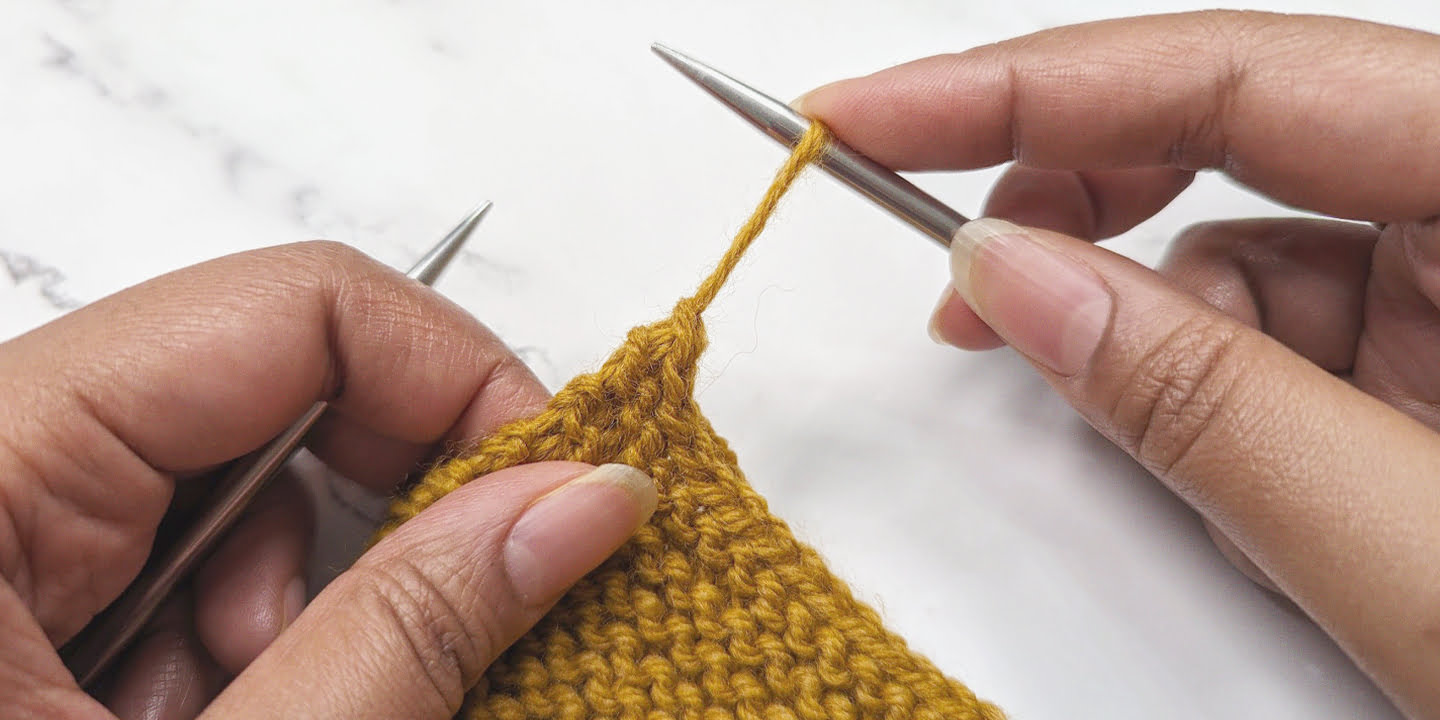
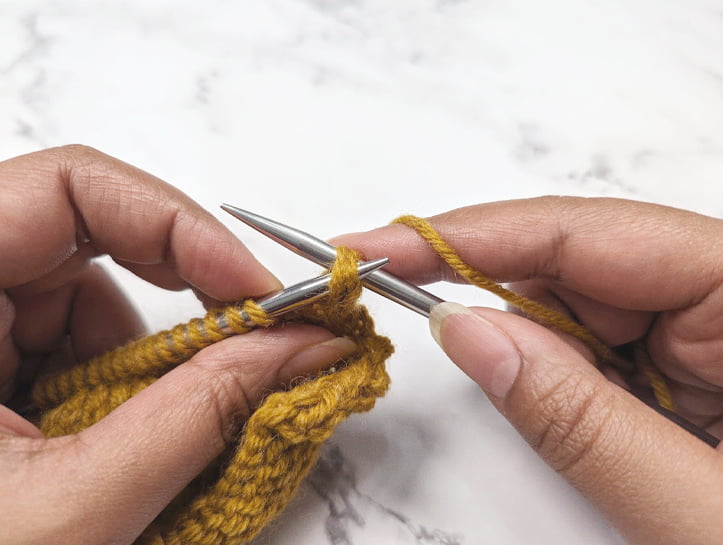
Step #1:
Work the first two stitches in pattern.
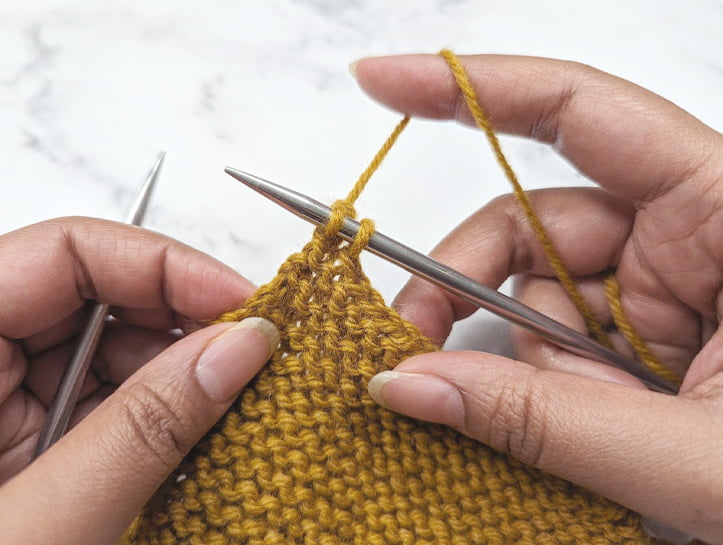
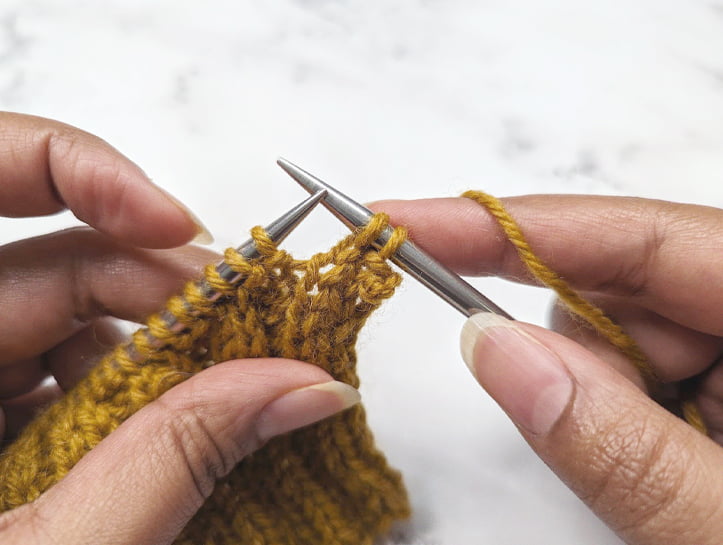
Step #2:
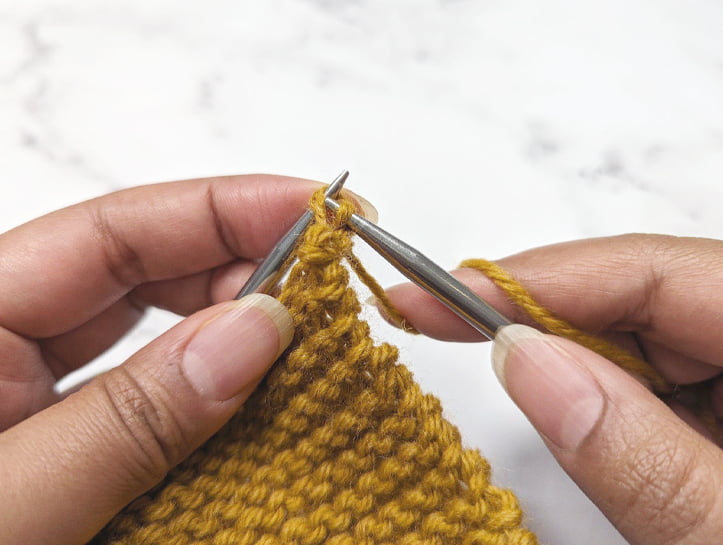
Insert your left hand needle into the first stitch on your right hand needle.
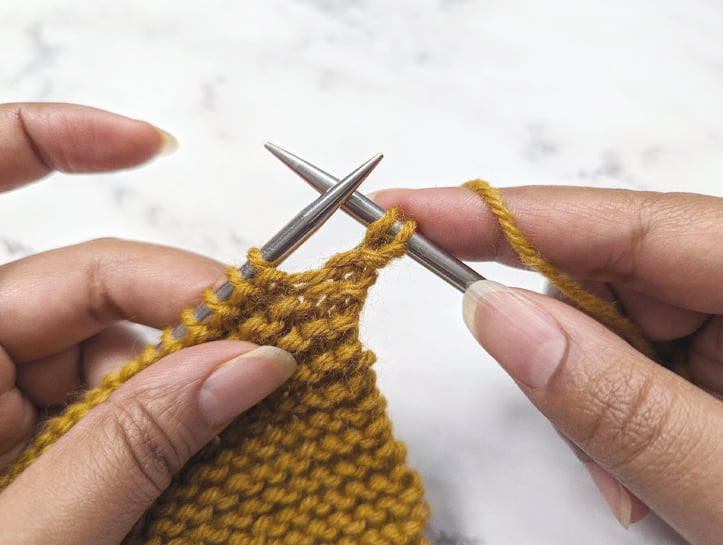
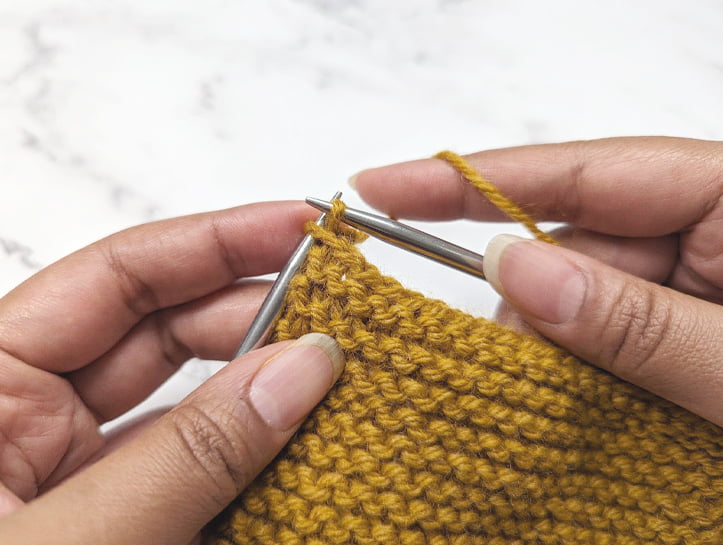
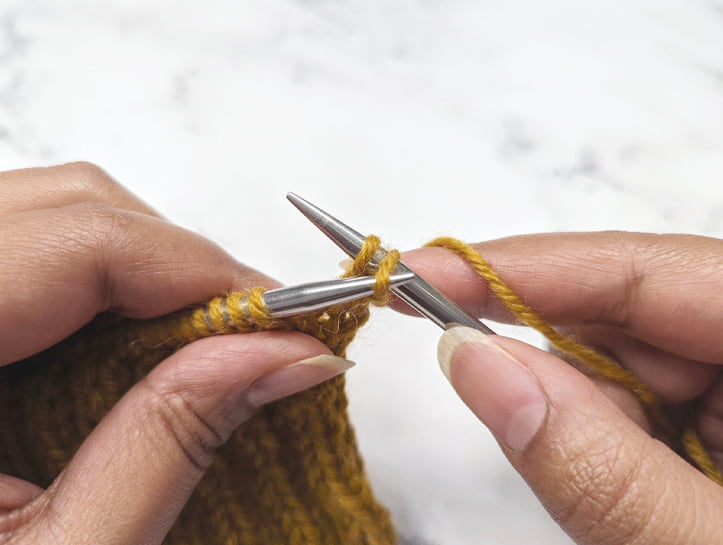
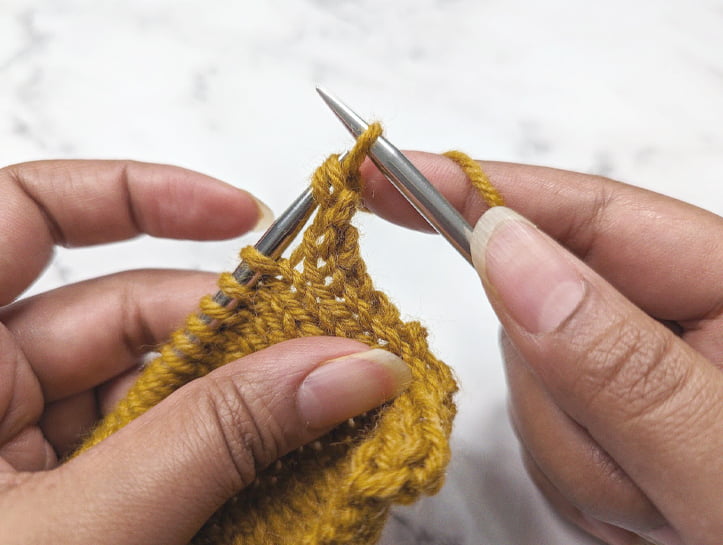
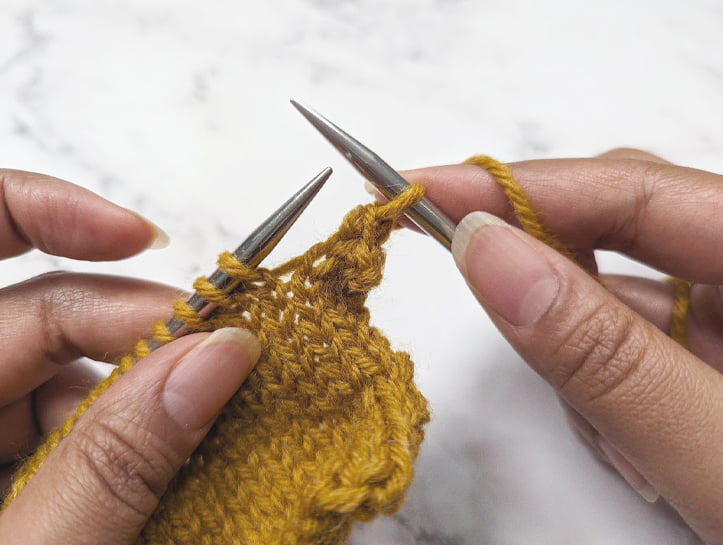
Step #3:
Pass the first stitch on your right hand needle over the second stitch.
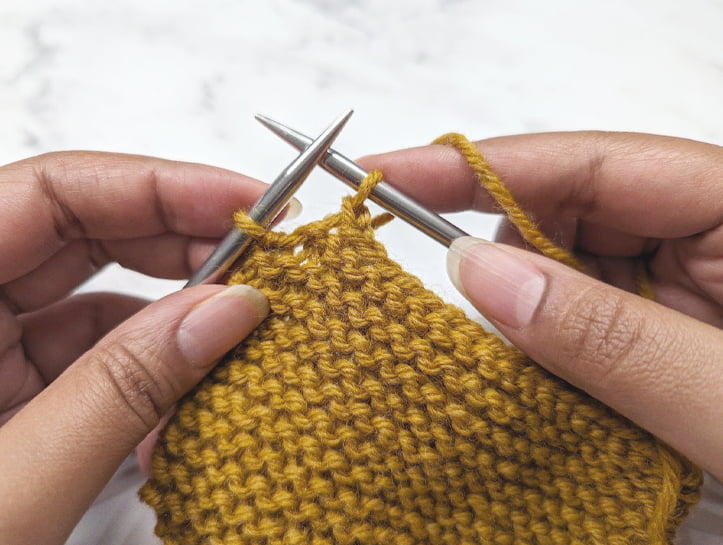
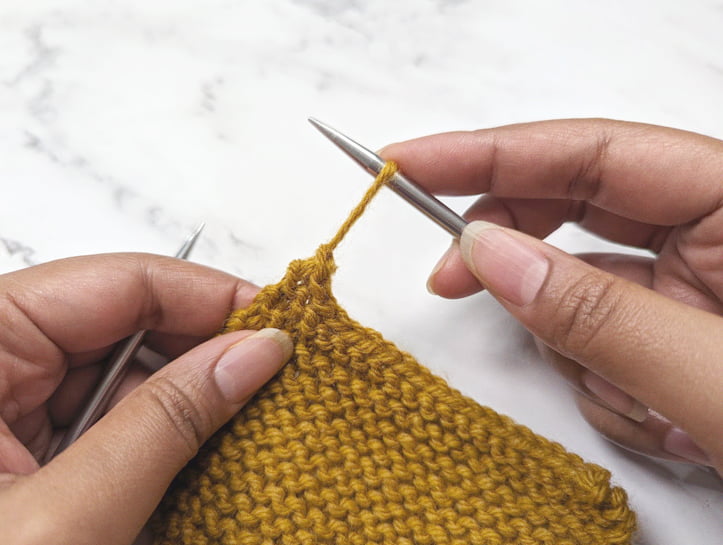
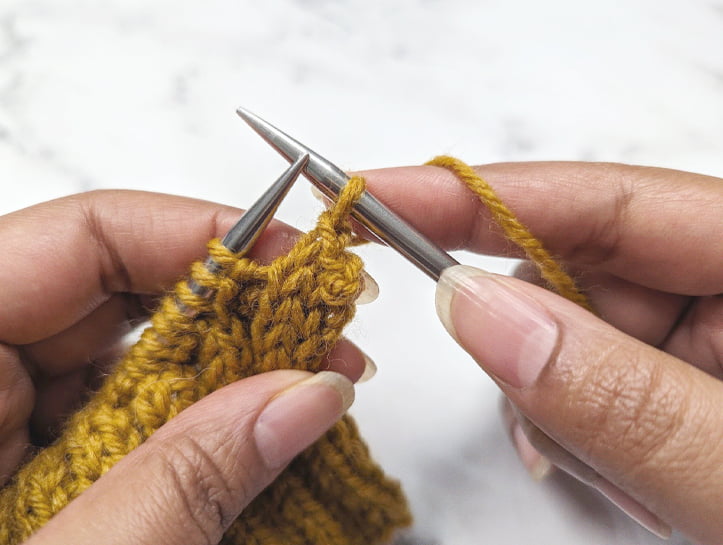
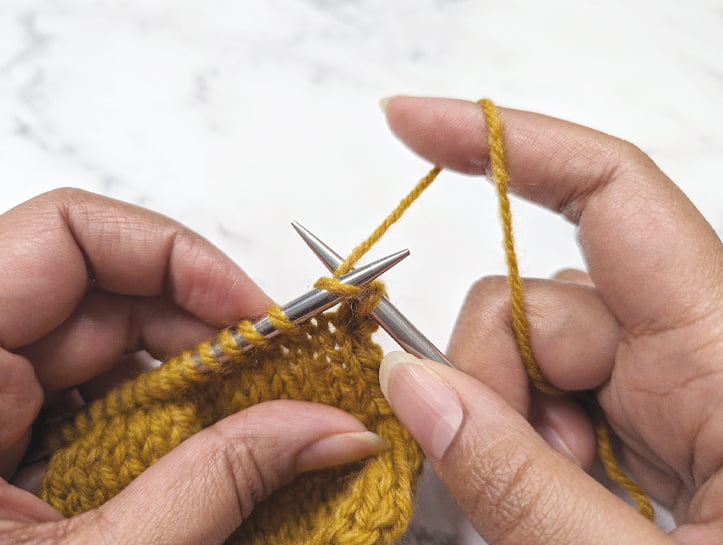
Step #4:
Work the next stitch.
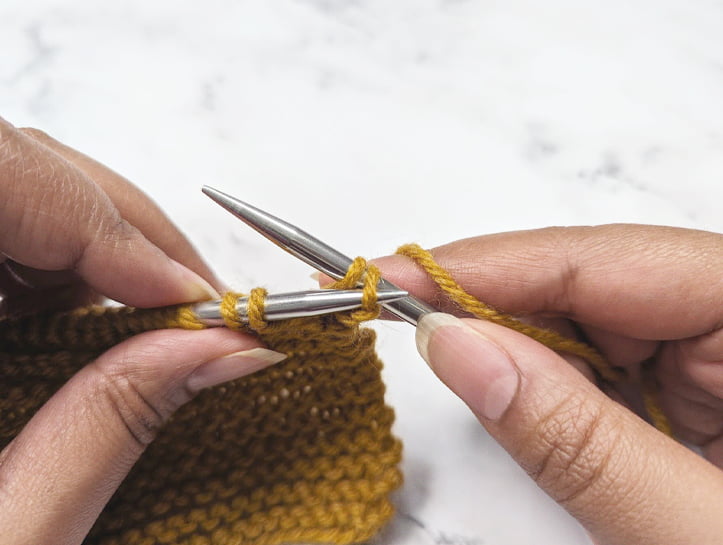
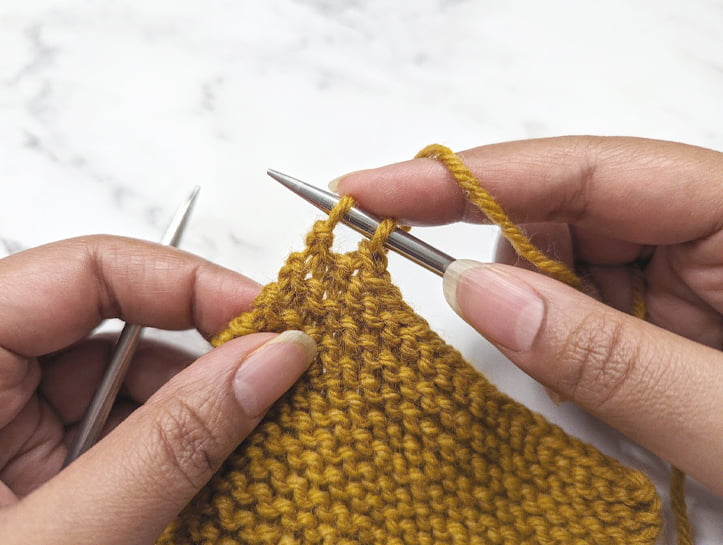
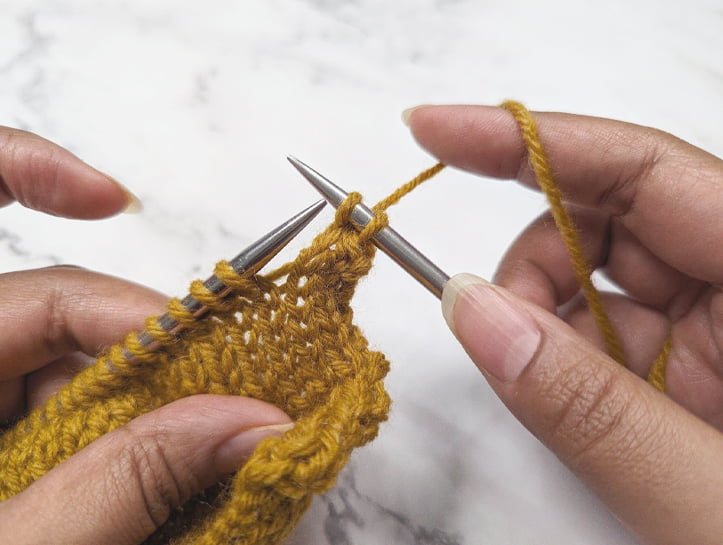
Step #5:
Pass the first stitch on your right hand needle over the second stitch.
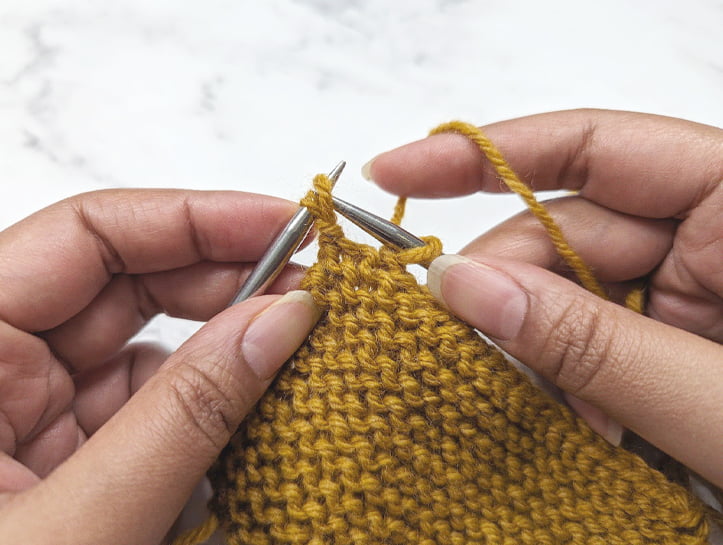
Step #6:
Repeat Steps 4 and 5 until one stitch remains on your left hand needle.
binding off the last stitch
When first learning the Standard Bind Off, many resources out there will teach you to bind off the last stitch just as you would the others, and simply pull the working yarn through before finally cutting it off. The problem with working the last stitch this way is that you’ll likely get a loose untidy corner where that last stitch was bound off. And after spending countless hours working away at your beautiful knitting, why let that very last stitch have its way with your project?
So, in order to ensure that you learn this thing well right from the get-go, I’ll teach you a little trick to get that last stitch looking nice and neat, just like the rest. Once you’ve got just one stitch left to work on your left hand needle, continue with the steps below:
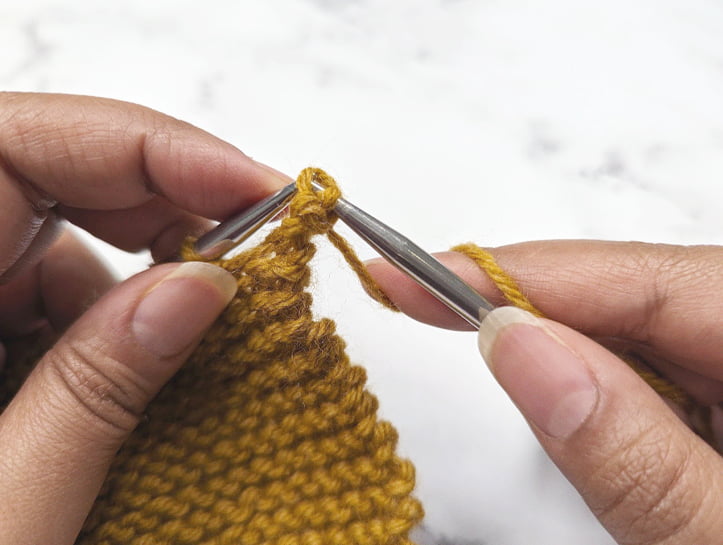
Step #7:
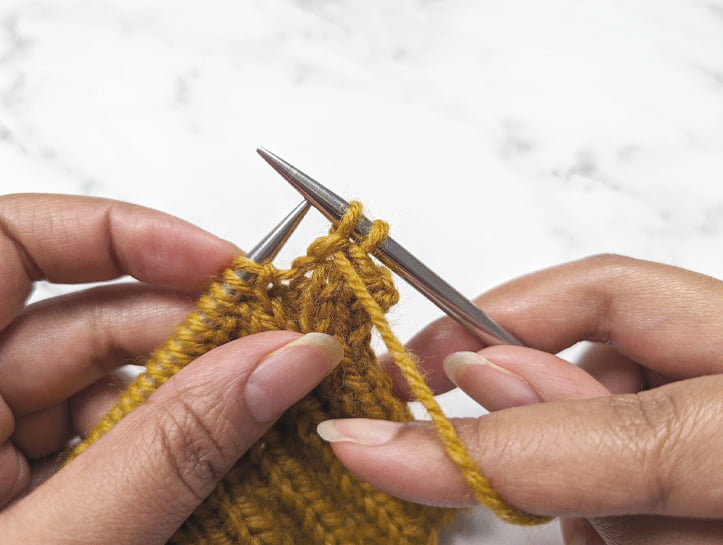
Slip the last stitch on your left hand needle over to your right hand needle. There are now two stitches on your right hand needle.
Step #8:
Locate the stitch directly under the last stitch and insert your left hand needle from underneath.
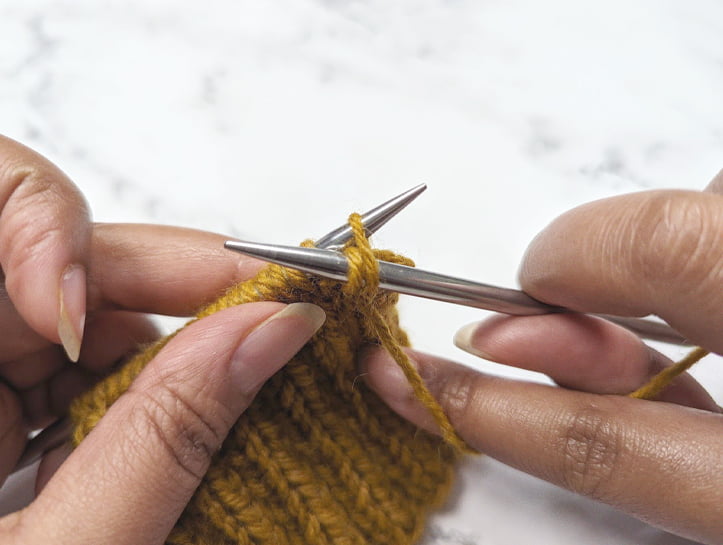
Step #9:
Slip the last stitch back onto your left hand needle.
Step #10:
Insert your right hand needle into both stitches on your left hand needle.
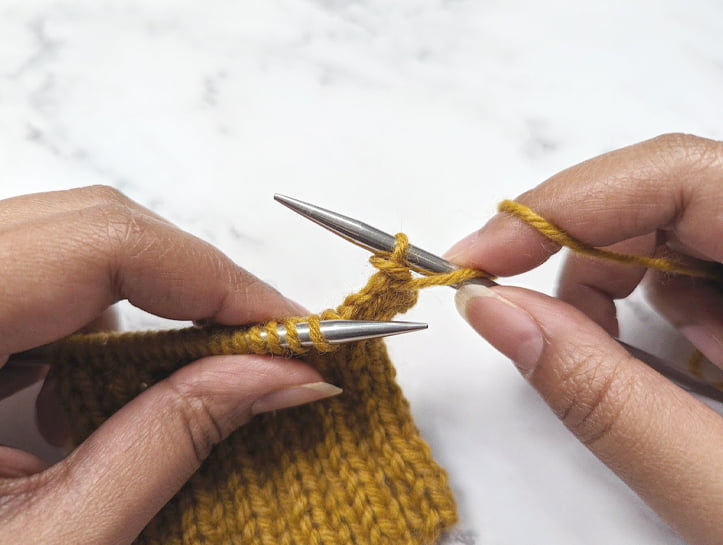
Step #11:
Work these two stitches together.
Step #12:
Finally, pass the first stitch on your RH needle over the second stitch.
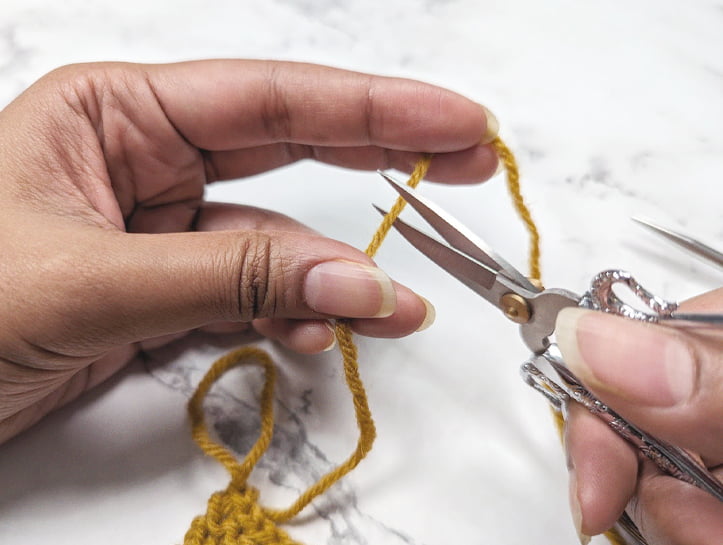
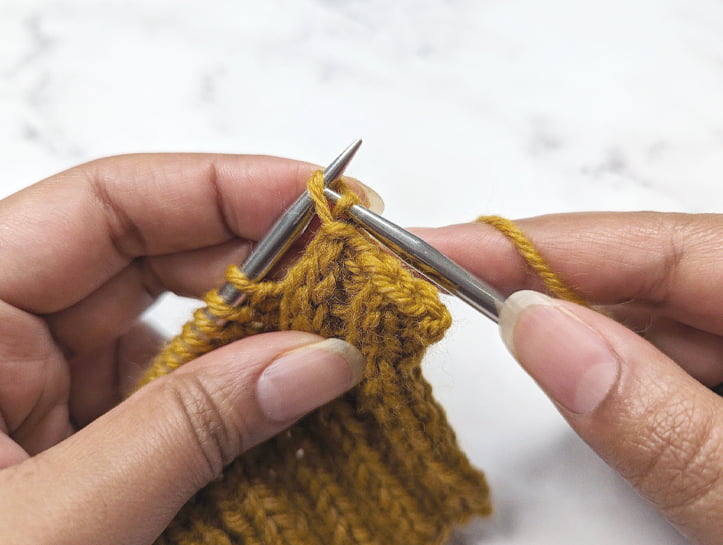
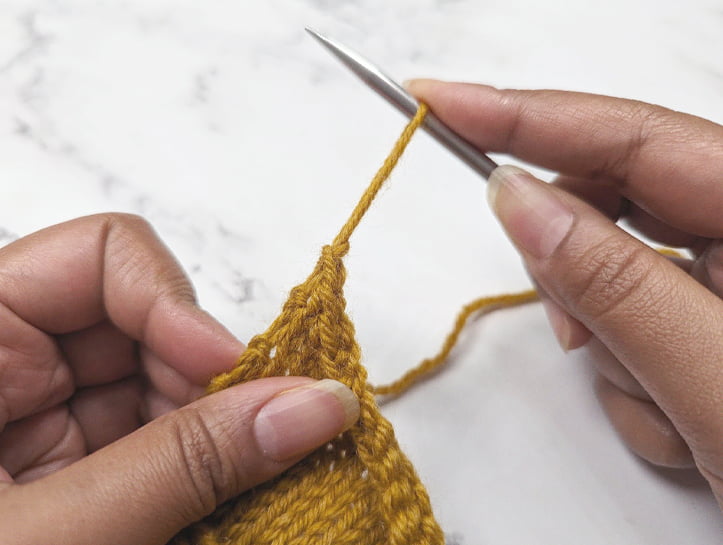
Step #13:
Pull your working yarn through.
Step #14:
Snip your working yarn, leaving a tail long enough to weave in later.
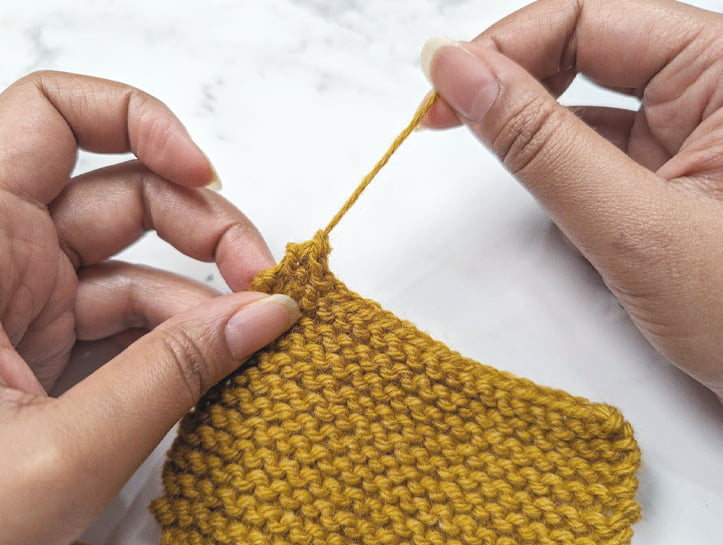
Step #15:
Pull the tail through.
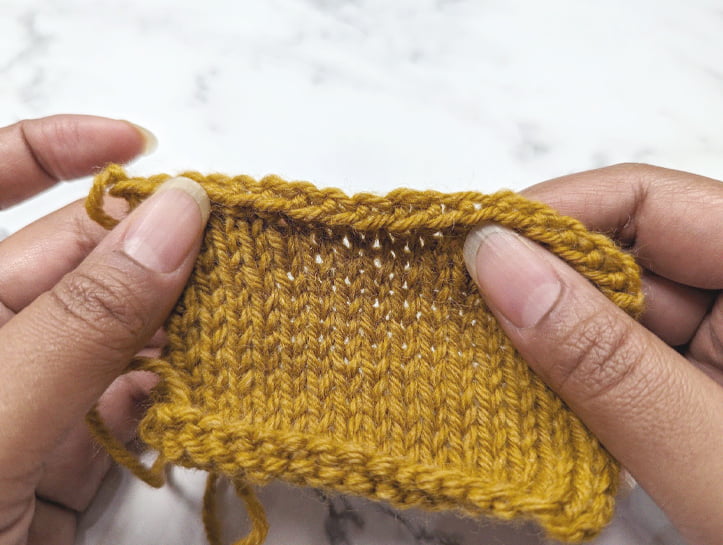
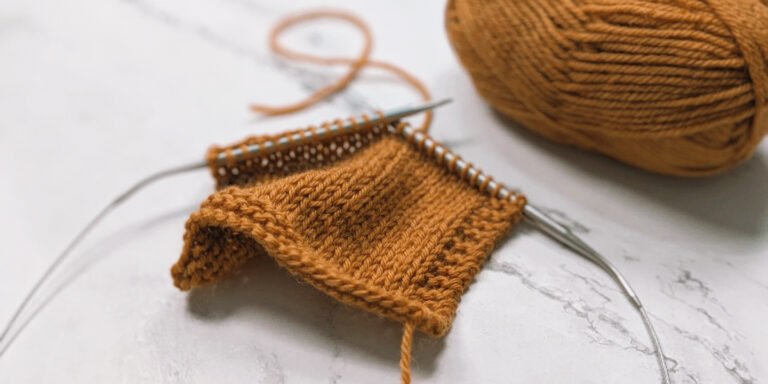
The Finished Standard Bind-Off
Binding off in pattern
Often times in the knitting world, you’ll come across instructions that state to ‘bind off in pattern’. So what exactly does that mean? Well, thankfully it’s actually quite simple! Binding off in pattern means you’ll simply work each stitch along your bind-off row as you normally would – maintaining the stitch pattern as you’ve been maintaining it – before binding it off.
For example, if the next stitch on my bind off row is meant to be a purl stitch in pattern, I’d purl that stitch, then pass the previous stitch over it to bind it off. If my next stitch is a knit stitch, I’d knit that stitch, then pass the previous stitch over it in order to bind it off. That’s all there is to it! Rinse and repeat.
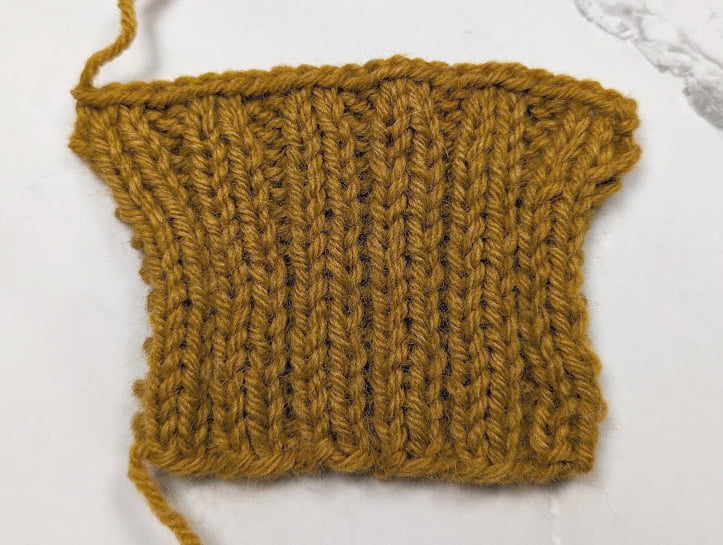
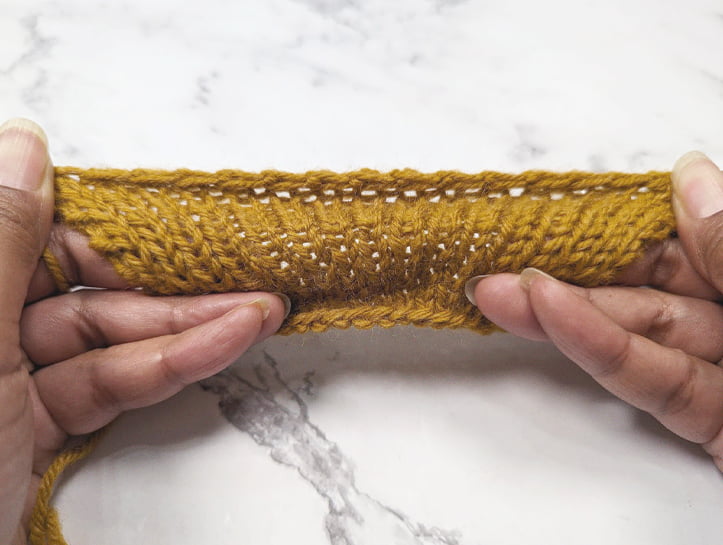
Now, why is it important to bind off in pattern? Well, let’s take a closer look at what it looks like to bind off in pattern vs. binding off all stitches the same way:
As you can see in the image at the top, there is a clear, very pronounced ‘chain’ at the top edge of my 2×2 rib swatch, where the stitches have all been bound off as knit stitches. The swatch in the image on the bottom, however, has been bound off ‘in pattern’. That is, I’ve maintained the stitch pattern all the way through, as I bound off each stitch. The result is an edge that blends much more naturally and subtly into the stitch pattern.
Now, enough chit-chat, let’s see how it’s done!
As you can see in the image on the left, there is a clear, very pronounced ‘chain’ at the top of my 2×2 rib swatch, where the stitches have all been bound off as knit stitches. The swatch in the image on the left, however, has been bound off ‘in pattern’. That is, I’ve maintained the stitch pattern all the way through, as I bound off each stitch. The result is an edge that blends much more naturally and subtly into the stitch pattern.
Now, enough chit-chat, let’s see how it’s done!
Step #1a:
Identify what kind of stitch you’ll need to work next. In the image above, it’s a knit stitch.
Step #1b:
Knit that stitch.
Step #2:
Pass the previous stitch over the stitch you just knit.
Step #3a:
The next stitch is now a purl stitch.
Step #3b:
Purl that stitch.
Step #4:
Insert your left hand needle into the back of the previous stitch.
Step #5:
Pass that stitch over the stitch you just purled.
Step #6:
Continue working in this manner – working each stitch in pattern and passing the previous stitch over – until all stitches are bound off.
the stretchy bind off (aka the elastic bind off)
The Stretchy Bind Off (also known as the Elastic Bind Off) is a great beginner friendly bind off for when you’re needing something that offers a lot of stretch. I typically use this bind off when working up gauge swatches because it allows me to stretch out the stitch pattern as far as it needs to in order to achieve an accurate gauge reading.
The Stretchy Bind Off is worked similarly to the Standard Bind Off in that you’ll only ever have a maximum of 2 stitches on your right hand needle as you’re working through it. Each stitch is eliminated by working a single decrease through the back loops all throughout the last row.
Step #1:
Knit the first two stitches.
Step #2:
Insert your left hand needle into the front legs of the two stitches you just knit.
Step #3:
Knit those two stitches together, through the back loops.
Step #4:
Knit the next stitch.
Step #5a:
You now have two stitches on your RH needle.
Step #5b:
Insert your left hand needle into the front legs of the two stitches on your right hand needle.
Step #6:
Knit those two stitches together, through the back loops.
Step #7:
Repeat Steps 4 to 6 until all stitches are bound off. Pull the yarn strand upward and through the last loop. Cut the yarn, leaving a short tail to weave in later.
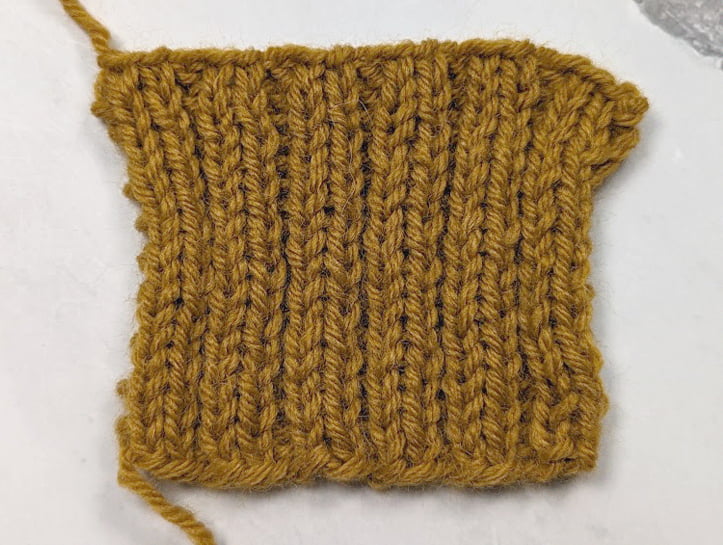
The Finished Stretchy Bind-Off
Wow! Look at that stretch!
your next steps...
That’s it guys! I hope you’ve enjoyed my carefully selected (albeit, short) list of the ultimate beginner friendly bind-off methods. Of course, there are a great deal more to discover than the ones I’ve listed here. But in my opinion, these are the best ones to start out with for all you lovely beginners out there.
Once you’ve gotten comfortable with the bind-off process, I encourage you to go out there and explore! If you’re looking for a great resource to really discover what your options are, check out Leslie Ann Bestor’s Cast On, Bind Off. It’s a fantastic book that I can’t recommend highly enough. If you’re like me, you’ll find yourself reaching for it time and time again.
So what’s the next step, you ask? Well, it’s time to get rid of all those dangling little yarn tails that are keeping your project from finally looking finished. Wanna see how it’s done? Head on over to the article I wrote about how to weave in ends. See you there!