Affiliate Disclaimer: This post may contain affiliate links. This means that I may earn a commission if you make a purchase through these links. I only recommend products and services that I personally use and believe will add value to my readers. Your support helps keep this blog running and is greatly appreciated. Thank you!
Decreasing stitches is a shaping technique that subtracts stitches from a knitted fabric in order to make it more narrow. The majority of decreases you’ll come across in knitting will lean either to the left or to the right. And as it is with increases, you’ll find some knitting decreases are decorative, while others are rather discreet.
There are several methods you can use to create what’s called a ‘centered’ decrease – that is, a decrease that has no lean. Typically, centered decreases are achieved by removing two stitches at a time – commonly known as ‘double’ decreases. The simplest way to do this (though, not the only way) is by working a left leaning decrease right next to its mirrored right leaning counterpart, or with a stitch or two in between them. These are also called ‘mirrored’ decreases. You’ll often see decreases worked this way, say, at the raglan lines of a sweater or at the crown of a hat – worked from the bottom-up.
In this article, I’ll be going over some of the most common decreases you’ll come across in knitting – that is, the ones you’ll probably end up stumbling upon over and over again. By no means is this an exhaustive list of all decreases in the knitting world – they are simply the most widely used. So grab your yarn and needles, and let’s get started!
knit 2 together & slip, slip, knit
K2Tog (knit 2 together) and SSK (slip, slip, knit) are easily the most widely used decreases in all of knitting. SSK leans to the left, while K2Tog leans to the right.
Of all knitting decreases, K2Tog is by far the easiest to perform, and is likely to be the first many a seasoned knitter will have learned. It is worked exactly the way it sounds – by knitting 2 stitches together as if they were one. Let’s take a look at how it’s done:
Knit 2 Together (k2Tog)
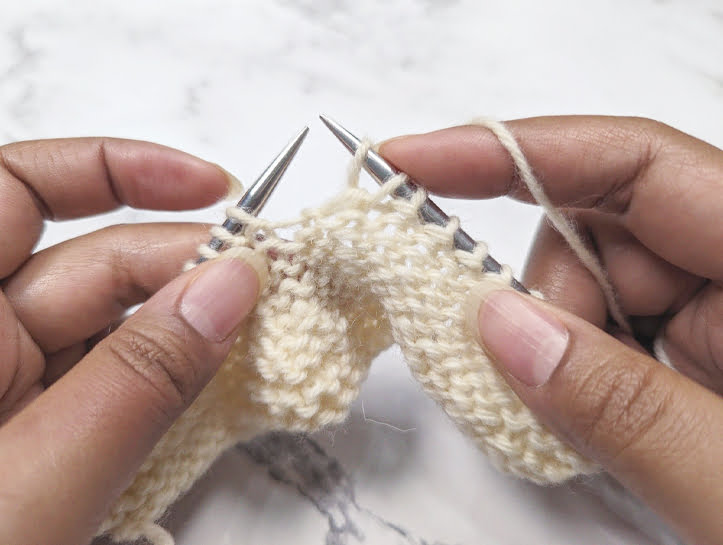
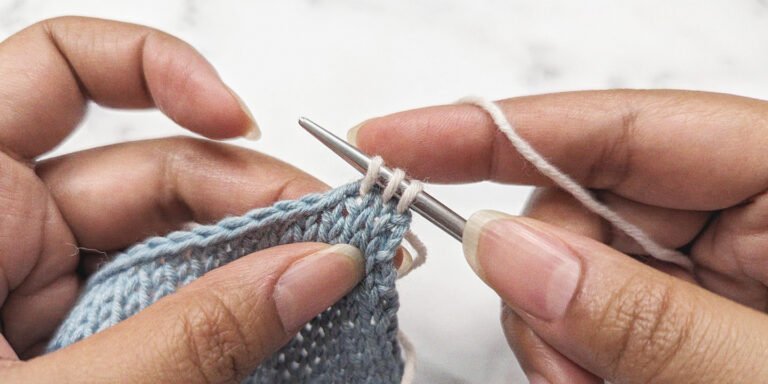
Step #1:
With the working yarn at back, insert your right hand needle into the front leg of the first 2 stitches on your left hand needle, knit-wise (from left to right).
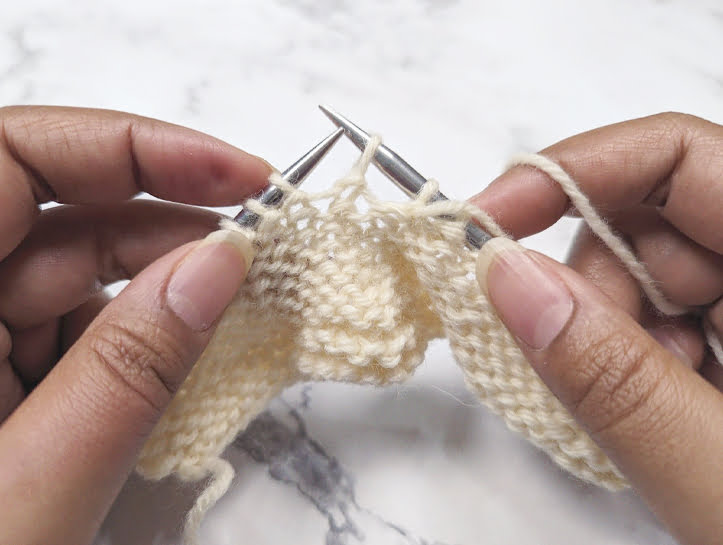
Step #2:
Knit the two stitches together as if they are one.
Step #3:
Slide both stitches off your left hand needle.
Slip, slip, knit (SSK)
Slip, slip, knit (SSK) is not quite as straight forward as a K2Tog and can be a bit frustrating at first. The main issue many knitters run into in regards to a SSK, is that it tends to look bigger and sloppier than its sister stitch (K2Tog). The reason for this is that you’re essentially manipulating the orientation of each slipped stitch by reversing its stitch mount in order to end up with a left lean. Because the stitch mount is reversed, you end up with two loose stitches carrying a bit of excess yarn, and its this excess yarn that makes the SSK look a bit more pronounced.
For this reason, it’s often advised to work a SSK as close to your needle tips as possible in order to limit overstretching. A little extra tug to tighten up the stitch as you’re working it should also help.
Additionally, another solution I’ve come across is only slipping the first stitch knit-wise. Rather than slipping the second stitch knit-wise, you simply slip it purl-wise and carry on with the rest of the decrease just the same. Personally, I find this method gives me a neater looking SSK that more closely resembles a K2Tog.
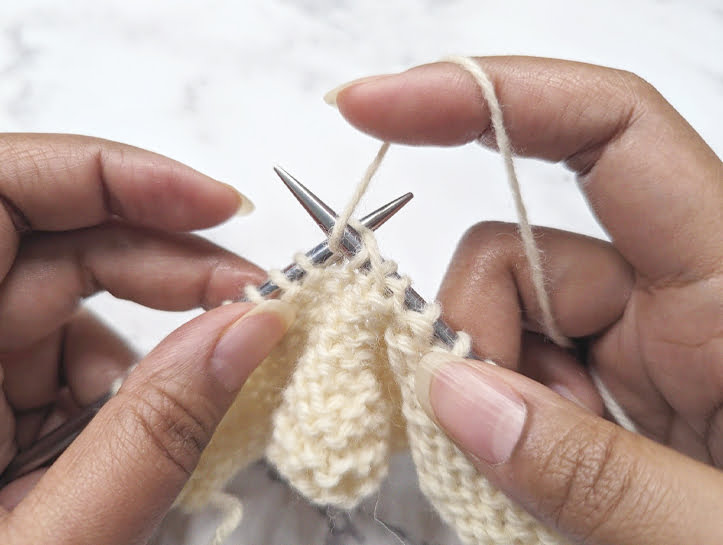
Step #1:
With the working yarn at back, slip the first stitch knit-wise onto your right hand needle.
Step #2:
Slip the next stitch purl-wise onto your right hand needle.
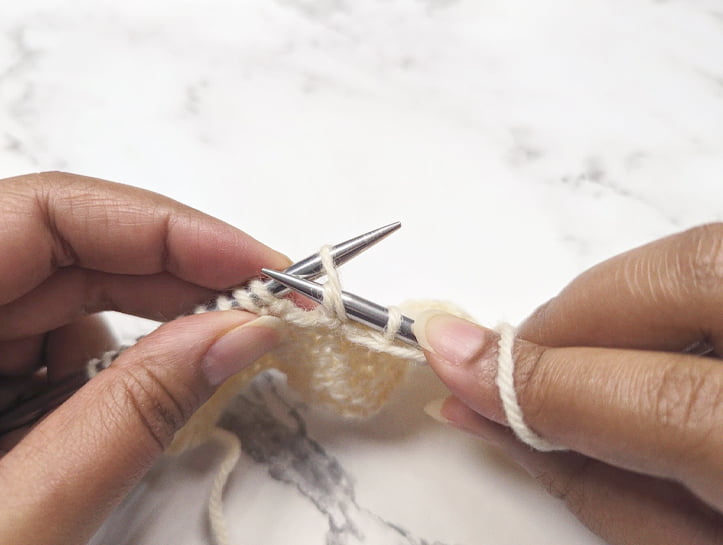
Step #3:
Insert your left hand needle tip into the back legs of the two stitches you just slipped.
Step #4:
Knit both stitches together through the back loops.
Step #5:
Slide both stitches off of your left hand needle.
slip, slip, purl & Purl 2 together
SSP (slip, slip, purl) and P2Tog (purl 2 together) are (you guessed it!) purl versions of SSK and K2Tog. They are worked in essentially the same way, only using purl stitches rather than knit stitches. Use these instead, if you’re looking to decrease on a wrong side row or if you’re simply looking to decrease a purl stitch in order to maintain a given stitch pattern.
P2Tog will lean to the right when viewed on the right side, while SSP will lean to the left.
Slip, Slip, purl (sSP)
Step #1:
With yarn in front, slip the first stitch purl-wise onto your right hand needle.
Step #2:
With yarn still in front, slip the next stitch knit-wise.
Step #3:
Slip both stitches back onto your left hand needle without twisting them.
Step #4:
Insert your right hand needle into the back leg of both stitches, purl-wise.
Step #5:
Purl into the back legs of both stitches together.
Step #6:
Drop both stitches off of your left hand needle.
Purl 2 together (p2Tog)
Step #1:
With yarn in front, insert your right hand needle into the first two stitches on your left hand needle, purl-wise.
Step #2:
Purl those two stitches together as one.
Step #3:
Slide both stitches off your left hand needle.
K2Tog & SSK (worked on the right side, left) / P2Tog & SSP (worked on the wrong side, right)
knit, slip, pass (KSP) & slip, knit, pass (skp)
These two mirrored decreases are worked slightly differently from SSK and K2Tog. Although they are not as ‘invisible’, personally I think they pair beautifully together. I love the more pronounced and obvious slant they produce – and honestly, when paired together, I always seem to get a much more appealing result than I would when working an SSK and a K2Tog. For this reason, I often prefer the SKP and KSP pairing and many times will end up using it instead.
SKP and KSP are also very easy to work. Essentially, you’ll be performing the same maneuvers as you would when working a bind off. Instead of working 2 stitches together to eliminate one stitch, you’ll be passing one stitch over the other to achieve the same goal.
SKP is worked by slipping the first stitch on your left hand needle knit-wise, knitting the next stitch, and to finish it off you’ll simply pass the slipped stitch over the knitted one. Sounds easy, right? It is.
KSP on the other hand is slightly more complex. You’ll start by knitting the first stitch, slipping that same stitch back onto your left hand needle, then passing the second stitch on your left hand needle over the first. The tricky part here is getting that second stitch over the first – as a beginner you may find the motion a little fiddly, but I promise with just a tiny bit of practice you’ll get accustomed to it in no time!
Oh, and one last thing I should probably mention – SKP leans to the left, while KSP leans to the right.
knit, slip, pass (kSP)
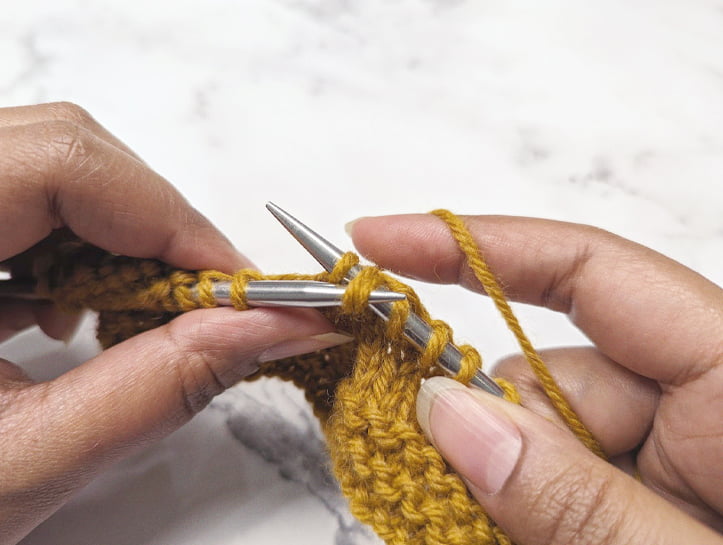
Step #1:
Knit the first stitch on your left hand needle.
Step #2:
Slip that stitch back onto your left hand needle (take care to ensure that you don’t twist it).
Step #3:
Insert your right hand needle into the front leg of the next stitch on your left hand needle.
Step #4:
Pass that stitch over the stitch you just knit.
Step #5:
Slip the resulting stitch back onto your right hand needle.
slip, knit, pass (sKP)
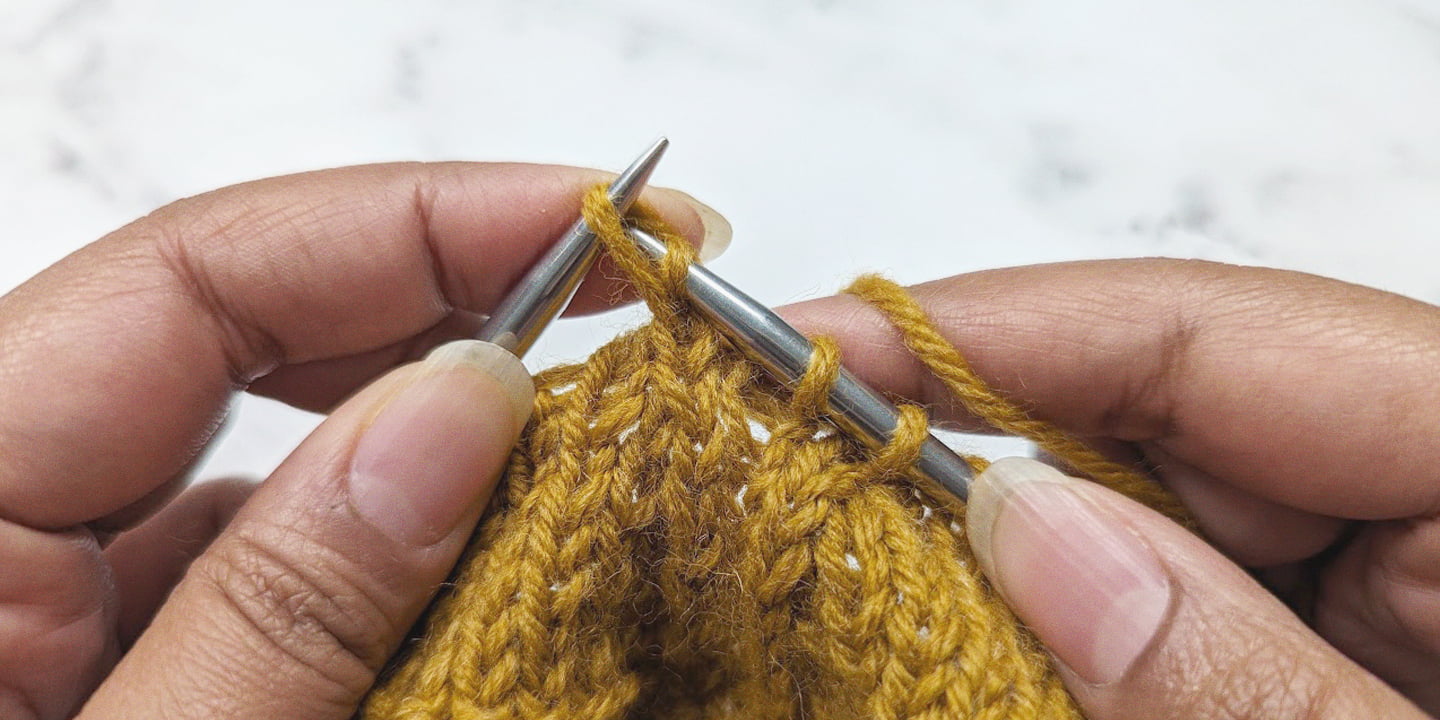
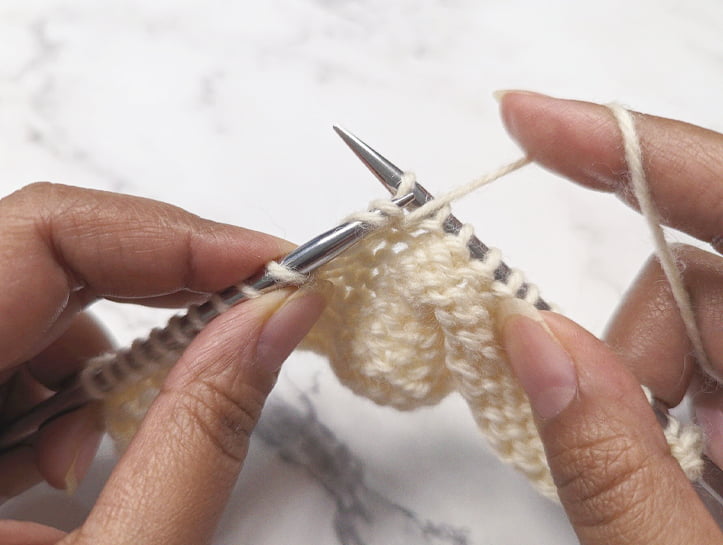
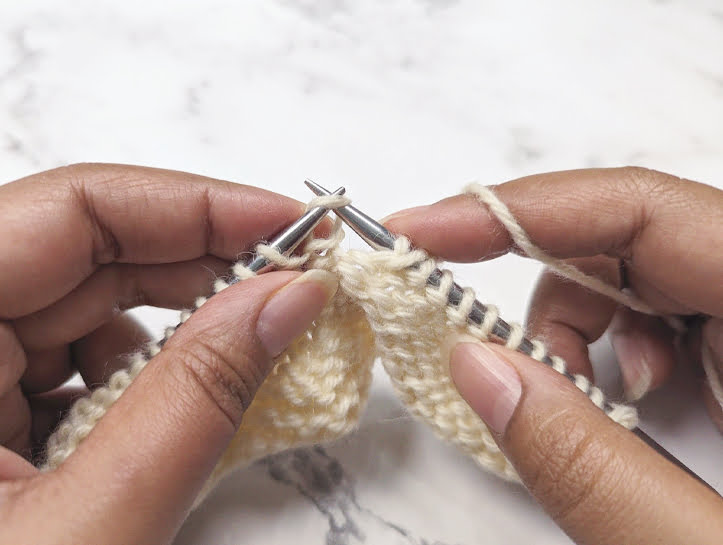
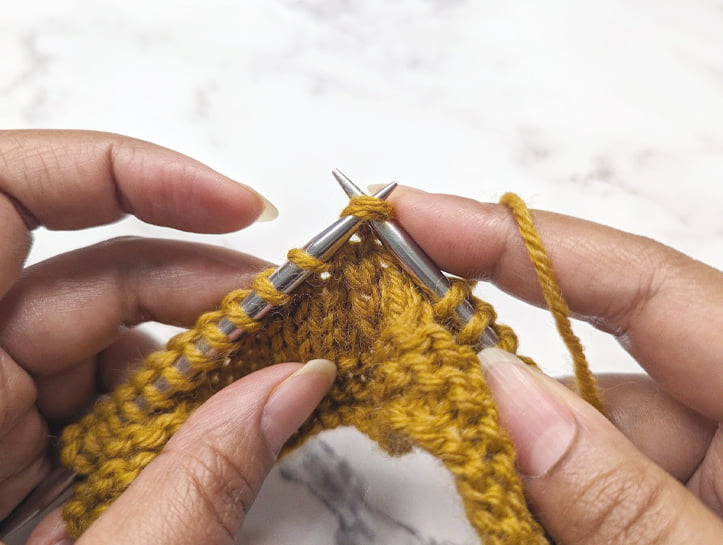
Step #1:
With working yarn in back, slip the first stitch on your left hand needle knit-wise.
Step #2:
Knit the next stitch.
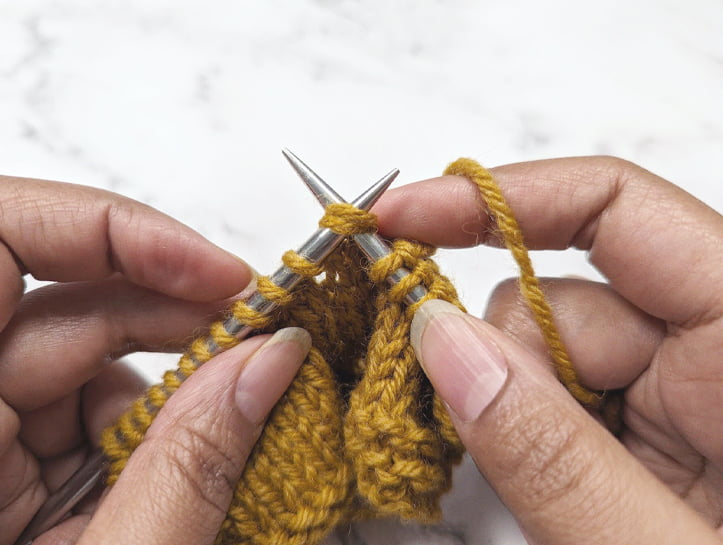
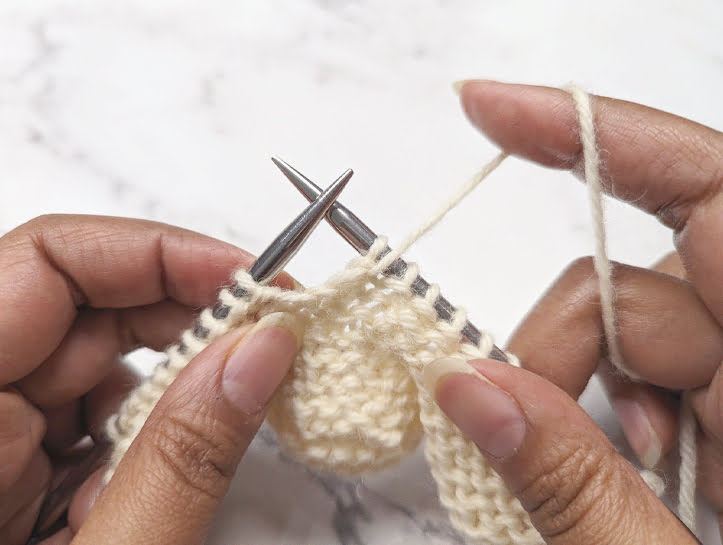
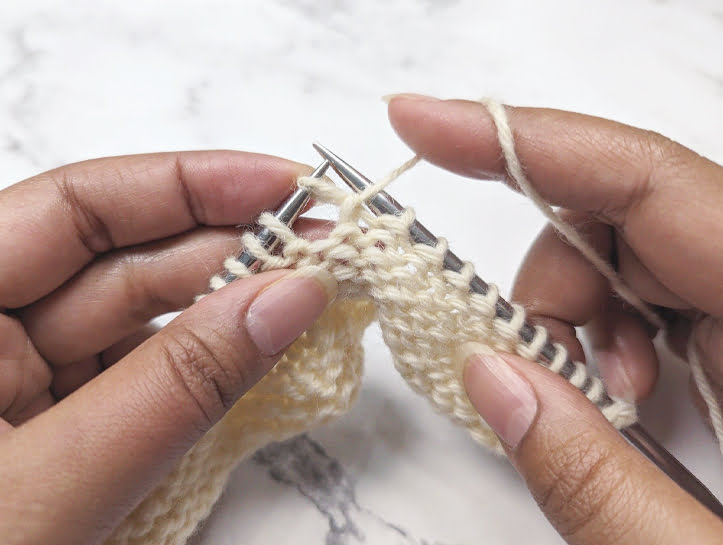
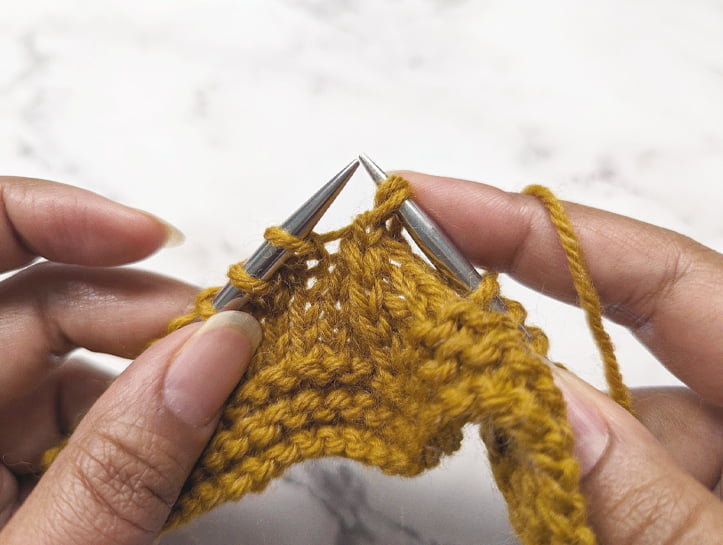
Step #3:
Insert your left hand needle behind the front leg of the slipped stitch.
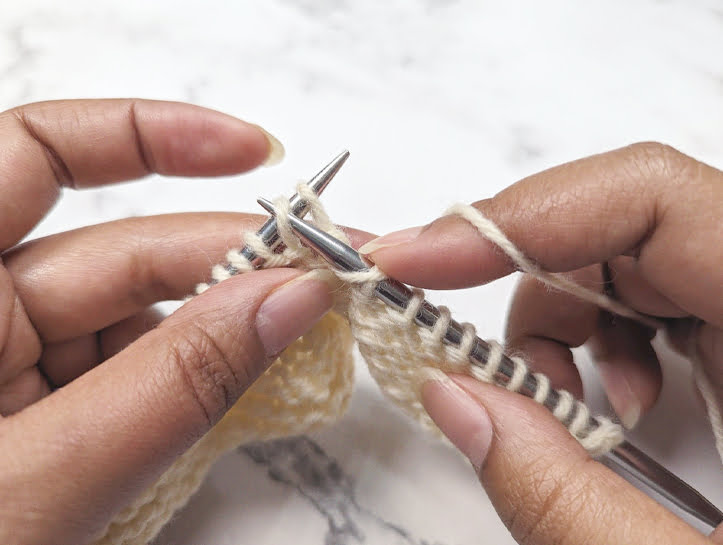
Step #4:
Pass the slipped stitch over the knitted stitch.
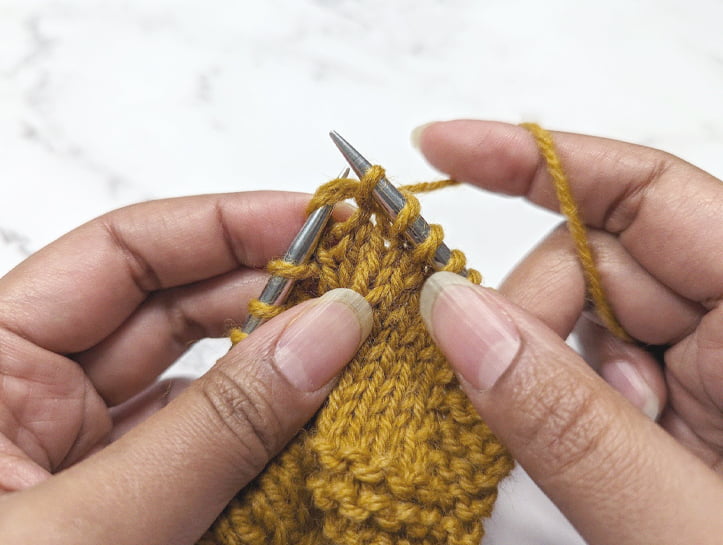
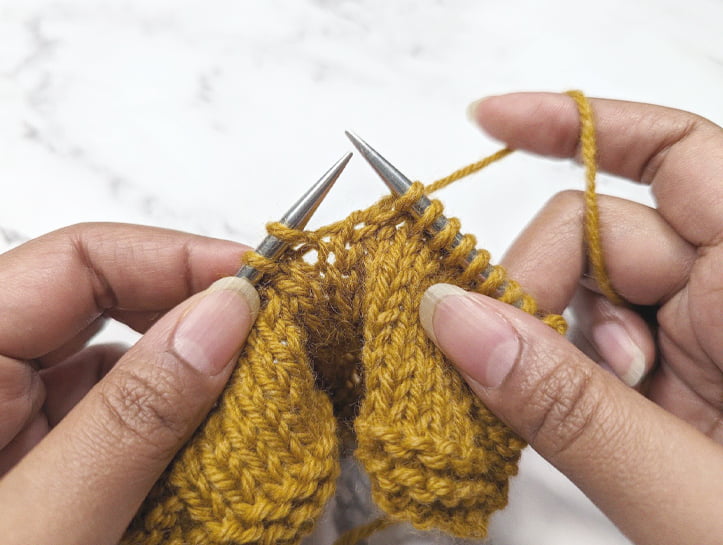
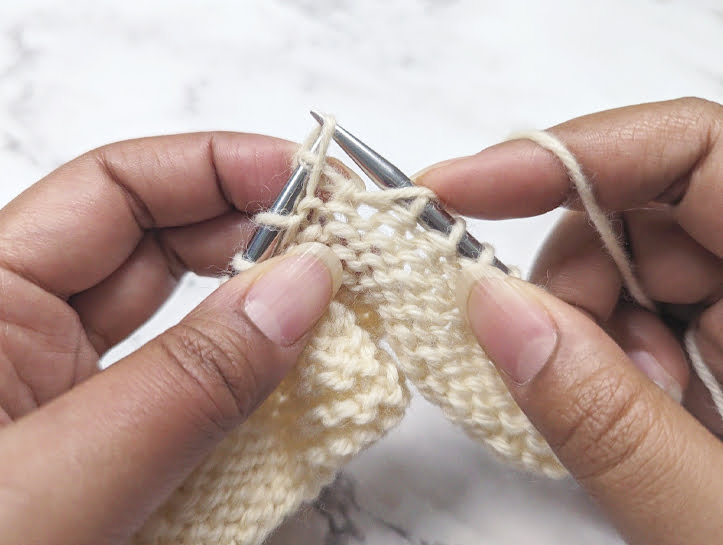
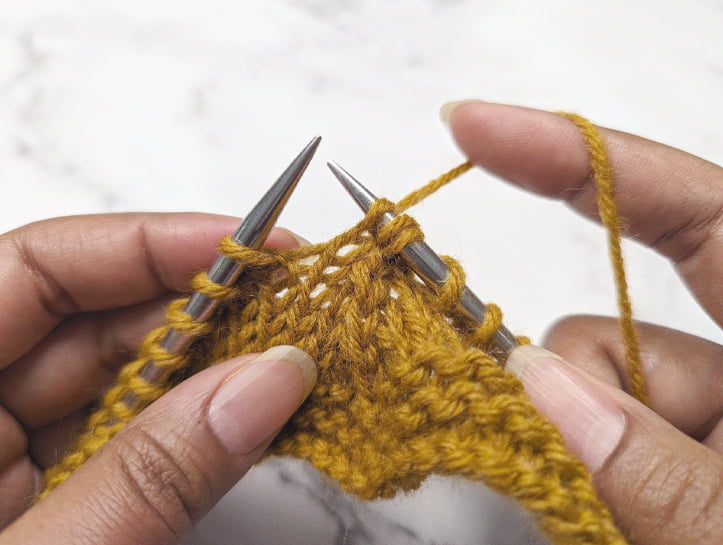
Step #5:
Tighten the resulting stitch (but not too much!)
Purl, SLIP, PASS & slip, purl, pass
Once again, as you may have guessed, PSP and SPP are simply purl variations of SKP and KSP. You’ll use these when you’re looking to work decreases on a wrong side row, or to simply maintain a given stitch pattern where a purl stitch is needed.
When viewed from the right side, SPP leans to the right and PSP leans to the left.
purl, slip, pass (pSP)
Step #1:
Purl the first stitch on your left hand needle.
Step #2:
Slip the next stitch knit-wise, with yarn in front.
Step #3:
Slip both stitches back onto your left hand needle.
Step #4:
Insert your needle into the front leg of the second stitch on your left hand needle.
Step #5:
Pass that stitch over the first stitch on your left hand needle.
Step #6:
Slip the resulting stitch back onto your right hand needle.
Slip, purl, pass (SPP)
Step #1:
Slip the first stitch on your left hand needle purl-wise, with yarn at back.
Step #2:
Purl the next stitch.
Step #3:
Insert your left hand needle into the back leg of the slipped stitch.
Step #4:
Pass the slipped stitch over the purled stitch.
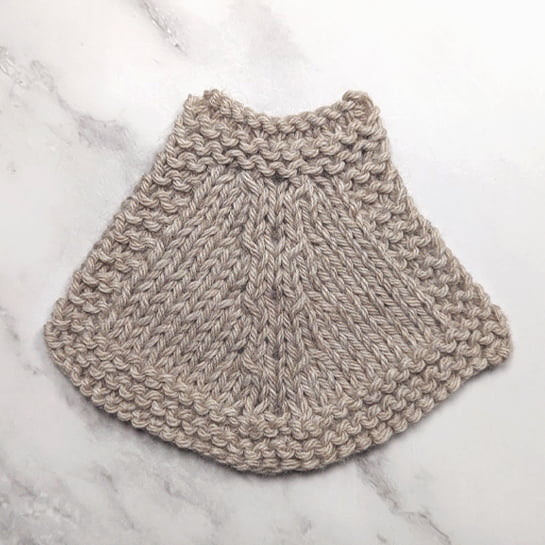
KSP & SKP (worked on the right side, left) / PSP & SPP (worked on the wrong side, right)
multiple stitch decreases
Just as you can increase stitches by more than one stitch at a time, you can do exactly the same with decreases in knitting. And of course, there are multiple ways to accomplish this, but let’s begin by learning how to decrease our stitch count by 2 stitches instead of just 1 – something commonly known in the knitting world as a ‘double decrease’.
Essentially, in order to achieve a 2 stitch decrease, you’ll apply the same steps as outlined for the single decreases above to create double variations of the same decreases.
S3K & K3TOG
For example, a K2Tog simply becomes a K3Tog (knit 3 stitches together) in order to create a double decrease that leans to the right. Easy peasy.
And what about a left leaning version? Ah, the S3K. Although slightly more tricky, an S3K (or SSSK) is also worked in pretty much the same manner as an SSK.
To work an S3K, you’ll slip the first two stitches knit-wise (one at a time), then slip the third stitch purl-wise before knitting the 3 slipped stitches together – all through the back loops. You see – just as you’ll knit 1 extra stitch in a K3Tog, you’ll slip one extra stitch in an S3K. Both end up resulting in 2 stitches decreased.
SK2P & K2SP
In a similar fashion, SKP and KSP become double decreases when you simply knit 2 stitches together instead of just one.
SKP becomes an SK2P and is worked by slipping the first stitch on your left needle knit-wise, then knitting the next 2 stitches together before finally passing the slipped stitch over this newly created stitch. Can you see how similar this is to SKP? If you can SKP, you can SK2P.
And in the exact same manner, our right leaning version – the K2SP – is worked just as a KSP. At this point, you can probably guess at how this one’s worked. That’s right! By replacing the single knit stitch with a K2Tog.
As you work through these double decrease variations, you’ll quickly come to realize that you can even work a triple or quadruple decrease in the exact same manner. All you’ll need to do is simply replace your K2Tog with a K4Tog or a K5Tog for your right leaners, and your SSK with an S4K or an S5K for your left leaners. Every other step remains exactly the same.
And for the purl variations, again, you’ll apply the exact same principles, only working purl stitches instead of knits.
the centered double decrease
Now, what if we wanted to create a double decrease that doesn’t lean either right or left – i.e. a centereddouble decrease? Good question!
One common way to do this is to simply work a single left and right leaning decrease right next to each other – or perhaps with a stitch or two in between them. Of course, the only thing here is you’ll still have a right or left lean to each single decrease – but paired together you’ll be able to achieve that symmetrical, ‘centered’ look.
If this doesn’t suit your fancy, however, there are ways to achieve a centered decrease without having to pair two single decreases together. Below are just a few examples on how to achieve a ‘true’ centered double decrease.
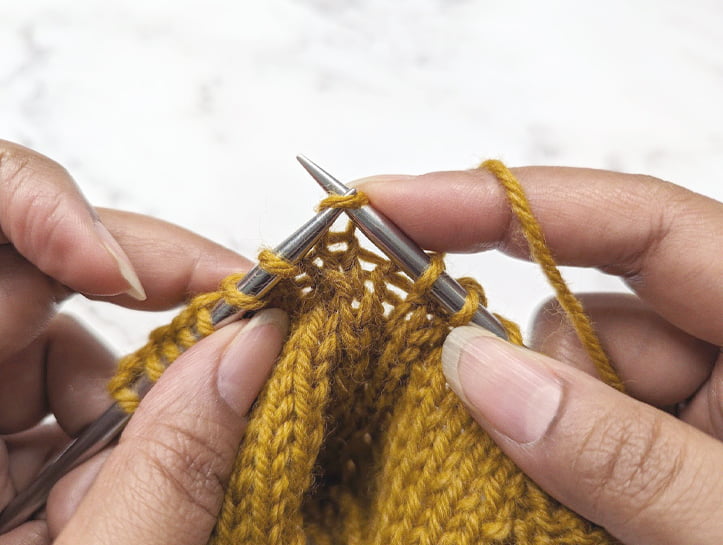
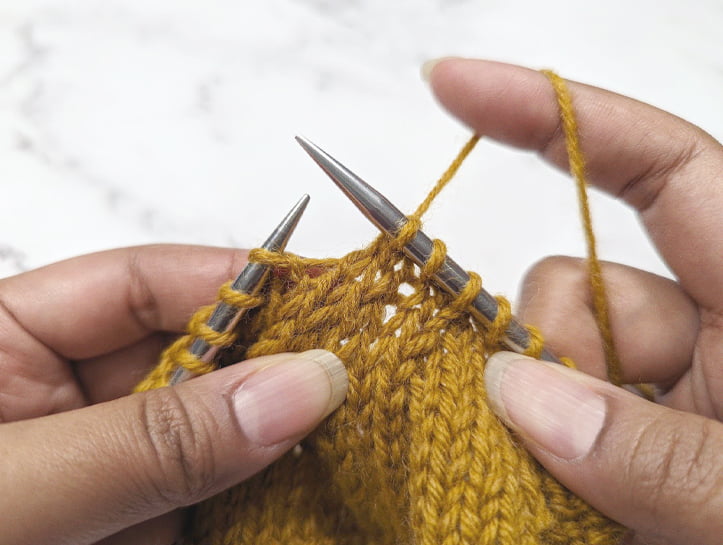
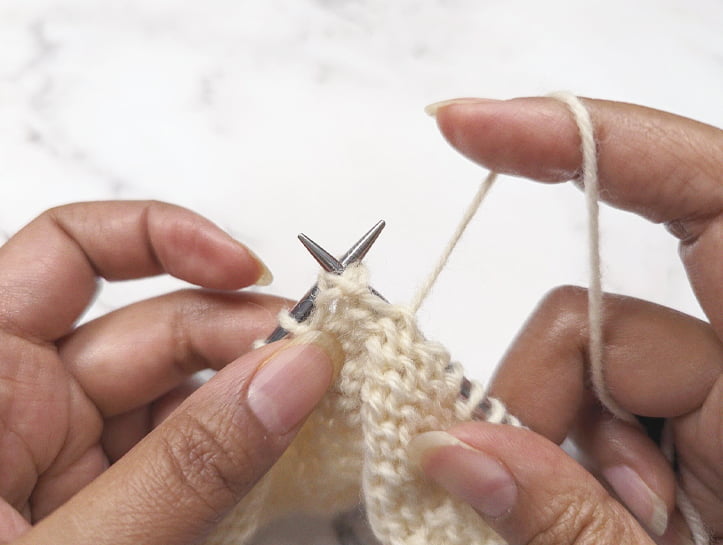
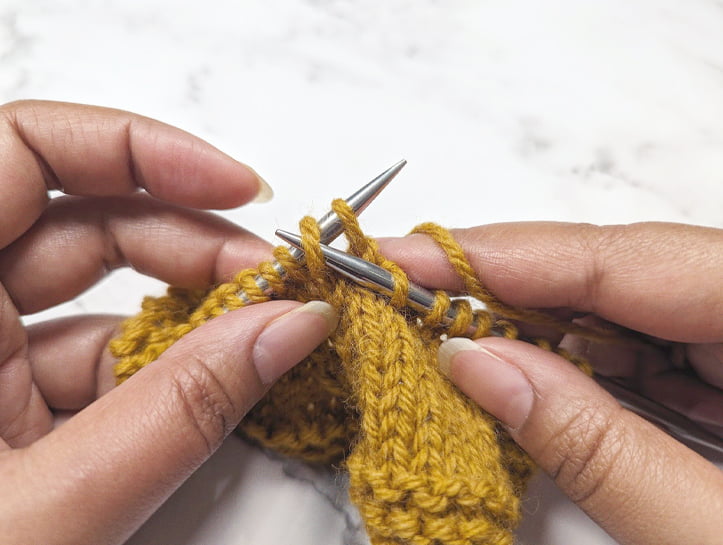
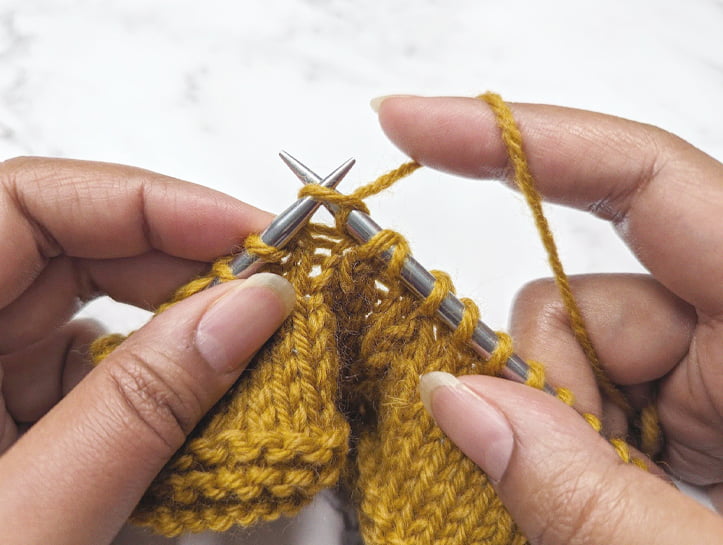
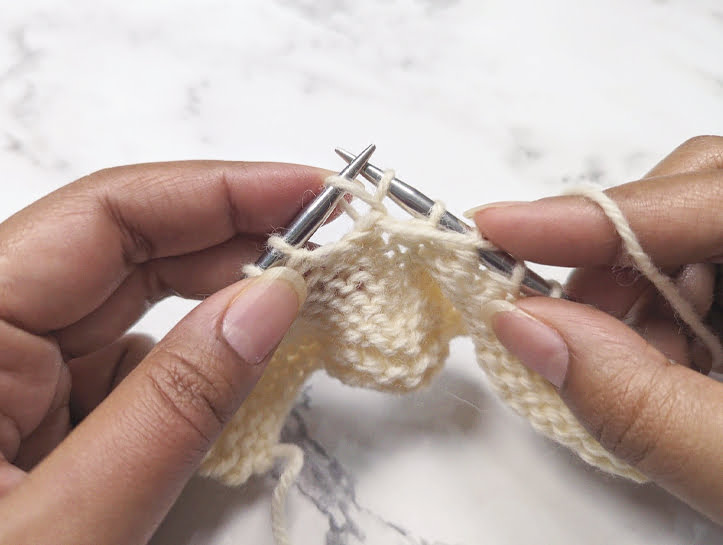
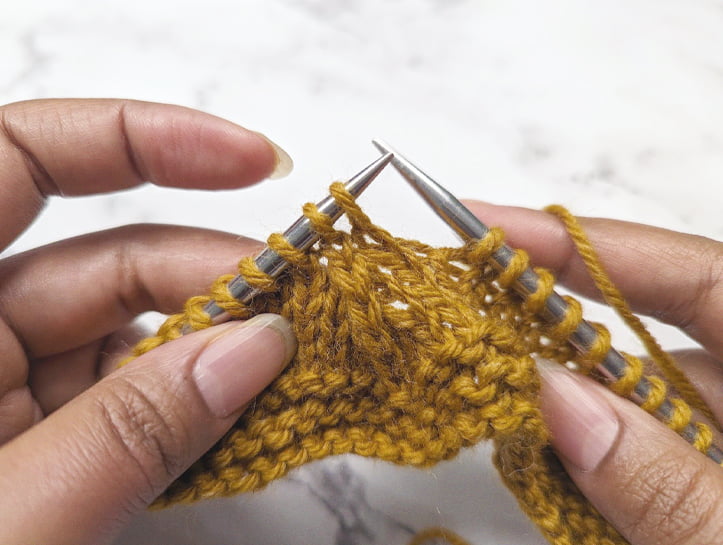
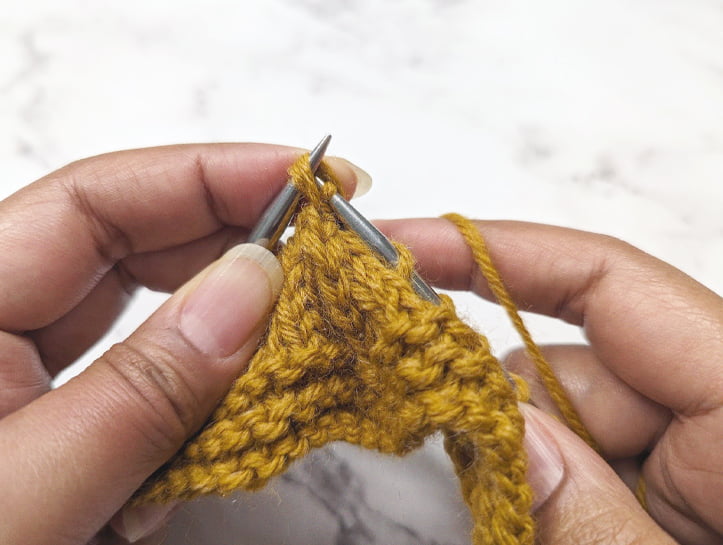
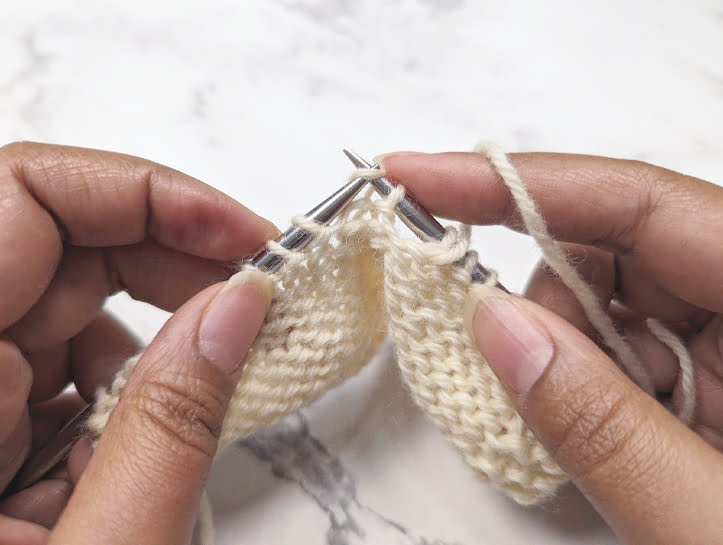
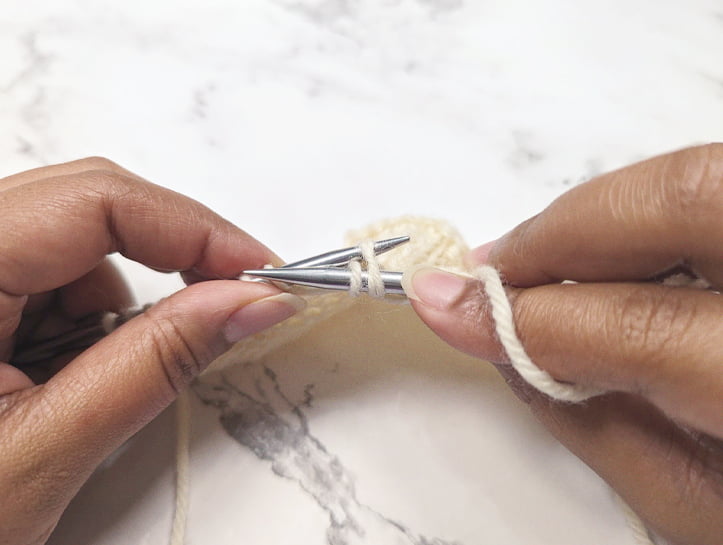
slip 2, knit 1, pass slipped stitches over (S2KP)
Not to be confused with the left leaning SK2P, S2KP is a decrease that has no lean. This centered decrease is characterized by a raised column of knit stitches that sits between the left and right sides. You’ll often see this decrease being used at the crown of a hat, for example, or within a variety of decorative stitch patterns.
S2KP is worked by slipping the first two stitches on your left hand needle together knit-wise, then knitting the next stitch before finally passing the two slipped stitches over the knitted stitch.
Step #1:
Work until 1 stitch before the point at which you want the centered stitch.
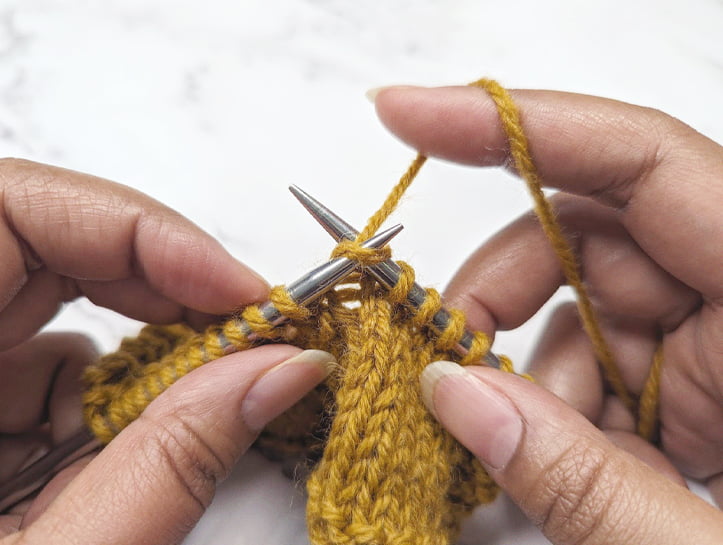
Step #2:
Insert your right hand needle into the front legs of the first two stitches on your left hand needle (at the same time), knit-wise.
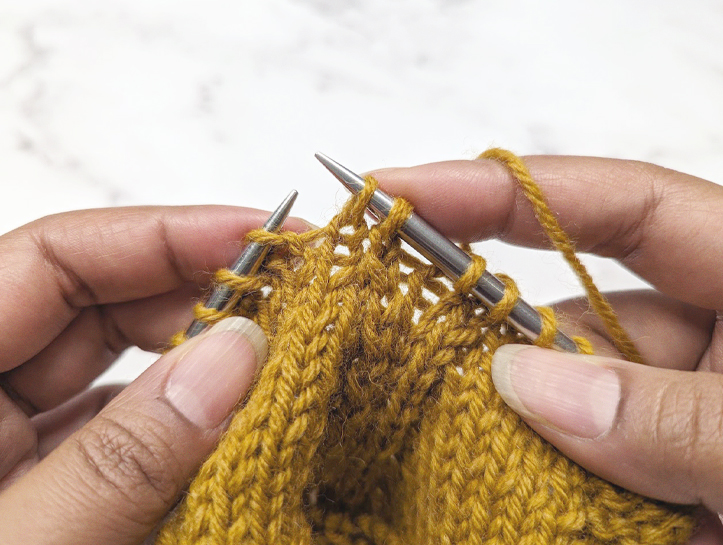
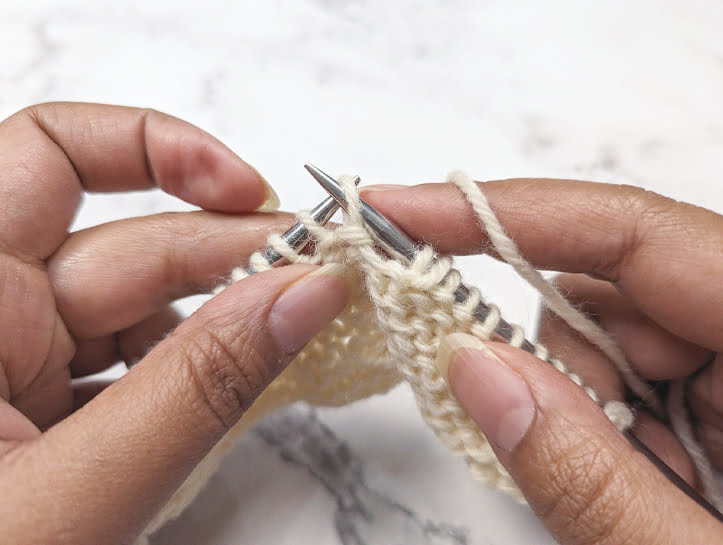
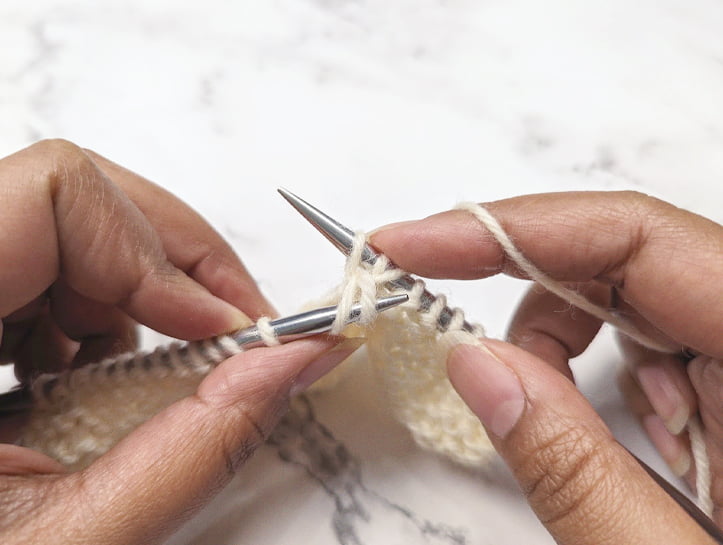
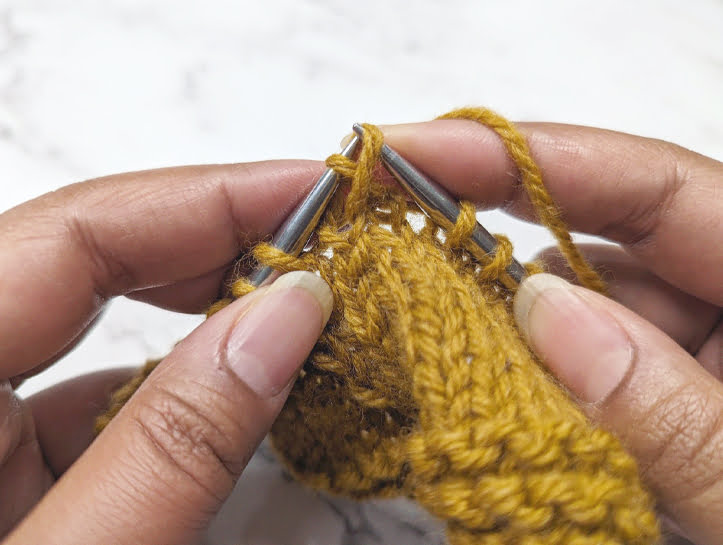
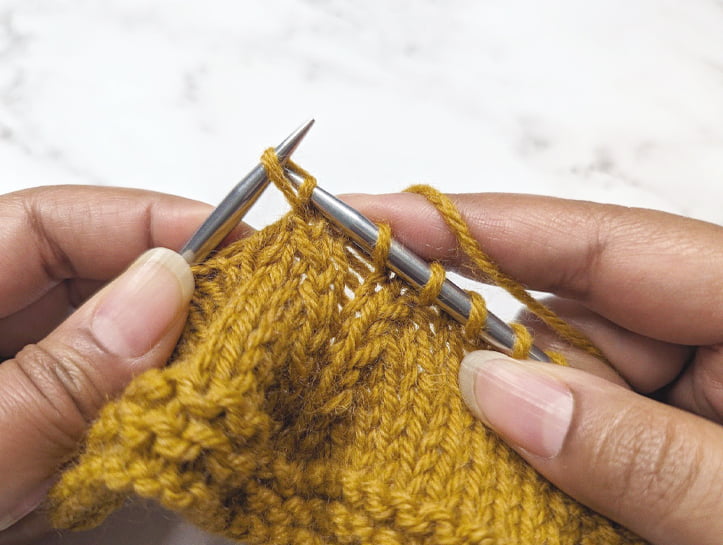
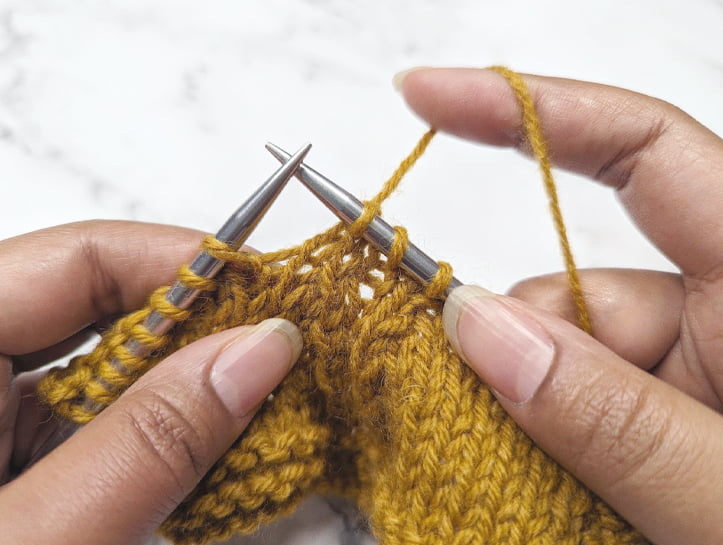
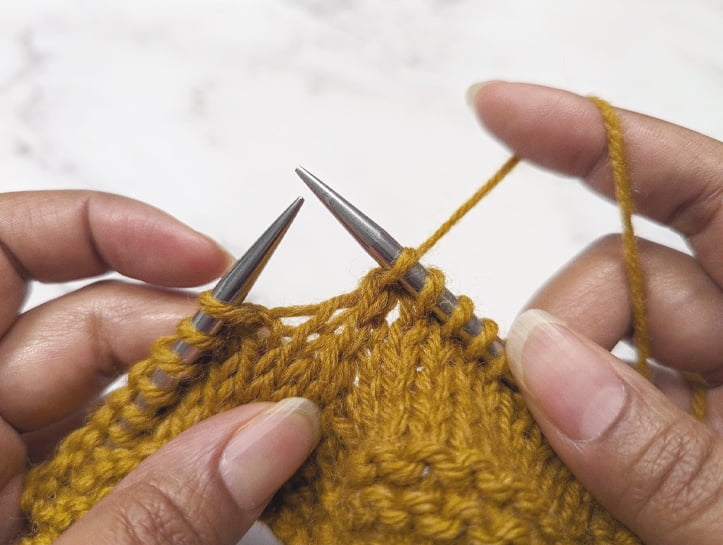
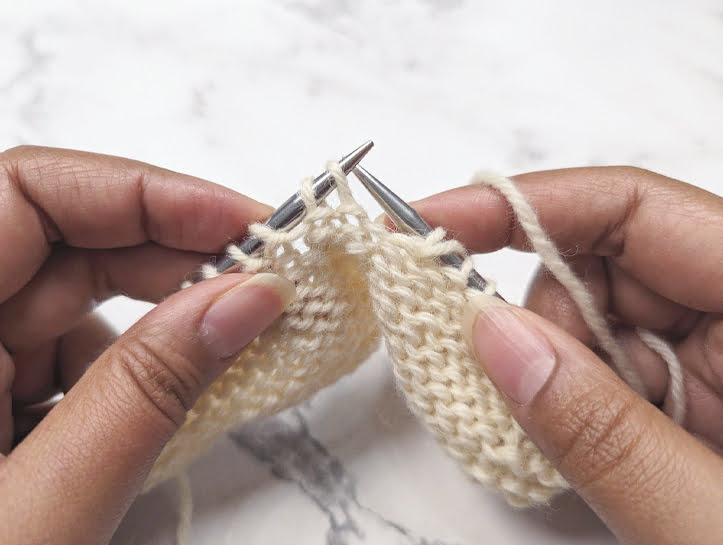
Step #3:
Slip both stitches together, onto your right hand needle.
Step #4:
Knit the next stitch.
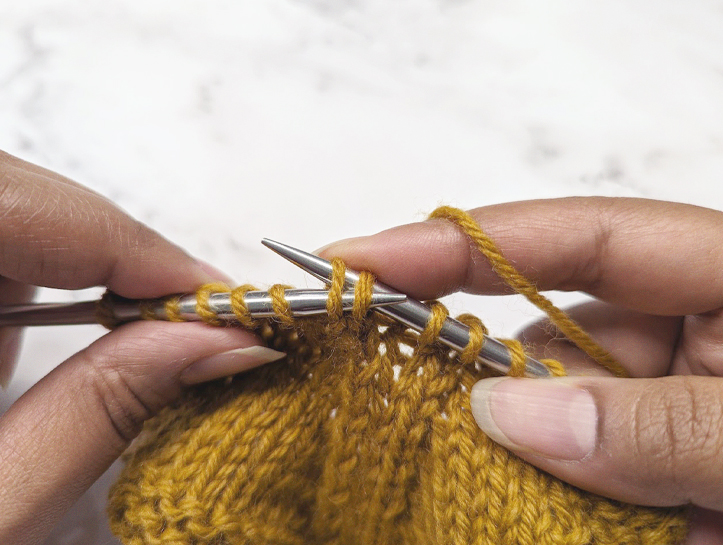
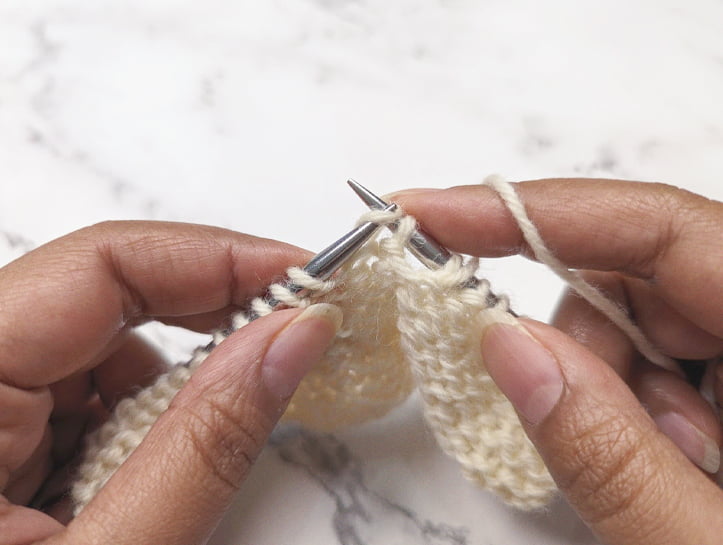
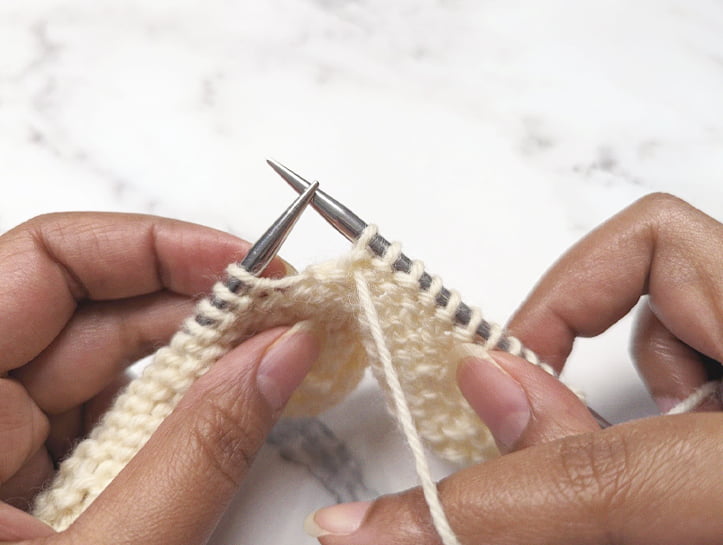
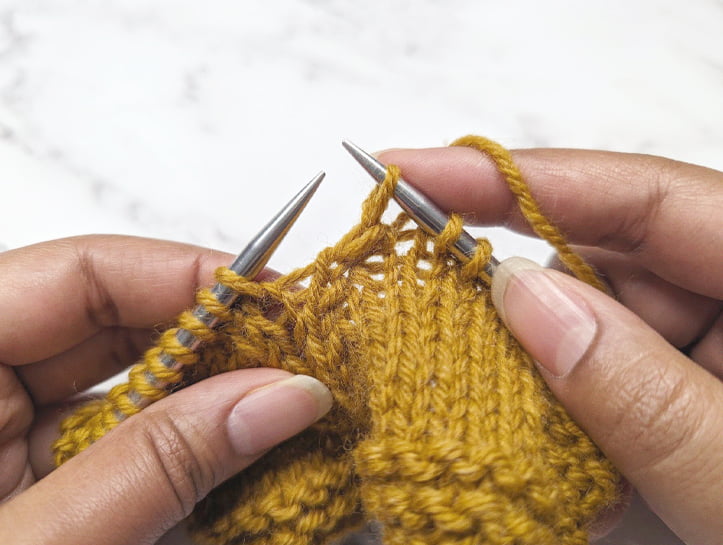
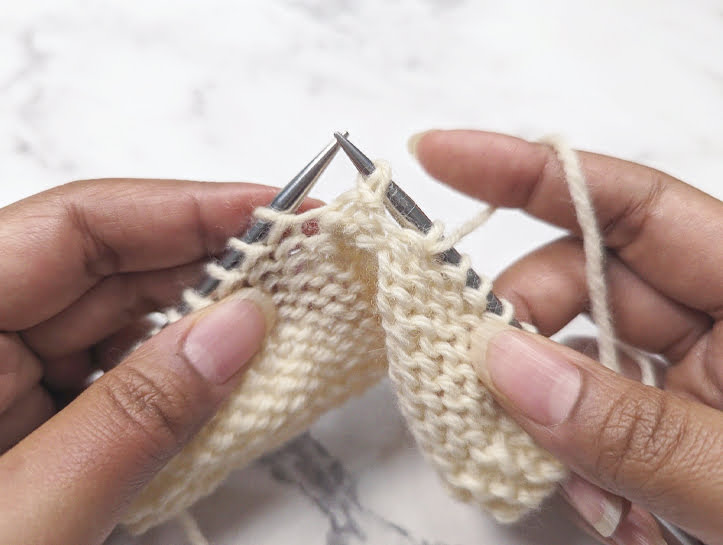
Step #5:
Insert your left hand needle behind the front legs of the two slipped stitches.
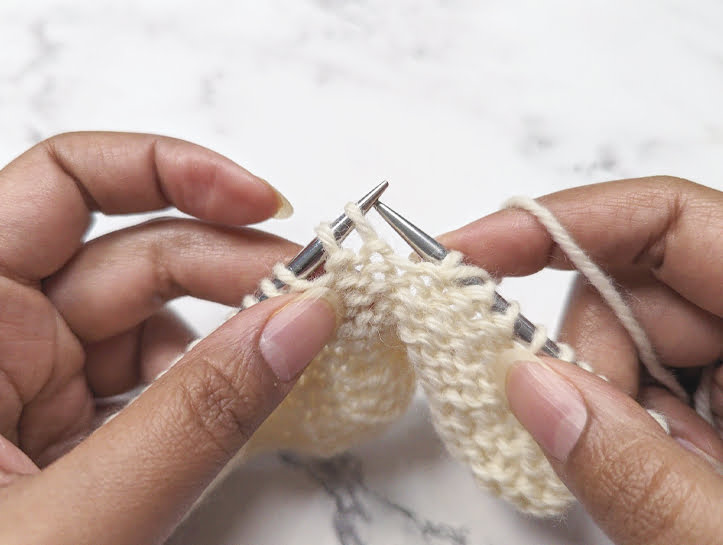
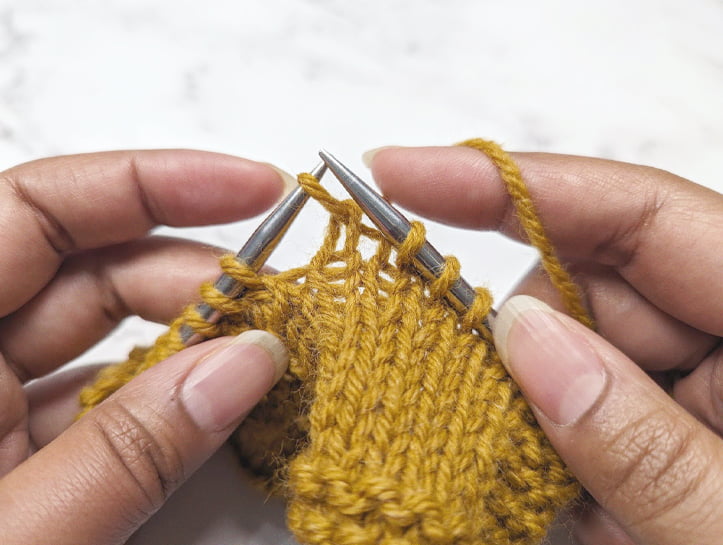
Step #6:
Pass both stitches together over the stitch you just knit.
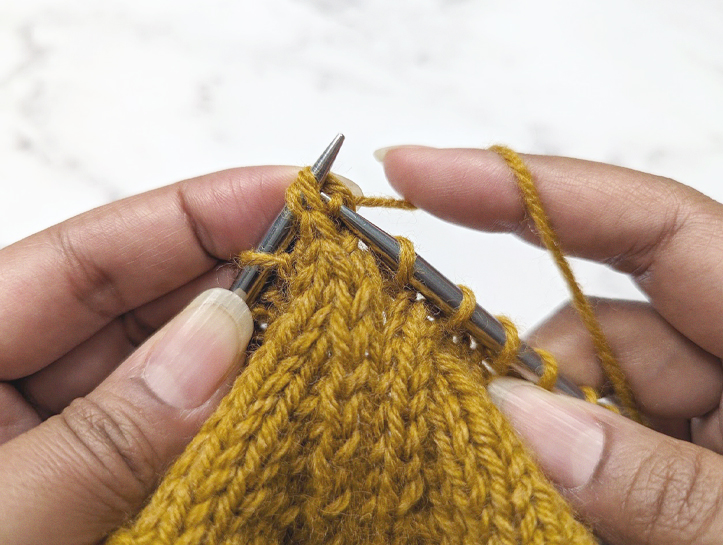
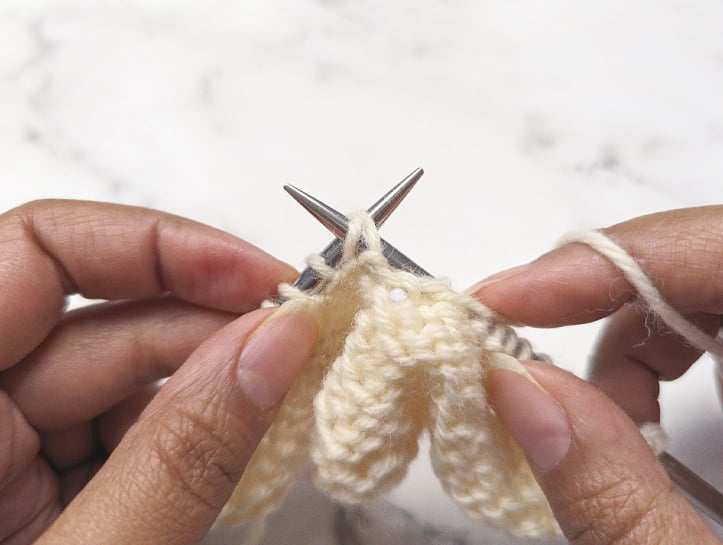
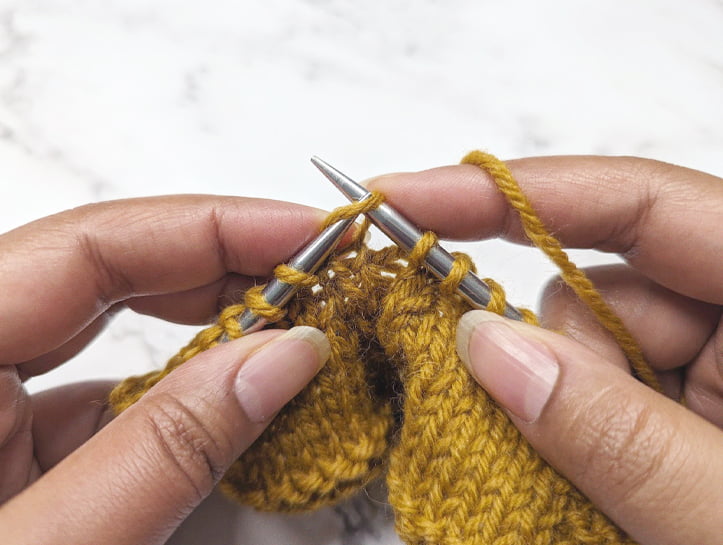
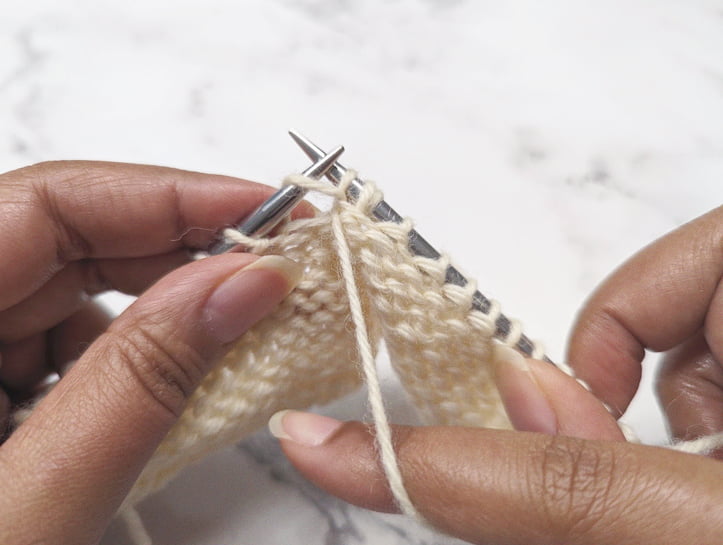
Step #7:
Give the resulting stitch a bit of a tug to tighten things up.
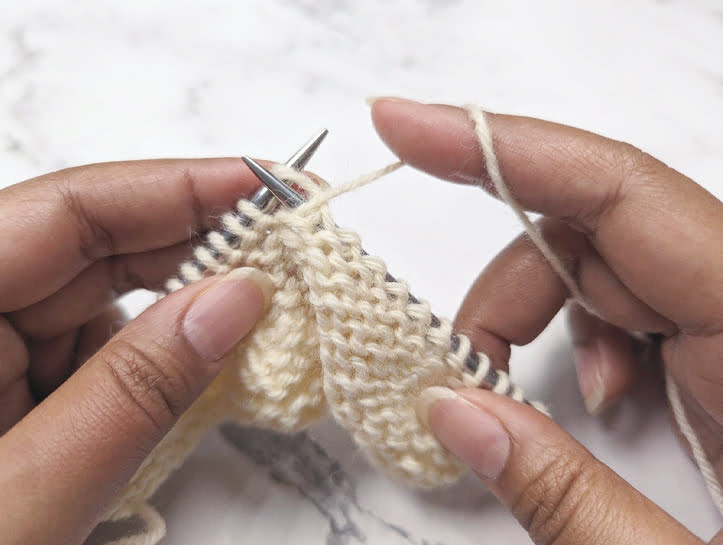
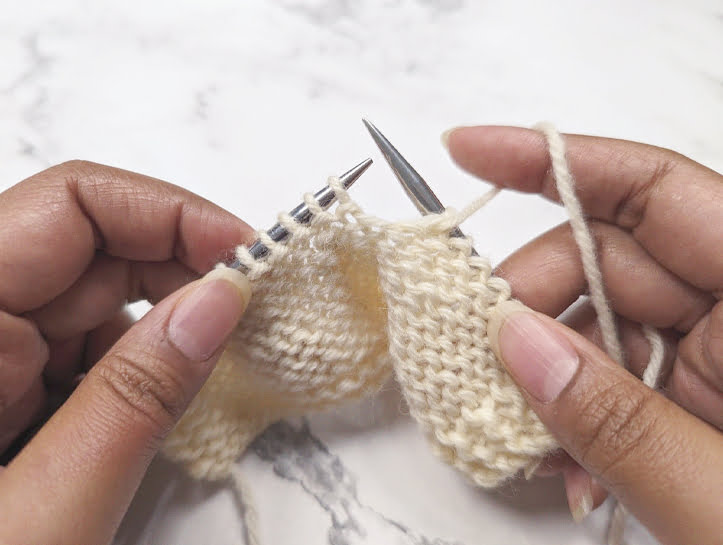
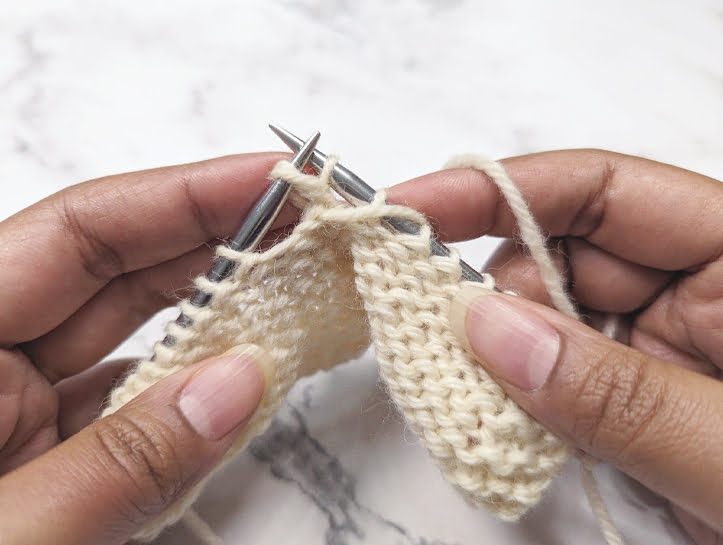
slip 2, purl 1, pass slipped stitches over (S2PP)
And here we go again! The purl version of the S2KP – the S2PP. Let’s see how to work this decrease on the wrong side of your fabric…
Step #1:
Work to one stitch before the point at which you want your centered stitch.
Step #2:
Slip the first stitch purl-wise, with yarn in front.
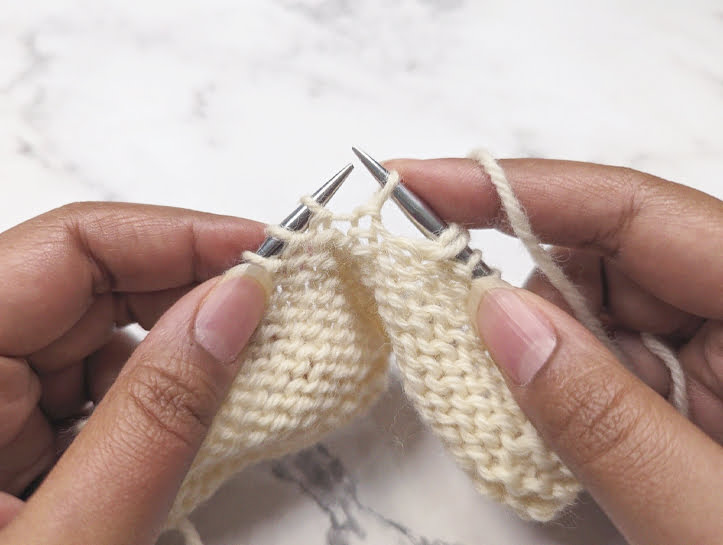
Step #3:
Slip the next stitch knit-wise, with yarn in front.
Step #4:
Place both stitches back onto your left hand needle, without twisting them.
Step #5:
Insert your needle purl-wise into the back legs of both slipped stitches.
Step #6:
Slip both stitches together back onto your right hand needle.
Step #7:
Purl the next stitch.
Step #8:
Insert your left hand needle into the back legs of both slipped stitches.
Step #9:
Pass both stitches over the stitch you just purled.
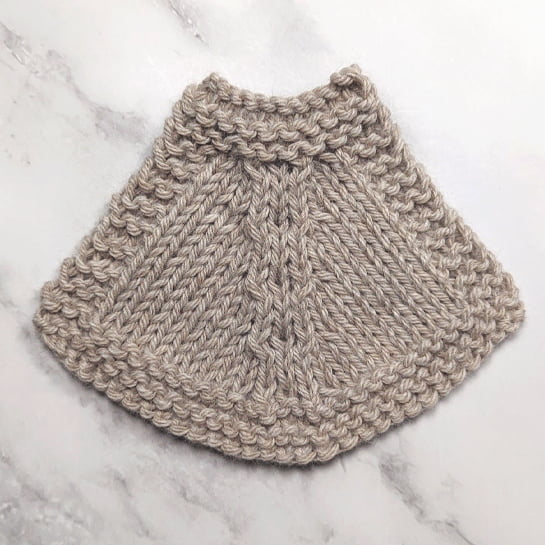
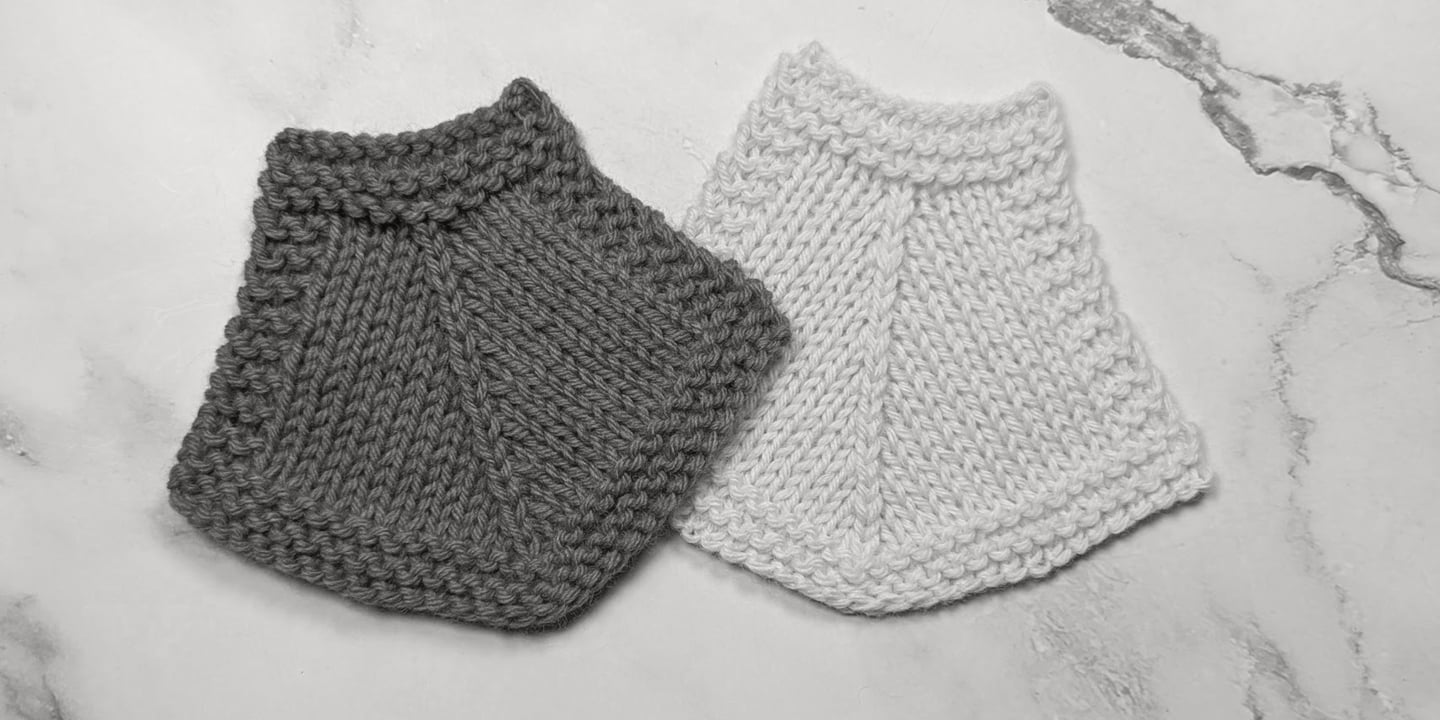
S2KP (worked on the right side, left) & S2PP (worked on the wrong side, right)
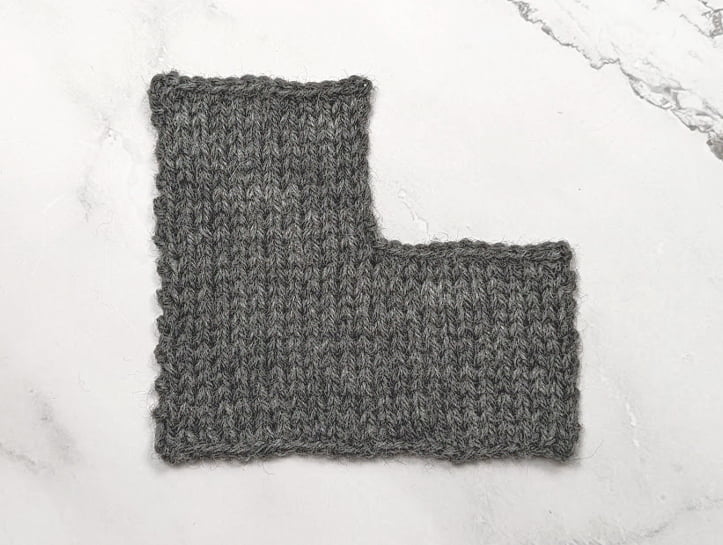
Decreasing by binding off
Perhaps the quickest and most efficient way to decrease multiple stitches at a time is to simply bind off as many as you need. You can use pretty well any bind-off method anywhere you want in your knitting, but by far, the most widely used method for binding off in the middle of your fabric is the standard bind-off. In fact, you may even find yourself using this one almost exclusively any time you run into this kind of knitting situation.
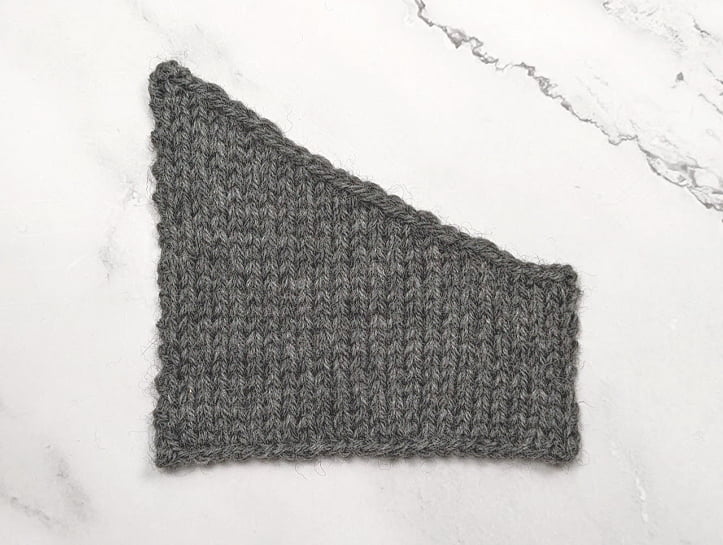
Another bind-off you’ll often see used between two sets of stitches is the sloped bind-off. This one is most commonly used to shape the neckline, shoulder slopes, and/or underarms of a bottom-up sweater.
To learn how to work these two bind-off methods (and more!), check out the article I’ve written on how to bind off your knitting.
The Standard Bind-Off
The Sloped Bind-Off
Some Final Words...
I hope you’ve enjoyed learning some of the many ways you can decrease stitches in your knitting. As always, if you have any questions at all, please do let me know in the comments below!
Also, if there’s a decrease method I haven’t mentioned here that you think I should know about – do tell! I’d love to hear about it.