Affiliate Disclaimer: This post may contain affiliate links. This means that I may earn a commission if you make a purchase through these links. I only recommend products and services that I personally use and believe will add value to my readers. Your support helps keep this blog running and is greatly appreciated. Thank you!
Ah, that dreaded dropped stitch. That sinking feeling when you look down at your work and suddenly notice a little straggler has somehow drifted away from the bunch. There’s nothing that can ruffle up the serene flow of your knitting quite like a dropped stitch can.
Whether you’ve just begun your knitting journey or you’ve been at this game for a long while, the truth is we’ve all done it – and we’ll probably forever continue to do it for as long as we remain knitters. Such is the nature of our human-ness. And you know what? That’s okay!
Today I’m going to show you just how to fix dropped stitches so they stay where they belong – on your needle with the rest of the bunch. Of course, not every dropped stitch situation is going to look the same as the ones I’ll be covering in this post. Some types of stitches (say, lace, cable, or brioche, for example) will require a different, more complex approach. But perhaps I’ll save the how-to on those for another post.
For now, I’ll be covering the basics on how to fix a dropped stitch – both knit-wise and purl-wise. As you’ll soon see, as far as knits and purls go, it’s actually super easy! You may even begin to wonder why you ever fretted about it in the first place.
stitch mount
First thing’s first, we’ve gotta talk stitch mount. If you’re a beginner, you may not realize just how important it is to ensure that your stitches are mounted on your needles correctly. And when you’re dealing with a straggler, you’ll want to make sure that it won’t cause you any further trouble along the way.
It’s far too easy to forget that there’s actually a proper way to orient your stitches. So let’s take a closer look at how to ensure that your stitches are placed on your needles correctly.
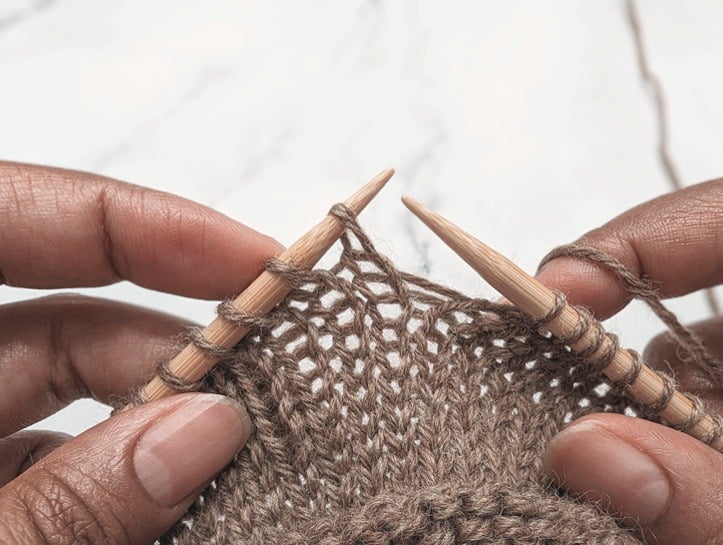
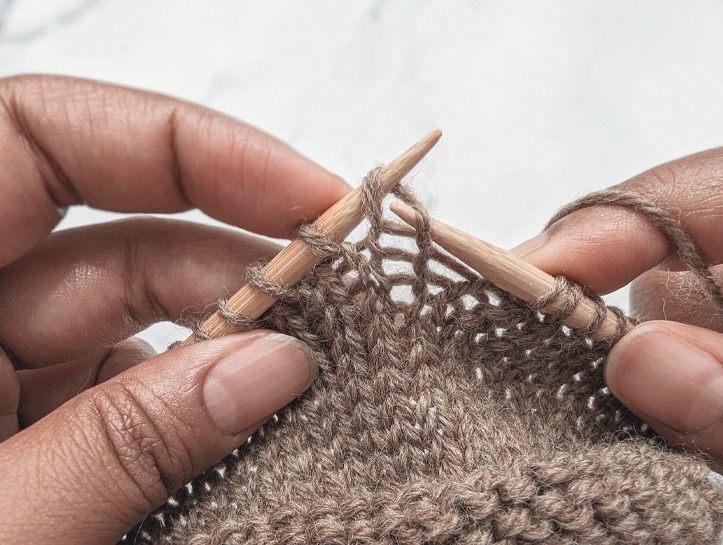
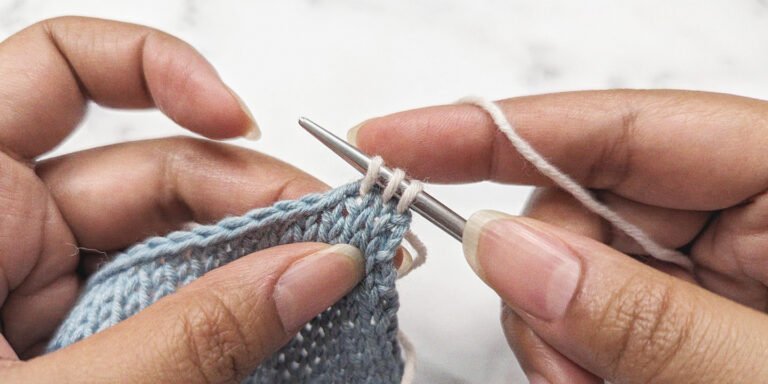
Proper Stitch Mount
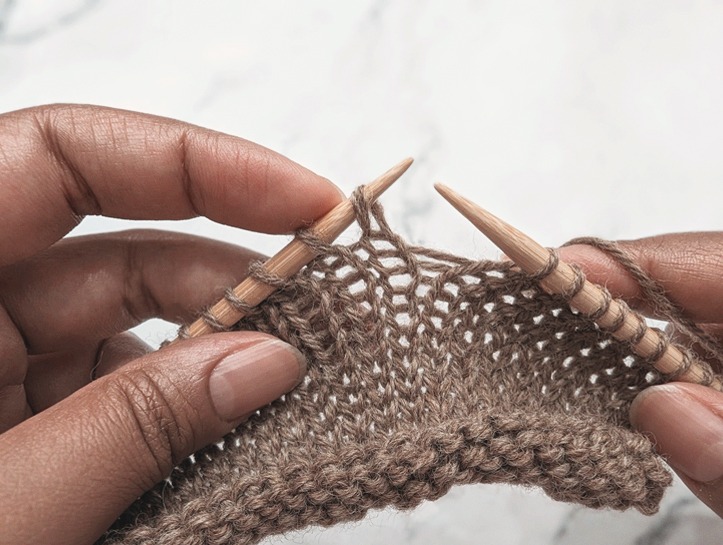
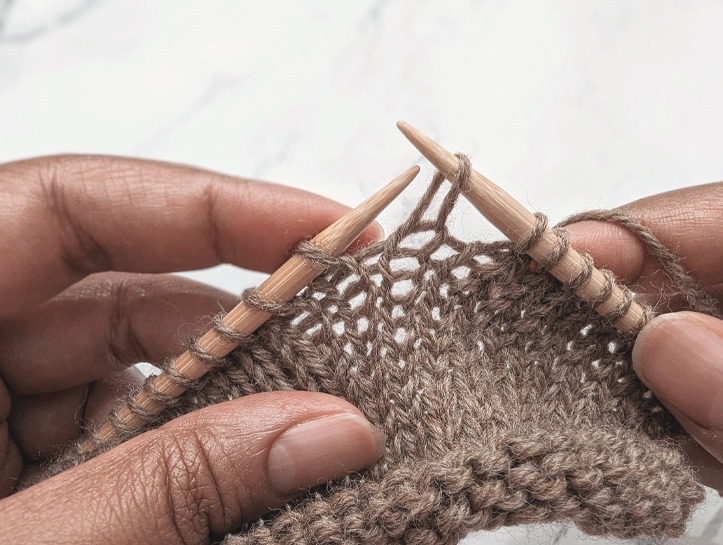
Reversed Stitch Mount
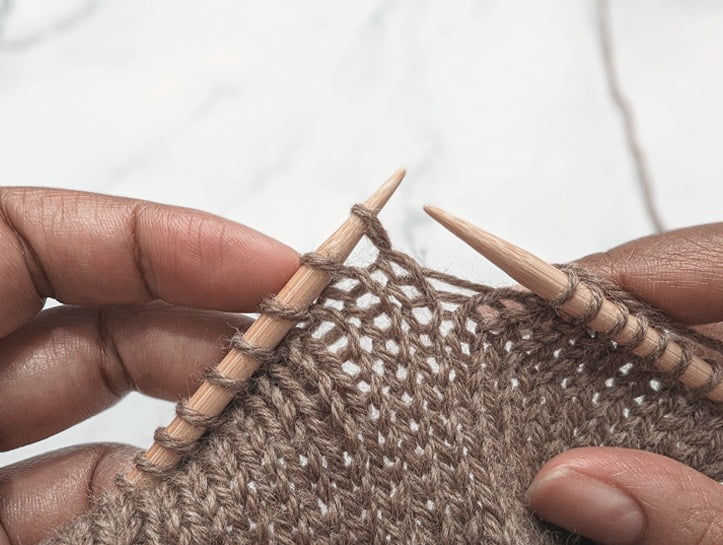
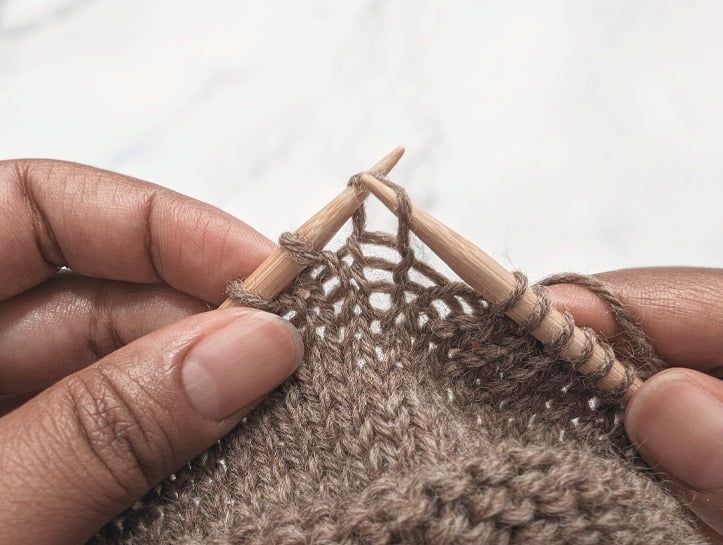
Twisted Stitch Mount
As you can see in the images above, proper stitch orientation means that your stitch’s front ‘leg’ is on the right side when viewed from the front. The back ‘leg’, on the other hand, is on the left side. A reverse stitch mount sits on your needle in the exact opposite direction, with the front leg on the left and the back leg on the right. This applies to both the right and wrong sides of your fabric. And finally, a twisted stitch mount has your stitch mounted with one leg crossing the other.
To fix a stitch that is mounted incorrectly, simply reorient that stitch so that the above ‘rules’ apply (taking care not to twist it even further). Let’s take a closer look at how to do this…
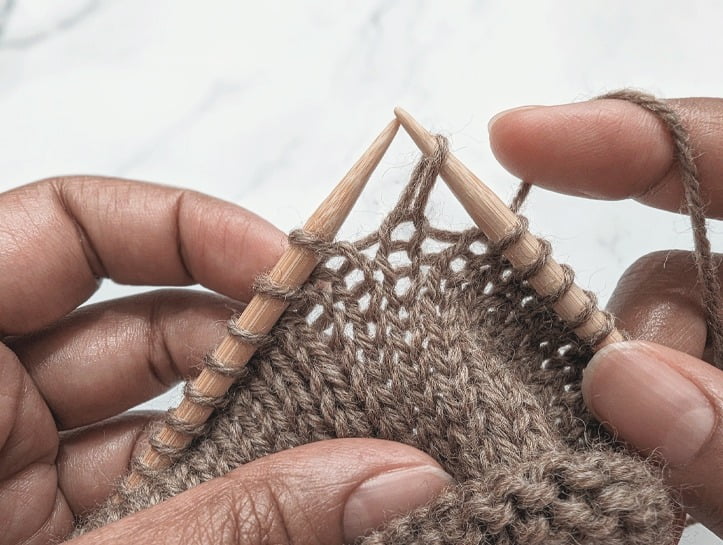
fixing a reversed stitch
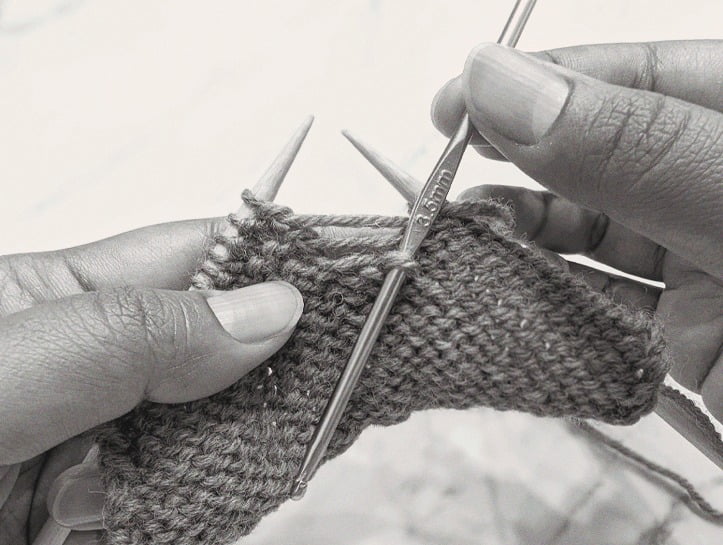
Step #1:
Insert your right hand needle into the back leg of the reversed stitch, from back to front.
Step #2:
Let that stitch slip onto your right hand needle.
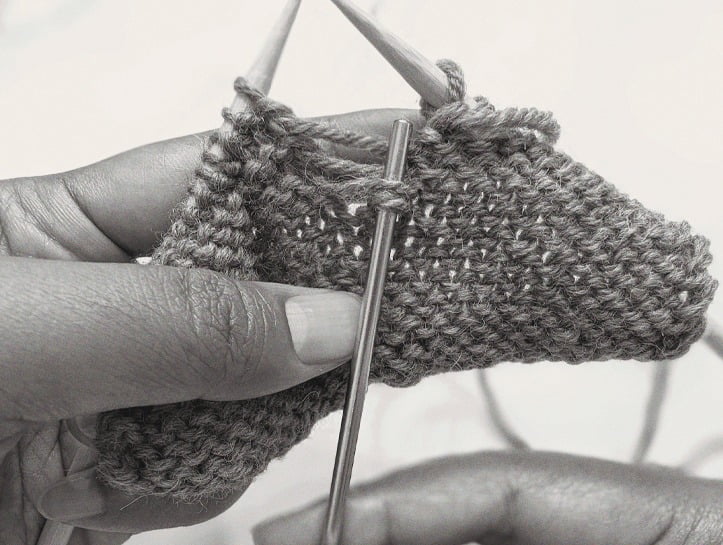
Step #3:
Slip that stitch back onto your left hand needle, taking care to ensure proper stitch mount.
fixing a twisted stitch
Step #1:
Insert your right hand needle into the front leg of the twisted stitch, from front to back.
Step #2:
Let that stitch slip onto your right hand needle.
Step #3:
Slip that stitch back onto your left hand needle, taking care to ensure proper stitch mount.
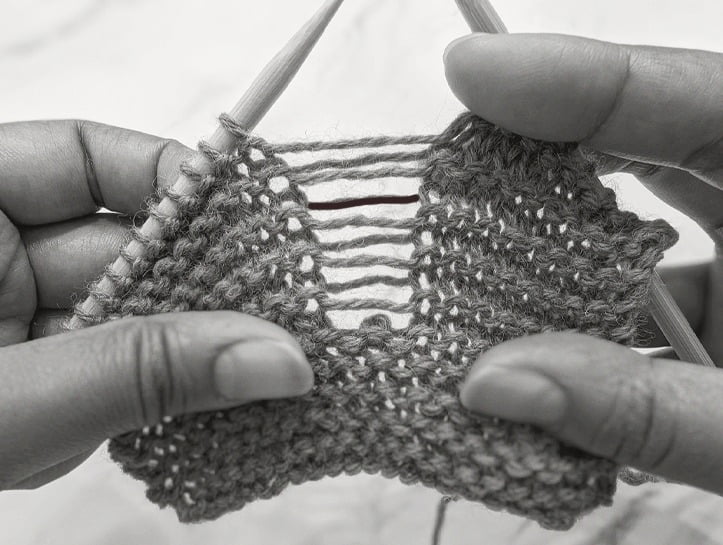
rescuing a dropped knit stitch
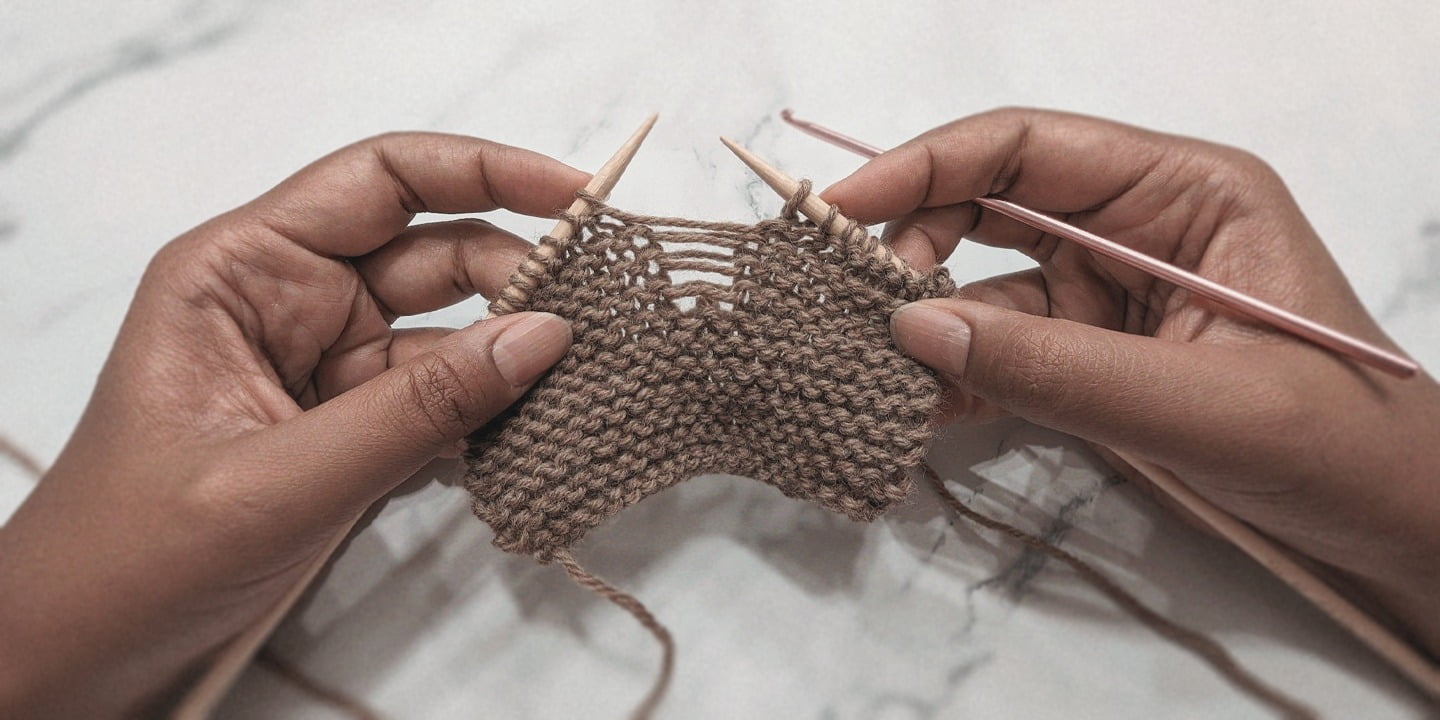
Now that we’ve gotten stitch mount out of the way – let’s take a look at how to fix that dropped stitch. First up – the knit stitch.
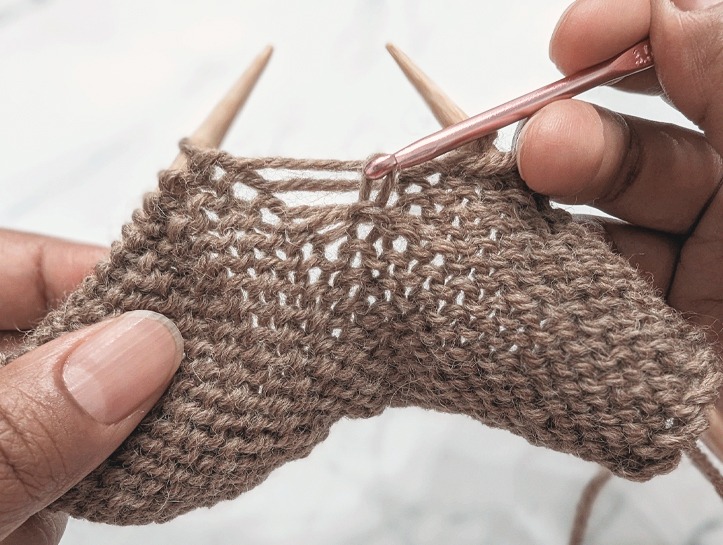
You’ll notice in the images below that I’ve recruited the help of a crochet hook for this task – or a ‘stitch fixer’ as it’s sometimes called in the knitting world. You don’t absolutely need this tool to be able to fix your dropped stitches but I highly recommend getting one. It’ll make your stitch rescuing a breeze!
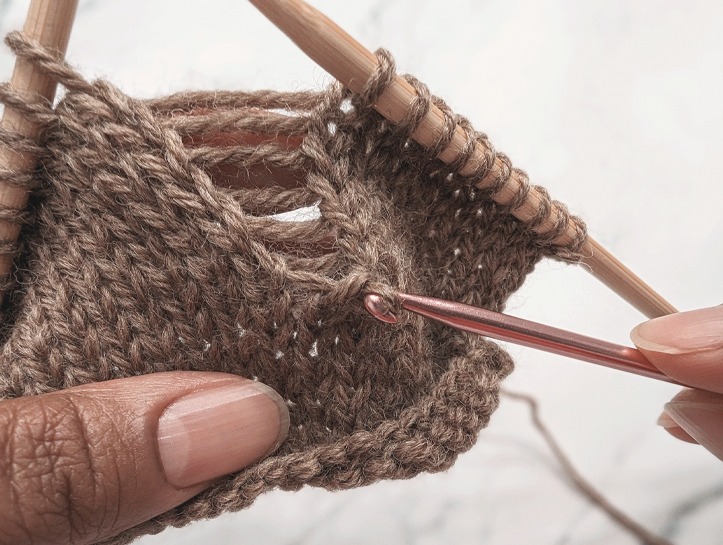
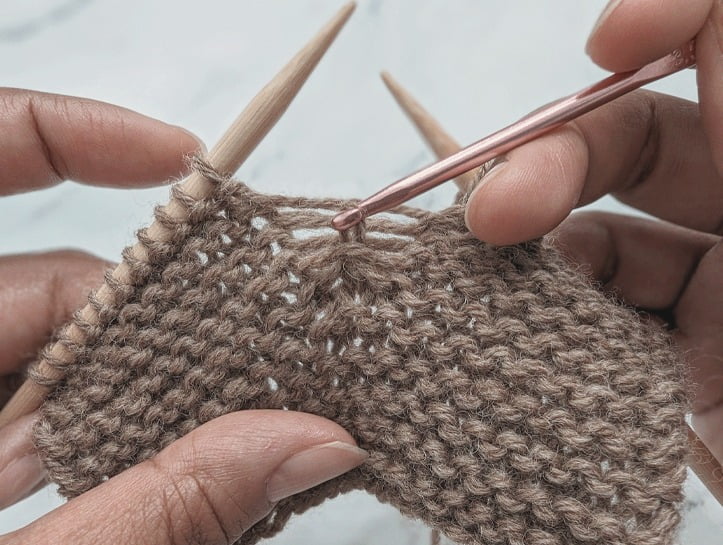
Step #1:
Locate the dropped knit stitch.
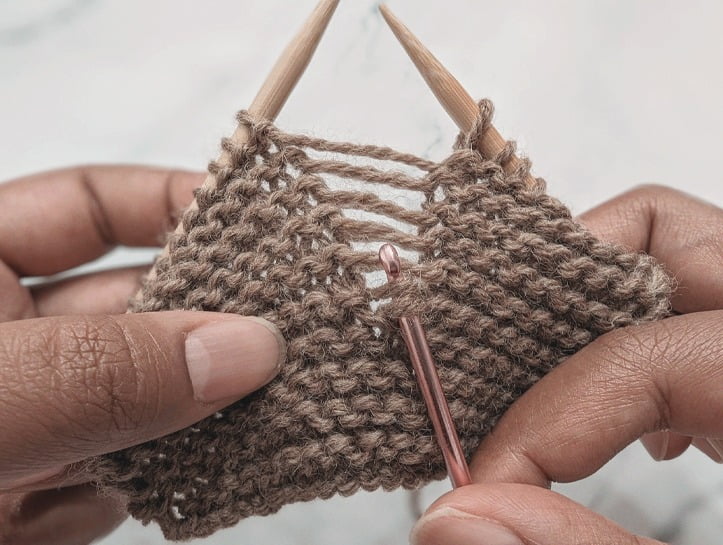
Step #2:
Insert your crochet hook into the dropped stitch from front to back, taking care to ensure that it’s not twisted.
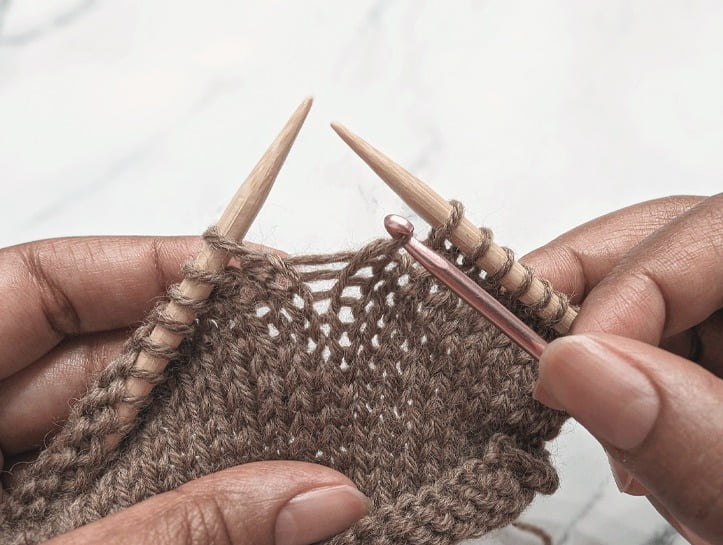
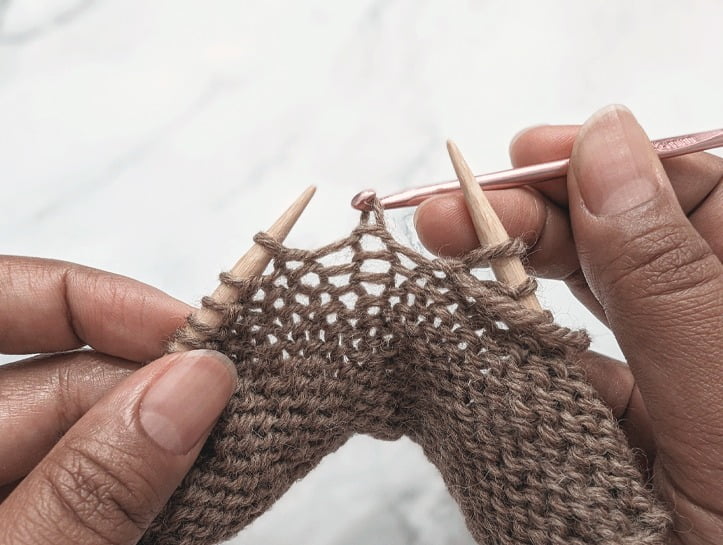
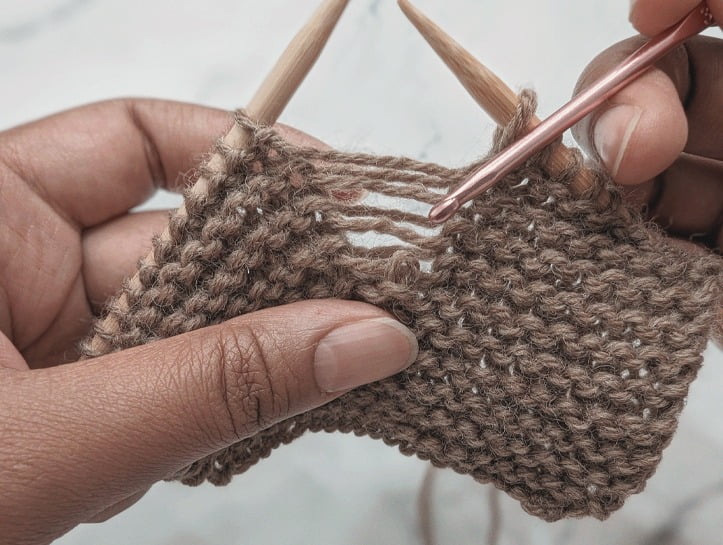
Step #3:
Locate the horizontal strand immediately above the dropped stitch and place your crochet hook directly behind it.
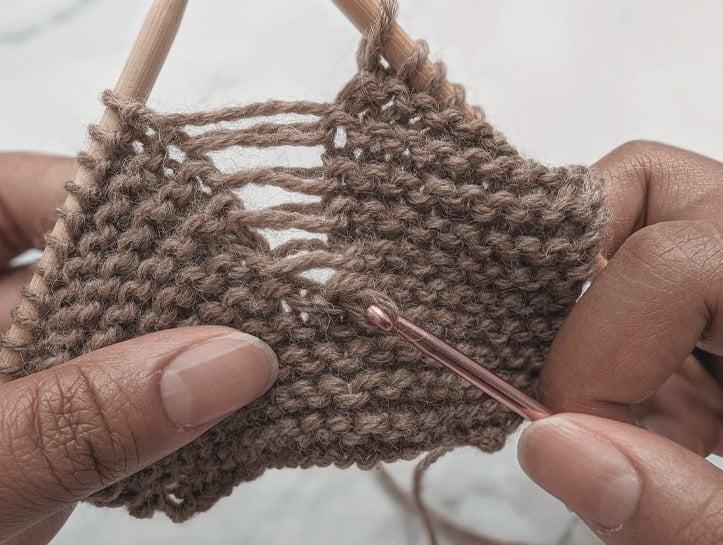
Step #4:
Pull the strand through.
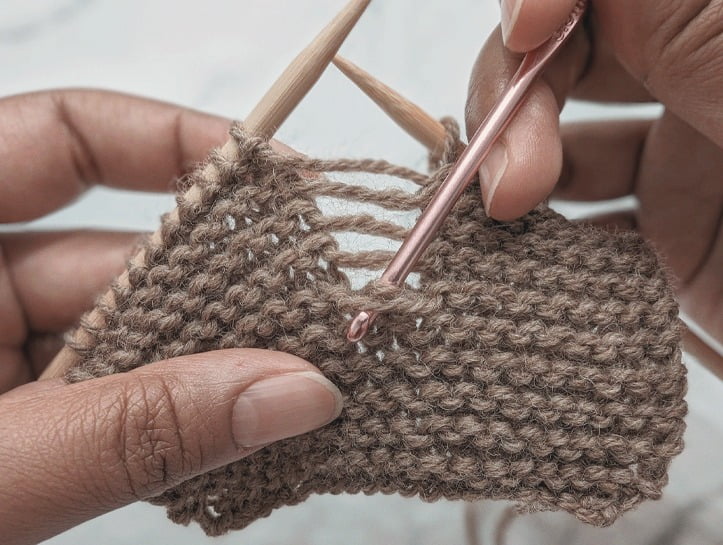
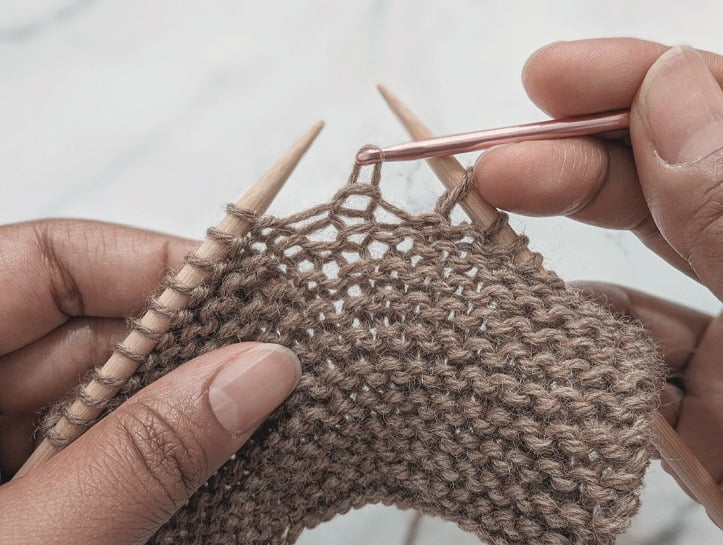
Step #5:
Repeat steps 3 & 4 until you’ve ‘laddered up’ the entire column of stitches.
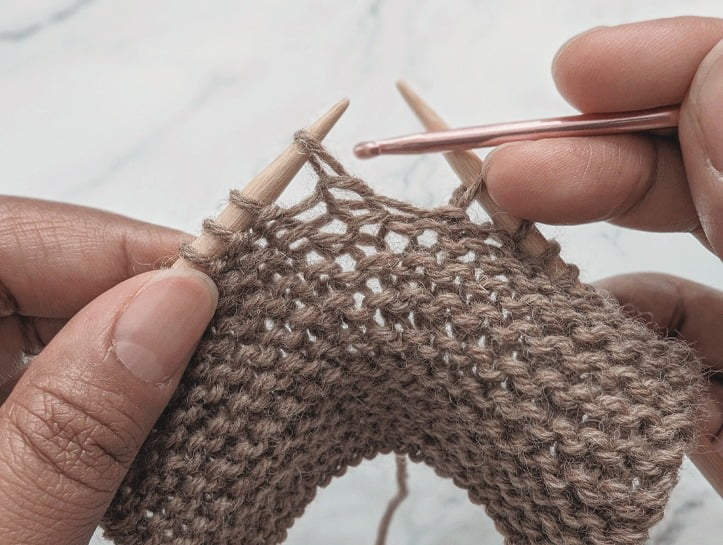
Step #6:
Place your newly rescued knit stitch back onto your left hand needle, taking care to ensure proper stitch mount.
rescuing a dropped purl stitch
Ok guys, I have to admit this one’s a bit fiddly. The easiest way to fix a dropped purl stitch is to simply flip your fabric to its wrong side and fix it as though it was a knit stitch (following the steps above). I mean, a purl stitch is really just a knit stitch worked backwards, no? This is what I do 99.99% of the time.
But if you’re really wanting to know how to fix a dropped purl stitch from the right side, simply follow the steps below:
Step #1:
Locate the dropped purl stitch.
Step #2:
Insert your crochet hook into the dropped stitch from back to front, taking care to ensure it’s not twisted. Take note of the loose strand that naturally falls across the front of the dropped stitch.
Step #3:
Pick up that loose strand, and pull it through the dropped stitch.
Step #4a:
To prepare to work the next horizontal strand, push your crochet hook down through the stitch you just pulled through, until you’ve reached the opposite end.
Step #4b:
Bring your crochet hook behind the horizontal strand located directly above the dropped stitch, and lift it all the way up.
Step #5:
Repeat steps 2-4 until you’ve ‘laddered up’ the entire column of stitches.
Step #6:
Place your newly rescued purl stitch back onto your left hand needle, taking care to ensure proper stitch mount.
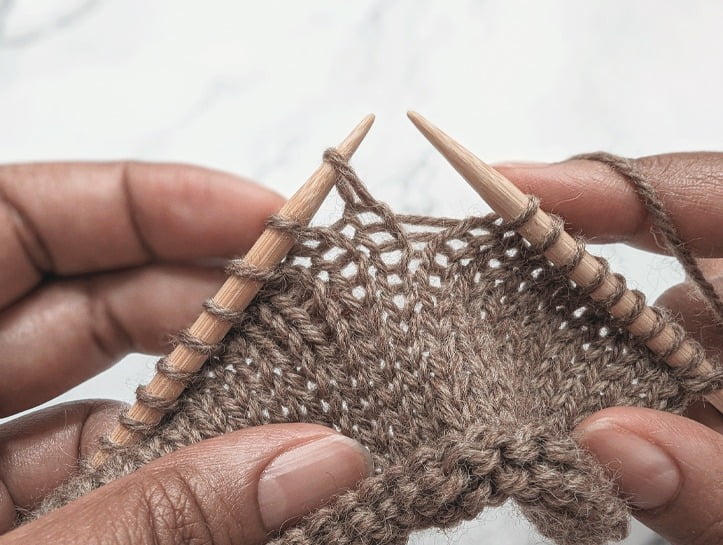
rescuing stitch combinations
So what happens when you need to pick up a dropped stitch in a stitch pattern that alternates between knit and purl rows? Great question! It’s a little more tedious – yes – but essentially you’ll be carrying out pretty much the exact same steps as outlined above.
But first, you’ll need to have a good understanding of what’s actually going on in your fabric. For instance, if you’re working with garter stitch fabric, it’s helpful to be able to recognize which of your rows are knit rows and which of your rows are purl rows.
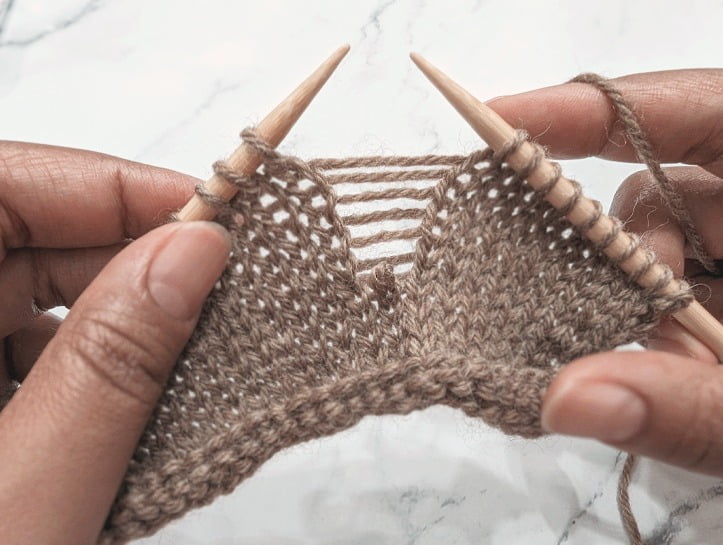
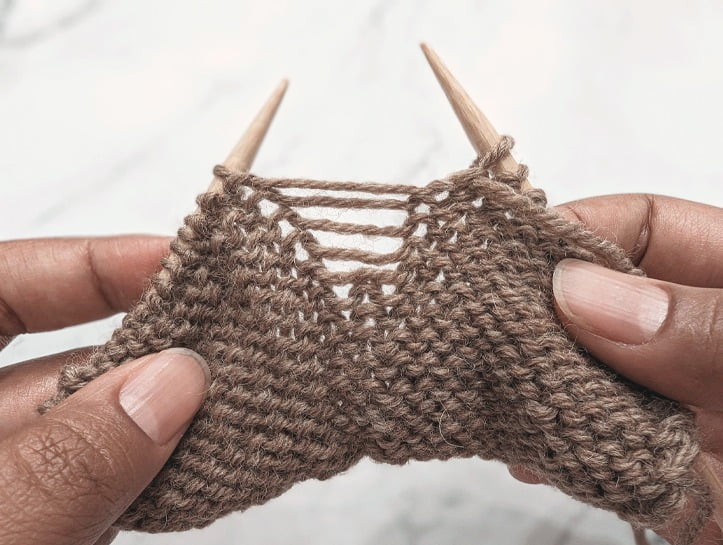
A Knit Strand
A Purl Strand
Besides taking a look at the stitches adjacent to your dropped stitch, an easy way to recognize if your next stitch should be a knit or a purl is by taking a look at the strand directly above. Taking a closer look at the images above, you can see that knit strands appear to be shorter and located at the back, while purl strands appear longer and located at the front. In other words, the longer strand will always belong to a purl stitch, and the shorter to a knit stitch.
If your next row is a knit row, you’ll ladder up that stitch as a knit stitch. If your next row is a purl row, you’ll ladder up that stitch as a purl stitch. Pretty straightforward, no?
You can apply the following techniques to any fabric that alternates between knit and purl rows in a single column of stitches – whether you’re working with garter stitch, seed stitch, Andalusian, broken rib – the list goes on and on. The important thing to take note of here is you really just need to recognize which stitch comes next when you’re working up the ladder.
Let’s take a look at how to pick up a dropped stitch in garter fabric.
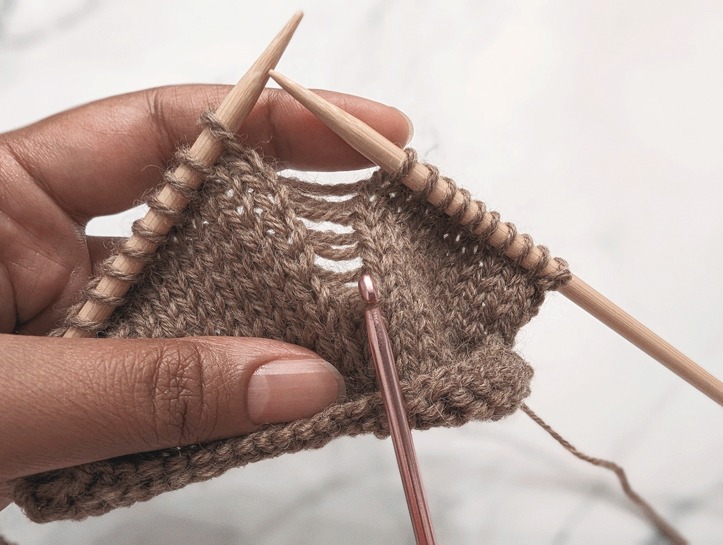
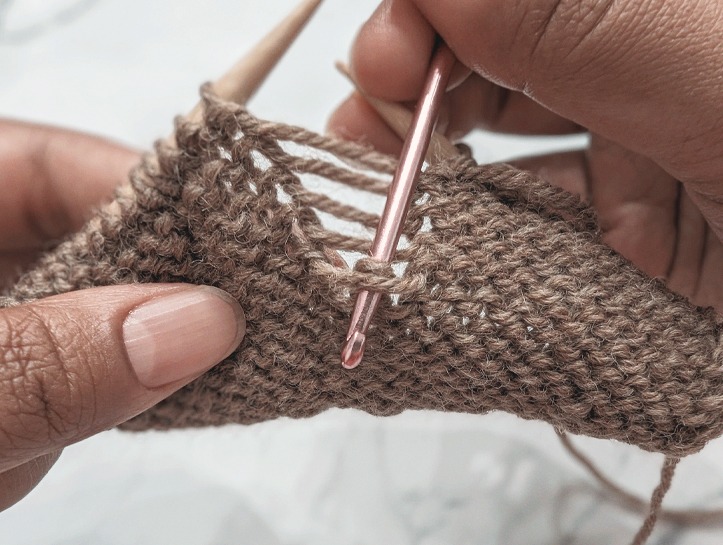
Step #1:
If the next strand is a knit strand, insert your crochet hook into the dropped stitch from front to back and pick up the knit strand.
Step #2:
Pull that strand through the dropped stitch.
Step #3:
If the next strand is a purl strand, remove your crochet hook and hold the dropped stitch in place as you prepare to pick up the next strand.
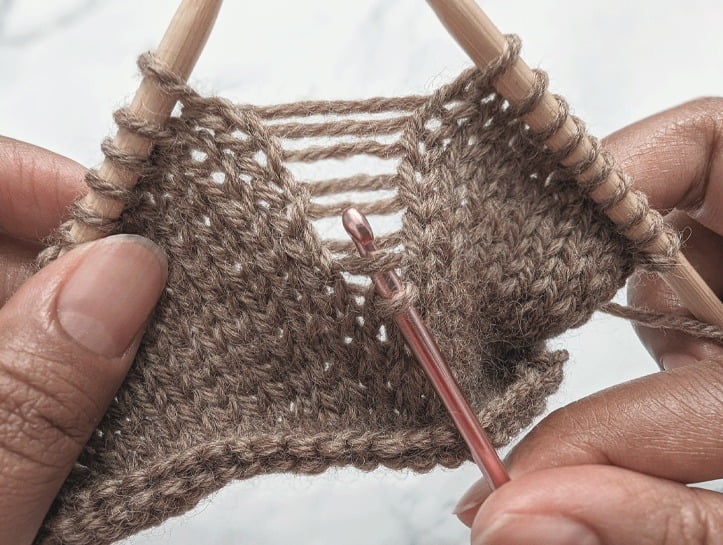
Step #4:
Insert your crochet hook into the dropped stitch from back to front, and pick up the purl strand.
Step #5:
Pull that strand through the dropped stitch.
Step #6:
If the next strand is a knit strand, remove your crochet hook and hold the dropped stitch in place as you prepare to pick up the next strand.
Step #7:
Repeat steps 1-6 until you’ve ‘laddered up’ the entire column of stitches.
Step #8:
Place your newly rescued stitch back onto your left hand needle, taking care to ensure proper stitch mount.
some final words...
So now that you’ve learned how to pick up a dropped knit and/or purl stitch, I hope you’re feeling much more free to allow yourself to make mistakes in your knitting – especially if you’re a beginner. Proceed in confidence knowing you’ve now got the tools to fix them! (At least insofar as knit/purl fabrics go).
Now, if you’ve been at this game for a while, however, you’ll know that dropped stitches don’t just stop with your regular ol’ knits and purls. Things get a bit more complicated when you start to throw things like yarn overs or k1b’s into the mix.
Have you dropped a stitch in the midst of knitting up a more elaborate stitch pattern, and just can’t for the life of you figure out how to fix it? Let me know in the comments below and I’ll do my best to point you in the right direction!