
Affiliate Disclaimer: This post may contain affiliate links. This means that I may earn a commission if you make a purchase through these links. I only recommend products and services that I personally use and believe will add value to my readers. Your support helps keep this blog running and is greatly appreciated. Thank you!
Increasing is a shaping technique generally used to add stitches to a knitted fabric in order to make it wider. Just as it is with cast-ons and bind-offs, there are options abound when it comes to increases in knitting. Some increases are decorative, while others nearly invisible. Some lean to the left, some lean to the right. In any case, the one(s) you choose in any knitting scenario will primarily depend on the goals you’ve set out for your project.
In this article, we’ll go over the most common increases you’ll come across in the knitting world as well as a few of the many ways you can go about applying them to your projects. So without further ado – let’s get to it!
Yarnover (YO) increases are by far the easiest of the bunch to perform. It’s so easy, that it’s actually quite common to create them accidentally – especially as a beginner. If you’ve ever forgotten to bring your working yarn to the back of your work when creating a knit stitch, you’ve probably unintentionally created a yarnover without even realizing it!
There are two ways you can go about working up a yarnover increase – either open or closed. Open yarnover increases are just as they sound – open. That is, they leave a very visible hole in your work. This makes them perfect for decorative use – especially within lace stitch patterns.
When working a yarnover before a knit stitch, you’ll simply bring the yarn forward to the front of your work and knit the next stitch with the yarn in front. When working a yarnover before a purl stitch, you’ll need to wrap your working yarn around your needle from front to back to front.
Let’s take a closer look at how each of these types of yarnovers are done:
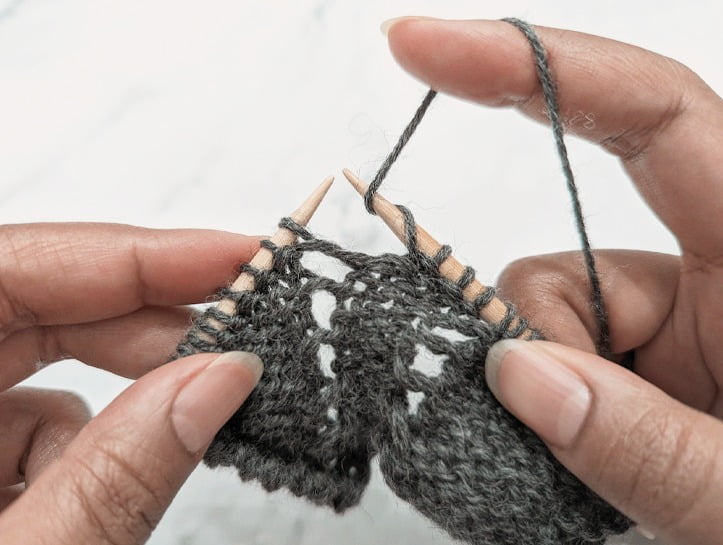
Step #1:
Wrap your working yarn around your right hand needle from front to back to front.
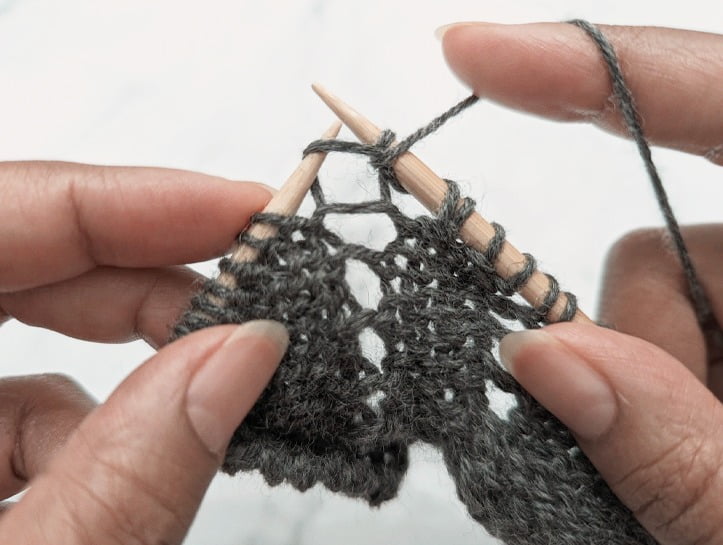
Step #2:
Purl the next st.
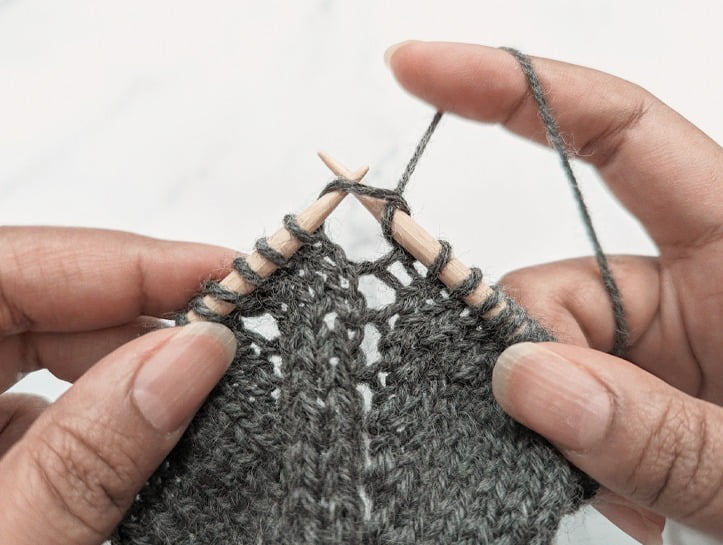
Step #3:
On the next row, knit the yarnover as normal (through the front leg).
Unlike Open Yarnover Increases, Closed Yarnover increases do not leave large holes in your work. Although still one of the simplest increases in the knitting world, they are worked slightly differently from their open counterparts. When worked either before a knit stitch or before a purl stitch, you have two options for each. Depending on the version you’re using, one extra step is required to close them up on the following row (more on that below). The result is a nearly invisible increase that you can apply to your knitting virtually anywhere you please.
One thing that I particularly love about closed yarnover increases is that they don’t require the use of an existing strand from your already worked stitches – as you’ll see in nearly all other types of knitting increases. What this means is that because you’re creating a new stitch from your working yarn rather than from an existing strand (thus potentially pulling the surrounding stitches tightly together), yarnover increases won’t cause the stitches around it to appear smaller than the rest.
And yet another wonderful thing about these guys is that you can use them to work multiple increases at the same time. I’ll often use them in this way in order to shape a top-down sweater neckline, for example.
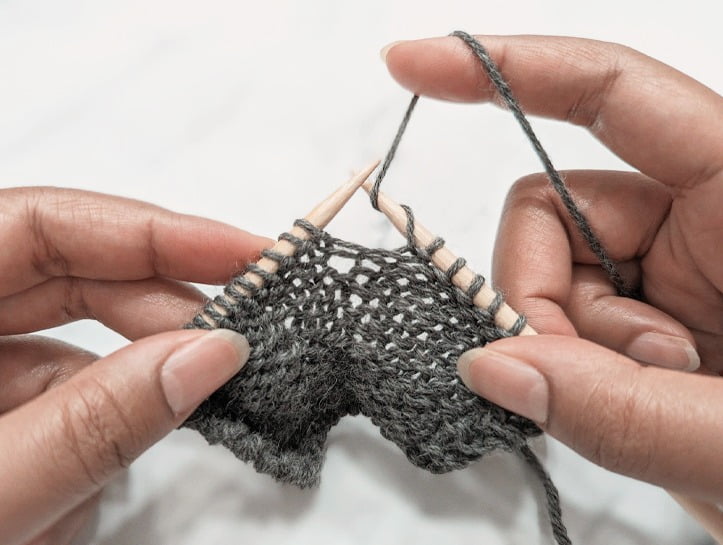
Step #1:
Wrap your working yarn around your right hand needle from front to back to front.
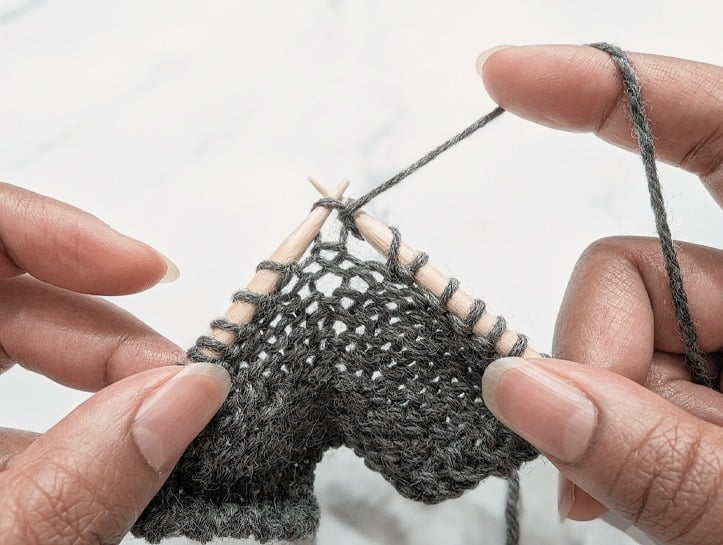
Step #2:
Purl the next st.
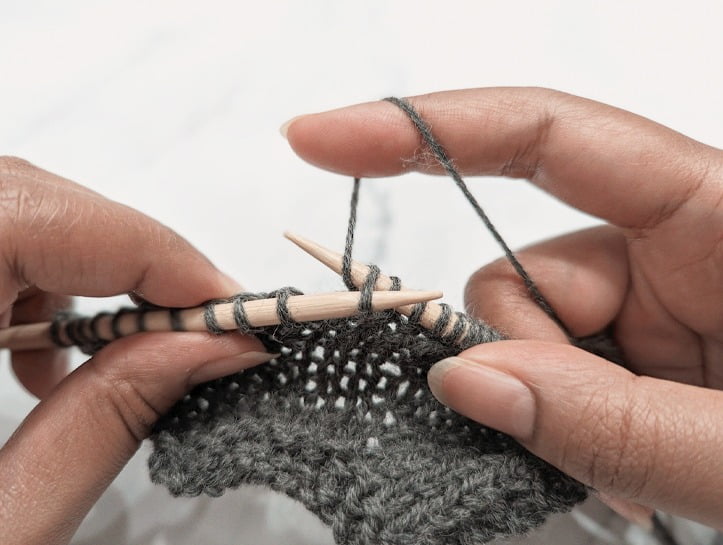
Step #3:
On the next row, work the yarnover through the back loop.
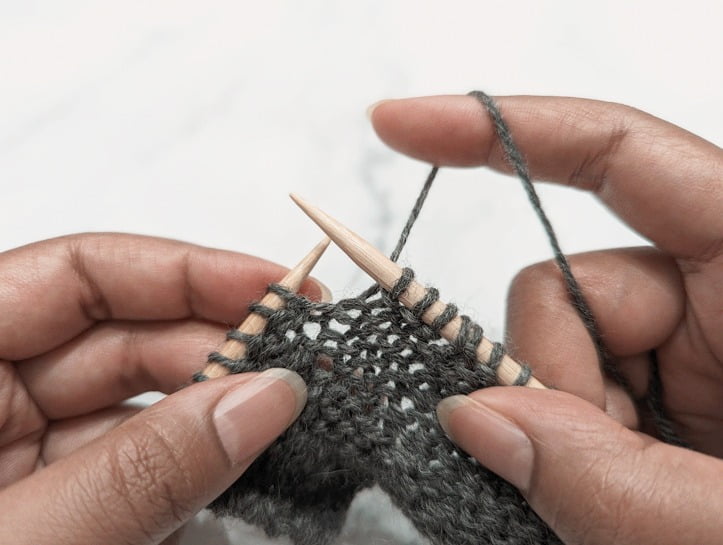
Step #1:
Bring your working yarn between your needles, to the back of your work.
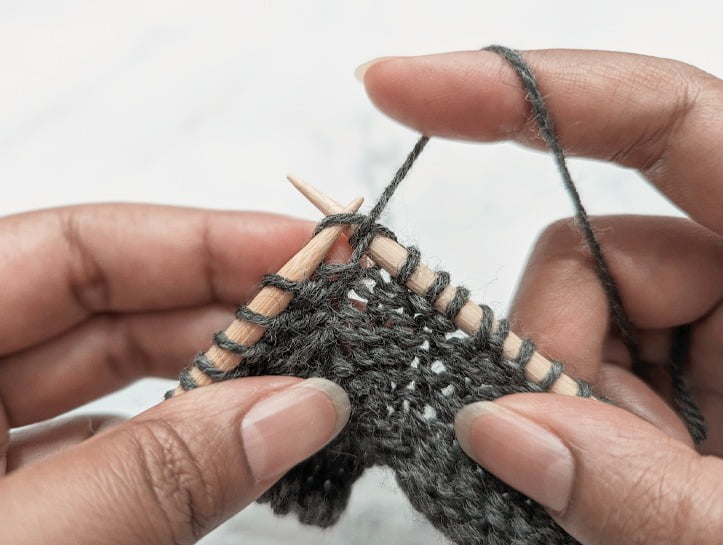
Step #2:
Purl the next st.
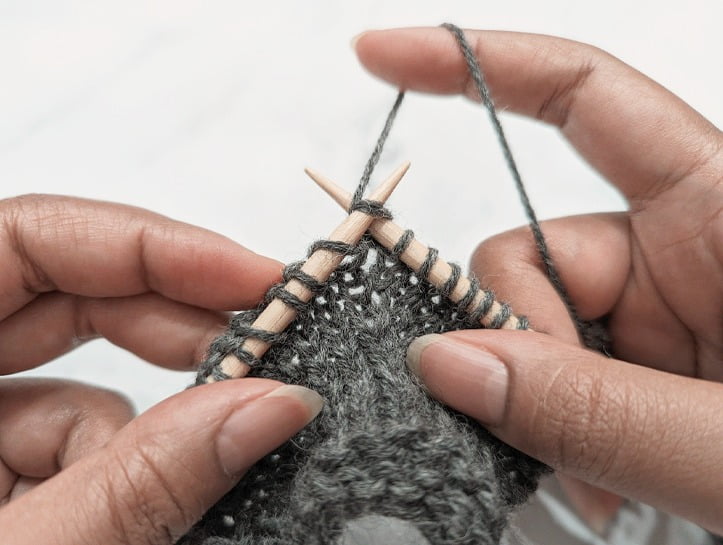
Step #3:
On the next row, work the yarnover as normal (through the front loop).
Knit front and back (KFB) is a neutral increase. That is, it neither leans to the left, nor to the right. Instead, you’ll notice a small horizontal bar at its base, just to the left of the stitch it’s created from.
KFB’s create a new stitch from a stitch that’s already on your needle. To work this increase, you’ll simply work into the front leg of a single stitch, then into the back leg of that same stitch before dropping it off your needle. To put it quite simply, virtually all you’re doing while working a KFB is creating a new stitch from each leg of the parent stitch.
As you can imagine, there are so many different ways you can go about working an increase into a single stitch in virtually the same manner. I’ve seen so many different variations of this method (knitting into the back leg first, then into the front; knitting and purling into the same stitch; etc.), each offering slightly different results.
When using this increase as a design element, one important thing to consider is the fact that the resulting stitch will always appear on the left side of the stitch it’s created from (as mentioned above). So for example, if you’re planning on working this increase on both the left and right sides of your fabric, the increase on the left should be worked one stitch earlier than the one on the right.
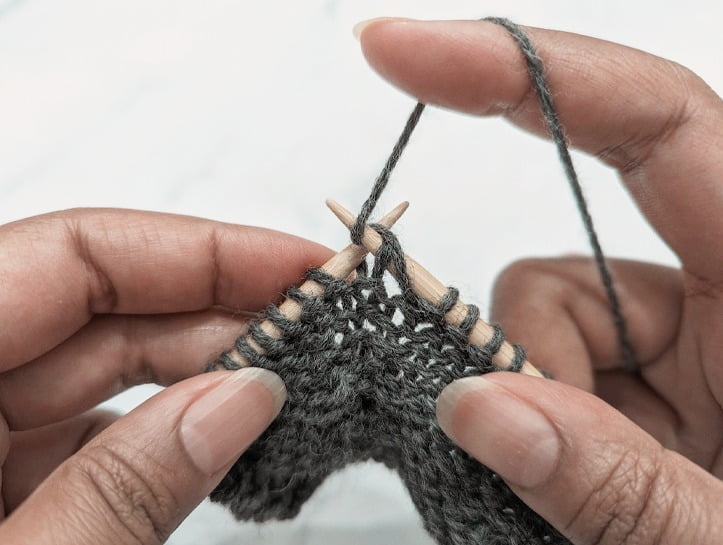
Step #1:
Purl into the front leg of the next stitch, leaving the parent stitch on your left hand needle.
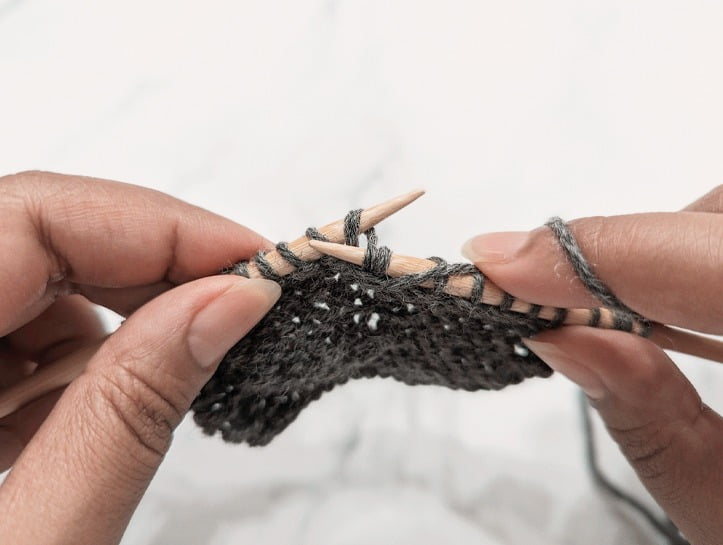
Step #2:
Purl into the back leg of the same stitch and slide it off your left hand needle.
Make one increases are just one in a category called ‘mirrored’, or ‘leaning’ increases. Unlike knit front and back, make one increases are created from a strand located between two existing stitches rather than from the stitch itself. Depending on the direction in which you lift that strand up and onto your left hand needle, you’ll get an increase that leans either to the left, or to the right.
It’s this leaning nature of make one increases that makes them a popular choice for shaping knitwear. Because they slant either to the left or to the right, you can use this slant to work in the direction of your shaping for a cleaner, more subtle finish.
Make one increases can be worked both knit-wise (M1L/M1R) and purl-wise (M1L-P, M1R-P), right side and wrong side. Although they are not as invisible as lifted increases (see below), both right and left versions mirror each other pretty well perfectly when placed on either side of one another.
I love make one’s for precisely that reason. Of all the increases I’ve tried, they always seem to look the most symmetrical when worked together.
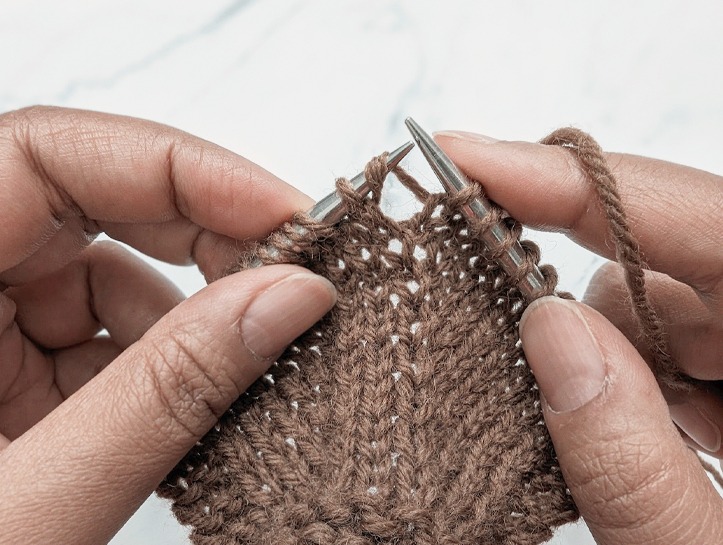
Step #1:
With the tip of your left hand needle, lift the strand between your two needles from back to front.
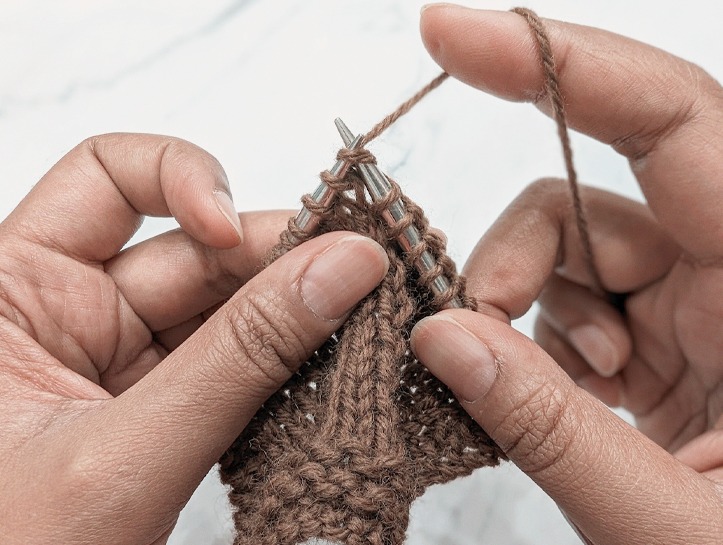
Step #2:
Knit into the front leg of that strand and slide it off your left hand needle.
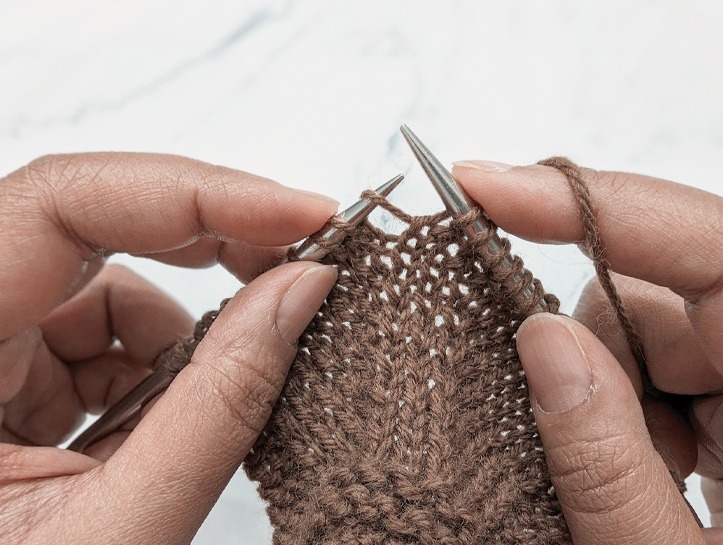
Step #1:
With the tip of your left hand needle, lift the strand between your two needles, from front to back.
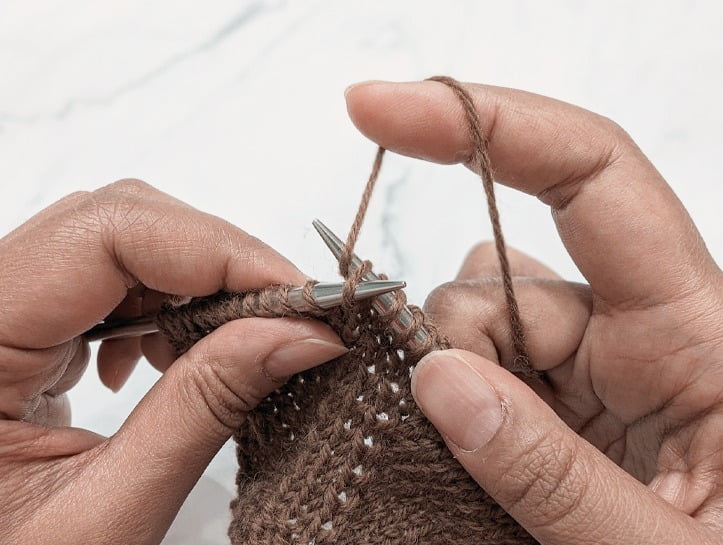
Step #2:
Knit into the back leg of that strand.
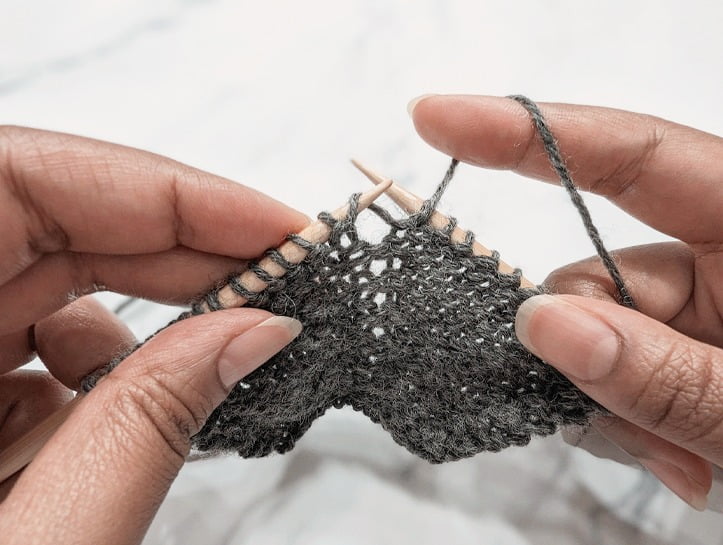
Step #1:
With the tip of your left hand needle, lift the strand between your two needles from back to front.
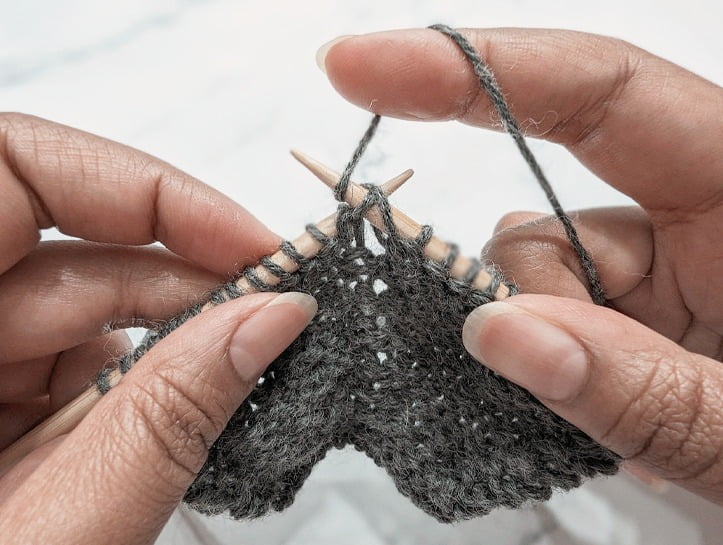
Step #2:
Purl into the front leg of that strand and slide it off your left hand needle.
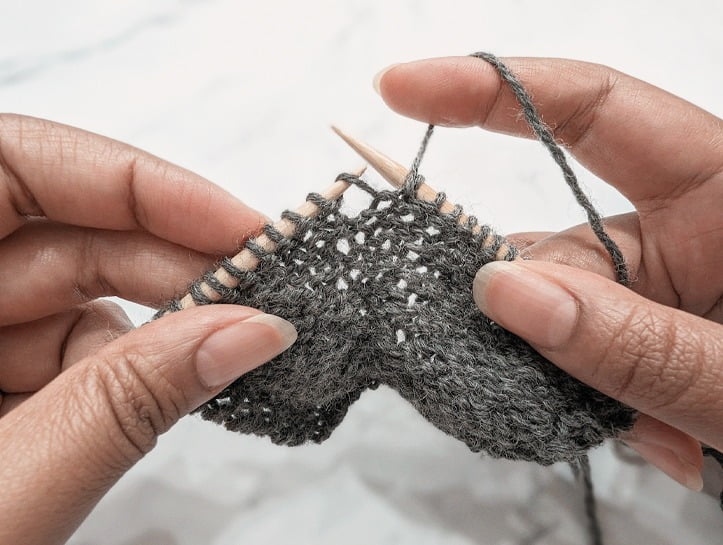
Step #1:
With the tip of your left hand needle, lift the strand between your two needles, from front to back.
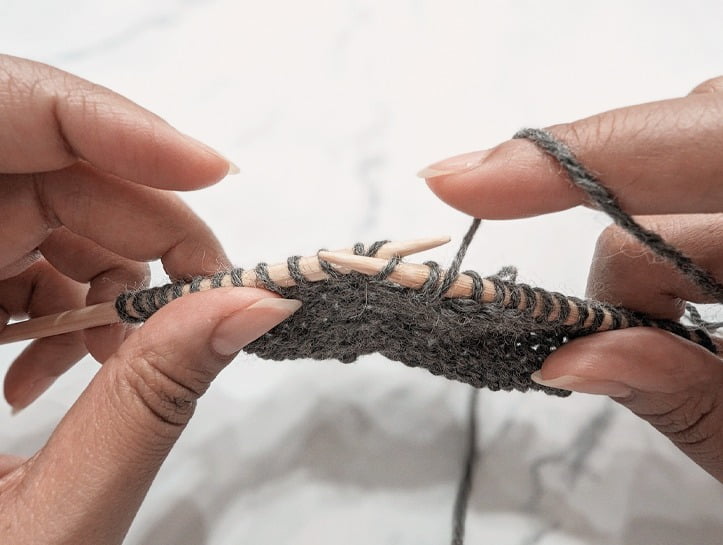
Step #2:
Purl into the back leg of that strand.
Lifted increases are easily the most invisible increases I’ve come across thus far, likely because they don’t leave any visible bump or hole in your work.
Just like make one increases, lifted increases are worked by lifting a strand of yarn onto your left hand needle. But, instead of lifting the strand in between two existing stitches, you’ll be lifting up the stitch located below the stitch you’re increasing from.
Lifted increases can look and sound a little more complicated than it actually is. Although they are probably one of the more challenging increases to execute – I promise you – they’re still quite easy to get a handle on once you’ve put in some practice!
Also similar to make one’s, lifted increases lean either to the left or to the right and can be worked in pairs, one mirroring the other.
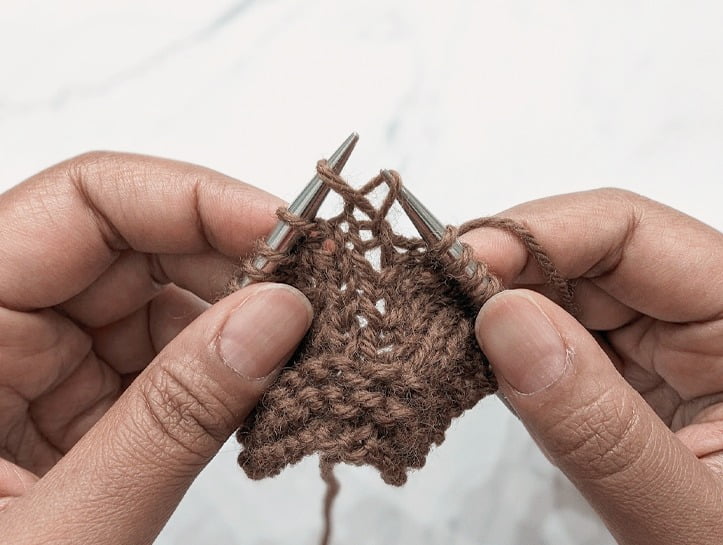
Step #1:
With the tip of your right hand needle, lift the stitch underneath the next stitch on your left hand needle, from back to front.
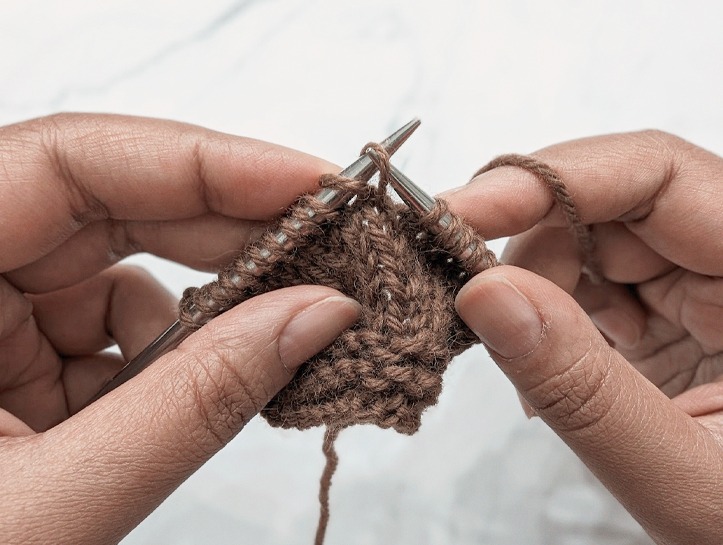
Step #2:
Lift that stitch onto your left hand needle without twisting it.
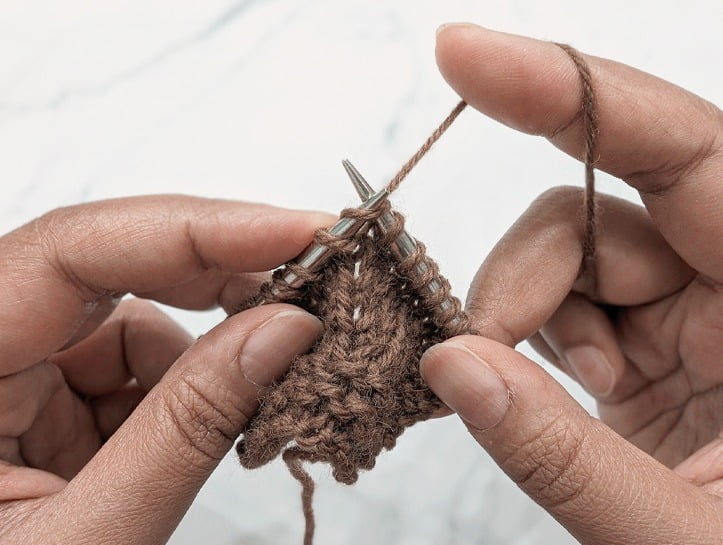
Step #3:
Knit into that lifted stitch.
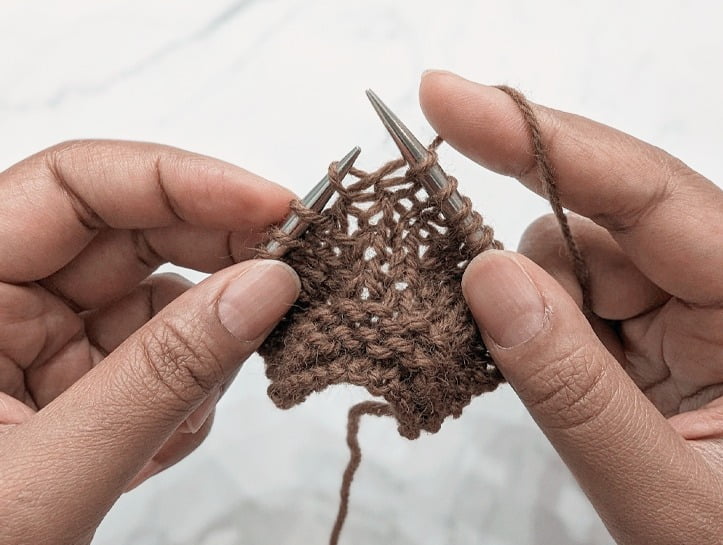
Step #1:
With the tip of your left hand needle, lift the stitch two stitches below the last stitch on your right hand needle, from back to front.
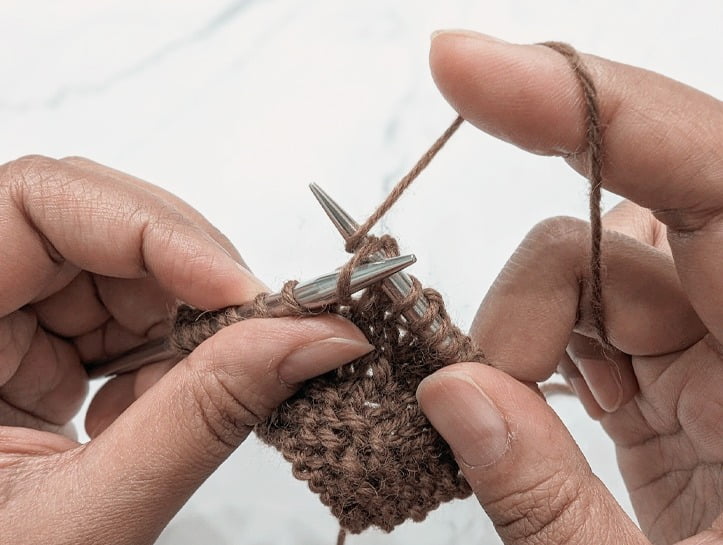
Step #2:
Knit into the back leg of that lifted stitch.
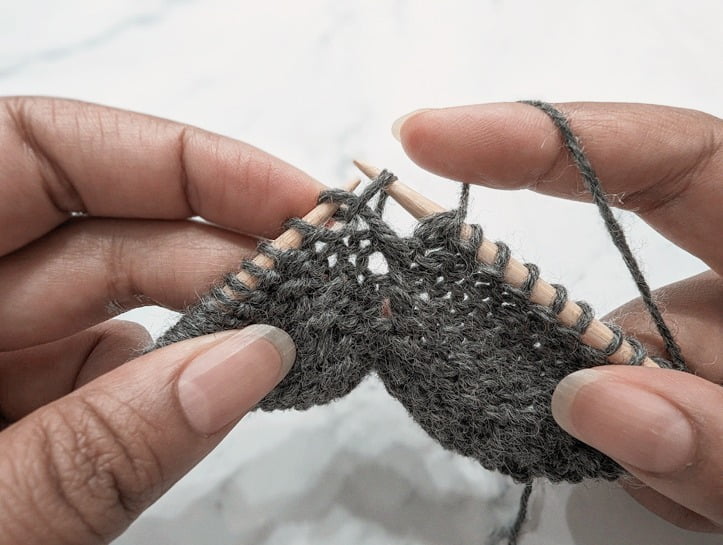
Step #1:
With the tip of your right hand needle, lift the stitch underneath the next stitch on your left hand needle, from front to back.
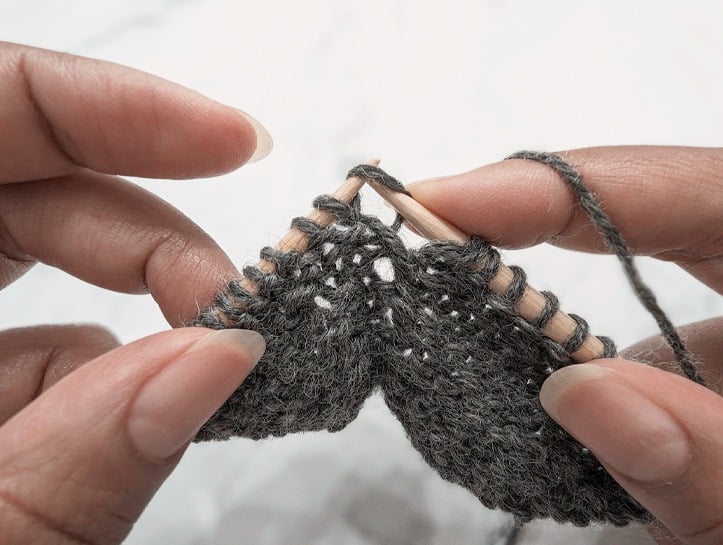
Step #2:
Insert the tip of your left hand needle into the stitch from front to back. Let the stitch rest on your left hand needle.
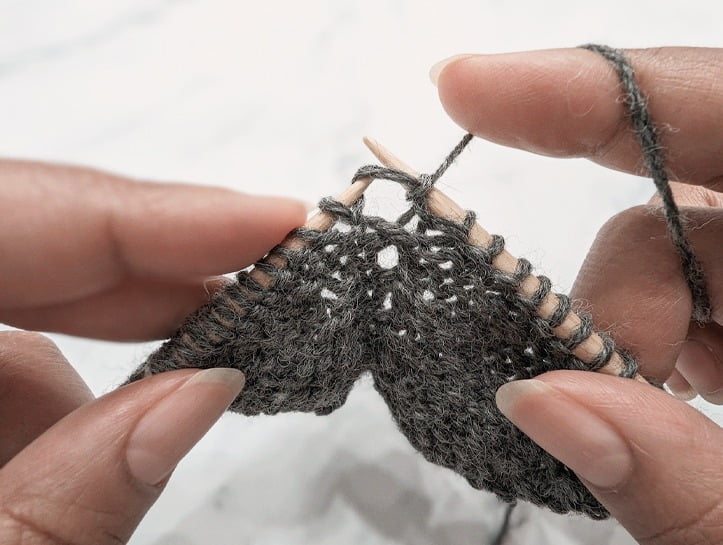
Step #3:
Purl into the front leg of that lifted stitch.
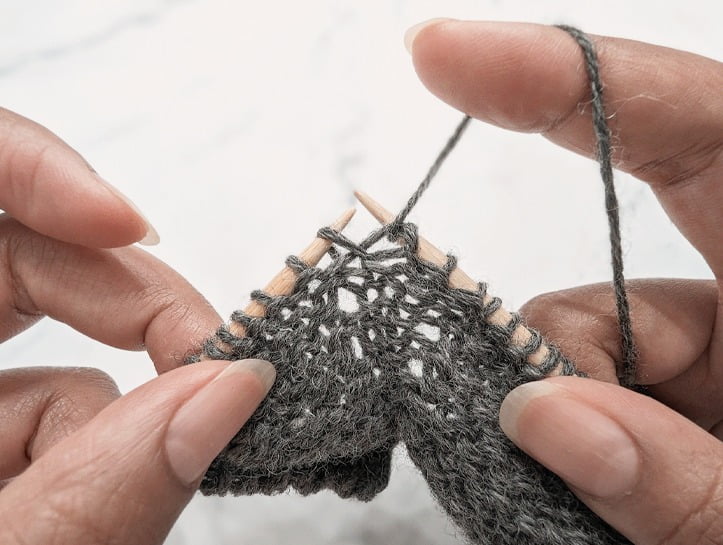
Step #1:
With the tip of your left hand needle, lift the stitch two stitches below the last stitch on your right hand needle, from back to front.
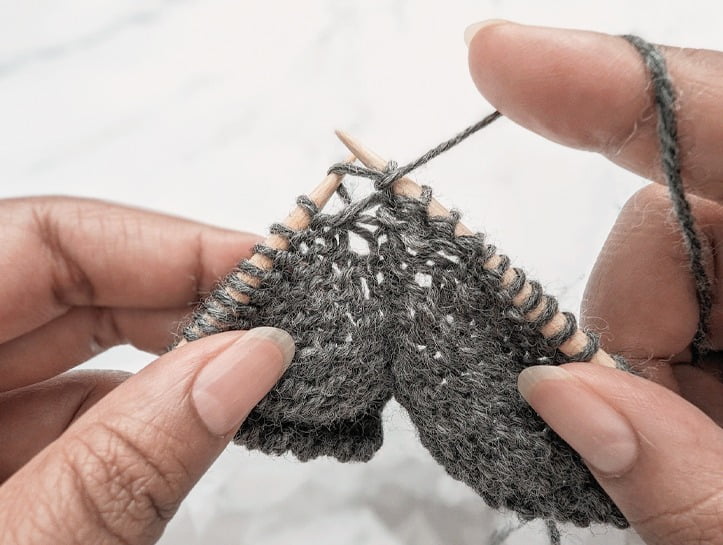
Step #2:
Purl into the front leg of that lifted stitch.
Okay, now that we’ve gone over some of the most common and popular ways you can increase your stitch count by one single stitch, let’s address the baby elephant in the room – what do you do if you need to increase your stitch count by multiple stitches at once?
Well, thankfully, there are several ways to do this, and as with pretty much all things knitting – some methods are used far more decoratively than others.
For one, you can work into the same stitch virtually as many times as you’d like – through the front leg, the back leg, alternating between front and back legs, alternating between knit and purl stitches through the front and/or back legs, etc., etc. As you can probably tell, you can really go wild here trying out all the many different ways you can create multiple stitches from a single stitch!
Really, you can keep knitting and purling into the same stitch to your heart’s content. The only thing to keep in mind here, is that the more you work into the same stitch, the bigger the originating hole becomes.
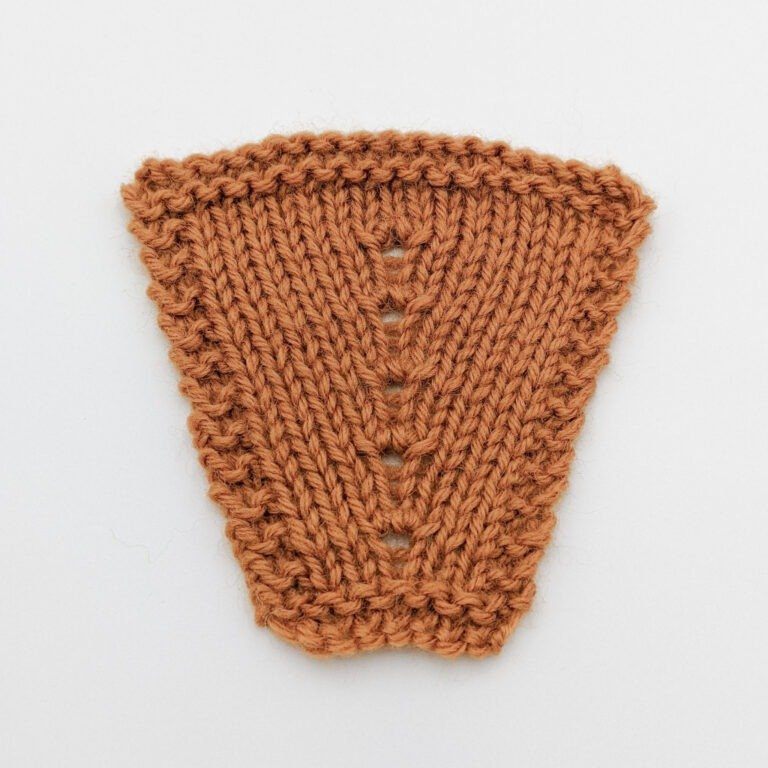
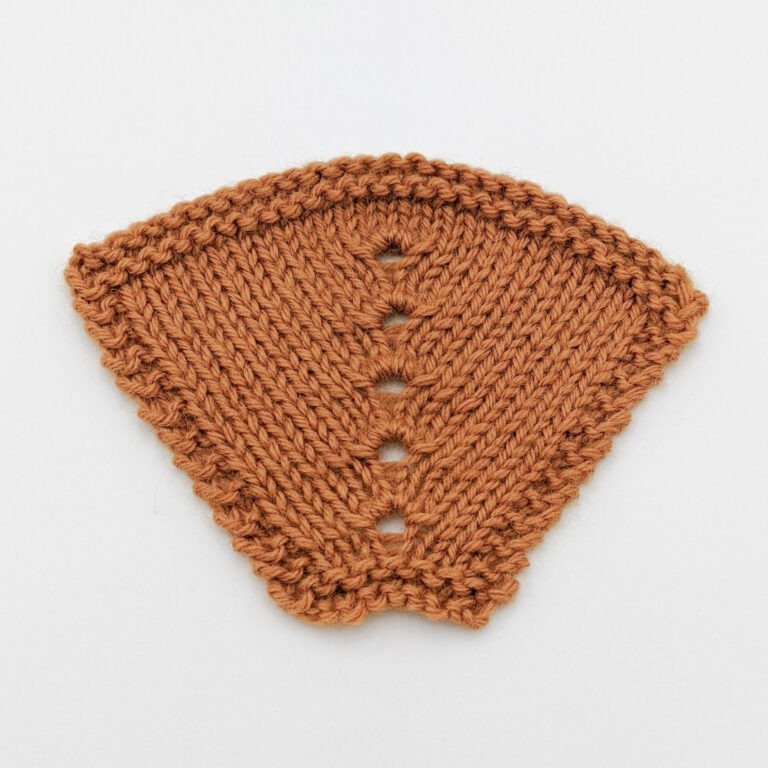
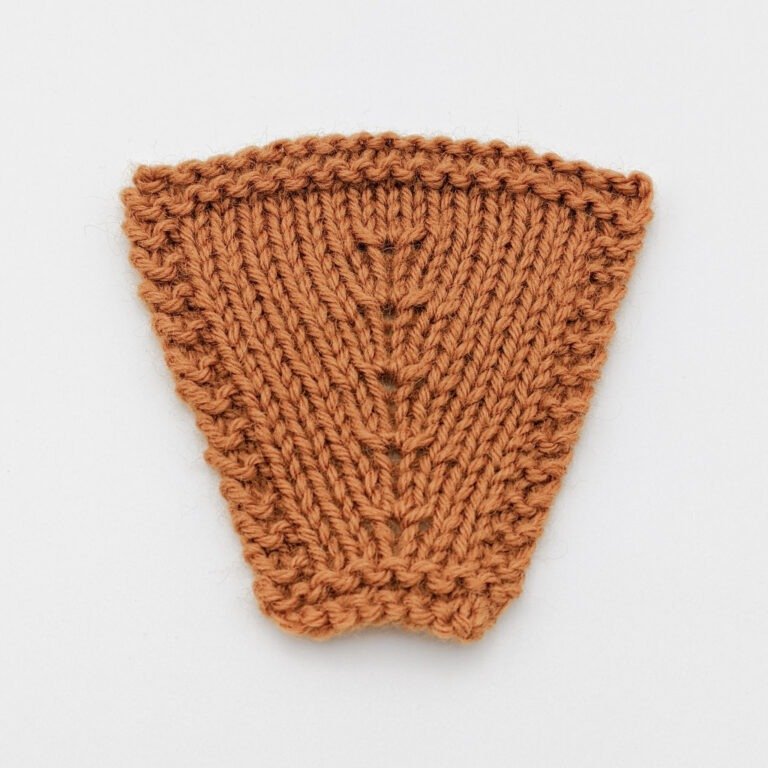
These increases are worked the same way as the ones above, but instead of working purl stitches you’ll be working yarn overs. Often, you’ll see this one being used in brioche knitting, in order to maintain the rib stitch pattern. As you can see, the result is very similar – the difference being that it’s just a touch less pronounced.
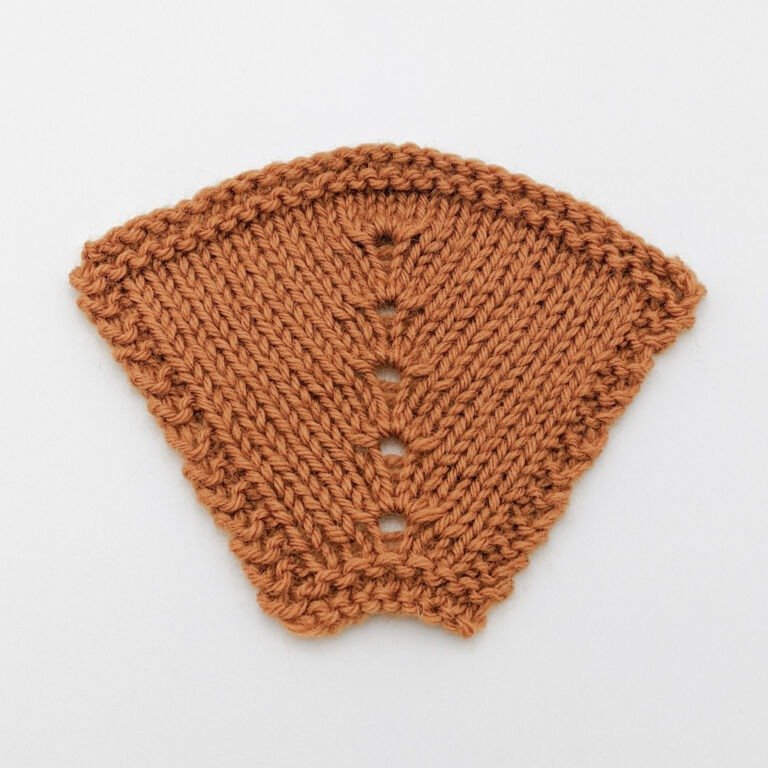
Another, probably much more utilitarian way to increase multiple stitches at once, is by simply casting on literally as many as you need, wherever you may need it. Again, there are several ways to do this. Though you can’t use just any ‘ol cast-on method here, you do have a few options, each offering slightly different characteristics. The following are some of the most popular cast-on methods you can use to add multiple stitches to your work. Check out the article I wrote about casting on if you want to learn exactly how to work these cast-on methods.
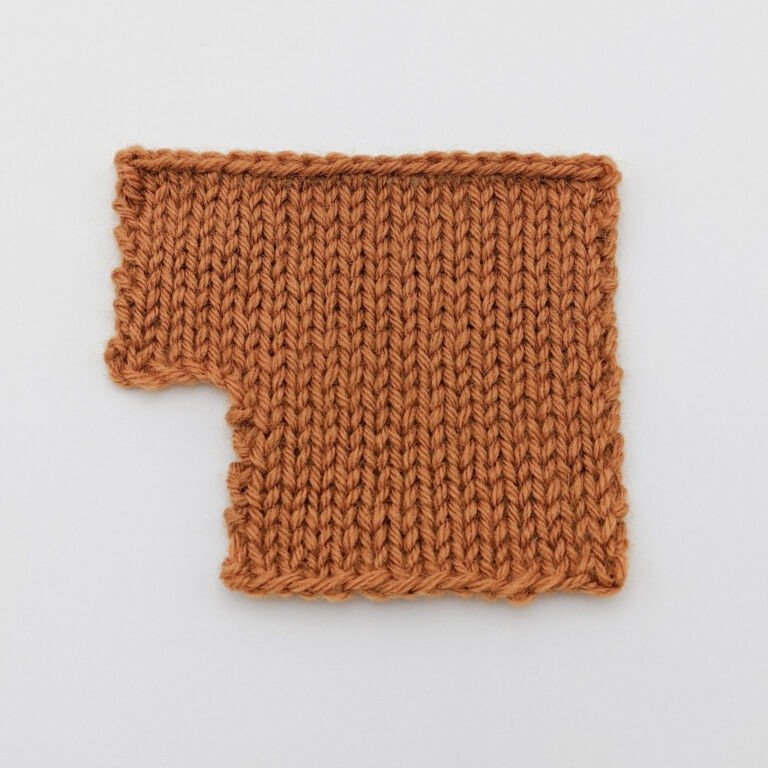
Although the backward loop cast on doesn’t produce the most attractive of edges, you can use it for when you need to pick up its stitches at a later time. Because the edge it produces is quite elastic, it can be a good option for any stitch pattern that requires a fair amount of stretch.
I often use this cast-on whenever I’m working up the front neckline or underarm of a top-down sweater.
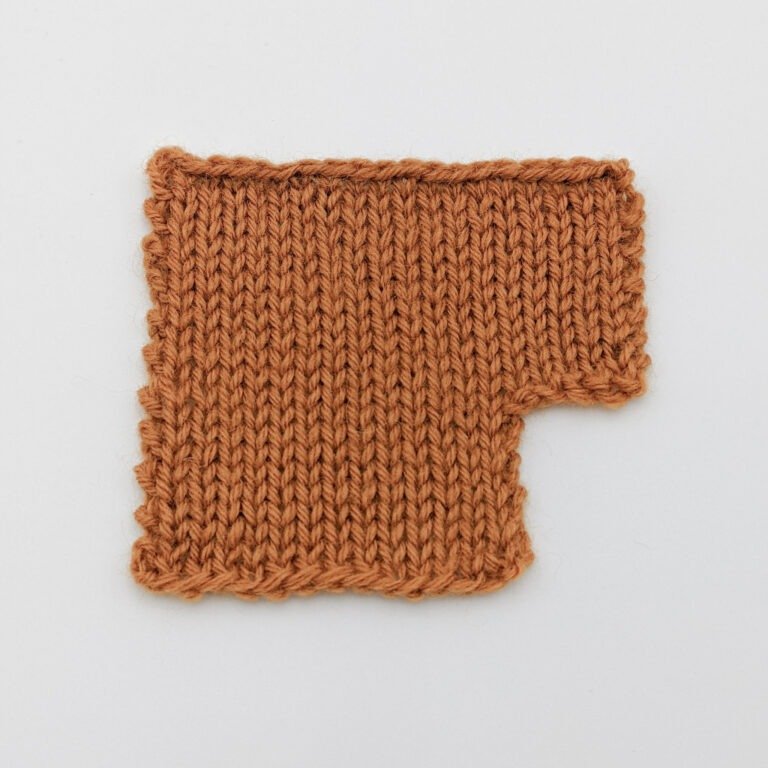
The knitted cast on is another option for increasing multiple stitches in the middle of your work. Although the edge it produces can be quite unstable and stretch over time, it can be a good option for the beginner knitter as essentially all you’re doing is creating knit stitches and placing them back on your left hand needle.
To be honest, I rarely ever use this one. I find the simplicity of the backward loop cast-on and the stability of the cable cast-on much more appealing, but of course, that’s just me! I still recommend giving this one a go, you might end up liking it!
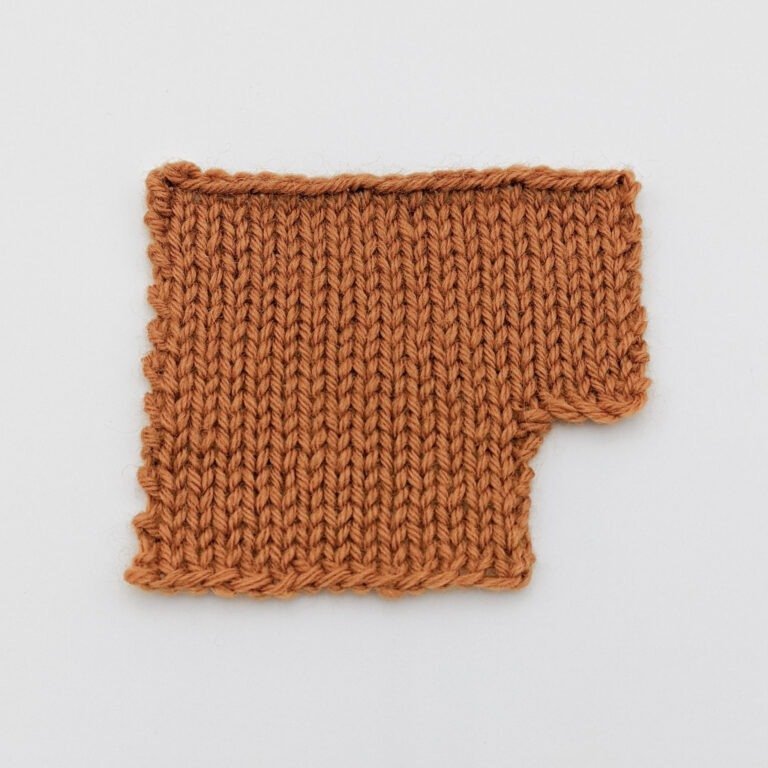
The cable cast-on is my favourite method of casting on particularly for buttonholes. The edge it produces is not only attractive, but virtually resilient to wear and tear.
Of the three middle-of-work cast-on’s that I’ve listed here, the cable cast-on is undoubtedly the most stable. So if you’re looking for something that won’t stretch out over time – this one’s probably your best bet.
And there you have it! A somewhat exhaustive guide on some of the most common ways in which you can increase your stitches in knitting. I hope you’ve found this post helpful! If you have any questions, please do leave them in the comments section below – I’m always happy to help!
If you’re looking for a detailed guide on how to decrease stitches in knitting, look no further – check out the article I wrote about how to decrease stitches.
Until next time, happy knitting!