Affiliate Disclaimer: This post may contain affiliate links. This means that I may earn a commission if you make a purchase through these links. I only recommend products and services that I personally use and believe will add value to my readers. Your support helps keep this blog running and is greatly appreciated. Thank you!
It always amazes me how one simple, unassuming little stitch can bend, stretch, combine, and extend to create such an endless variation of beautifully woven fabrics. Every single stitch you’ll ever see in the world of knitting stems from this one simple stitch – the knit stitch. Even a purl stitch is really just a knit stitch, only worked from the inside out.
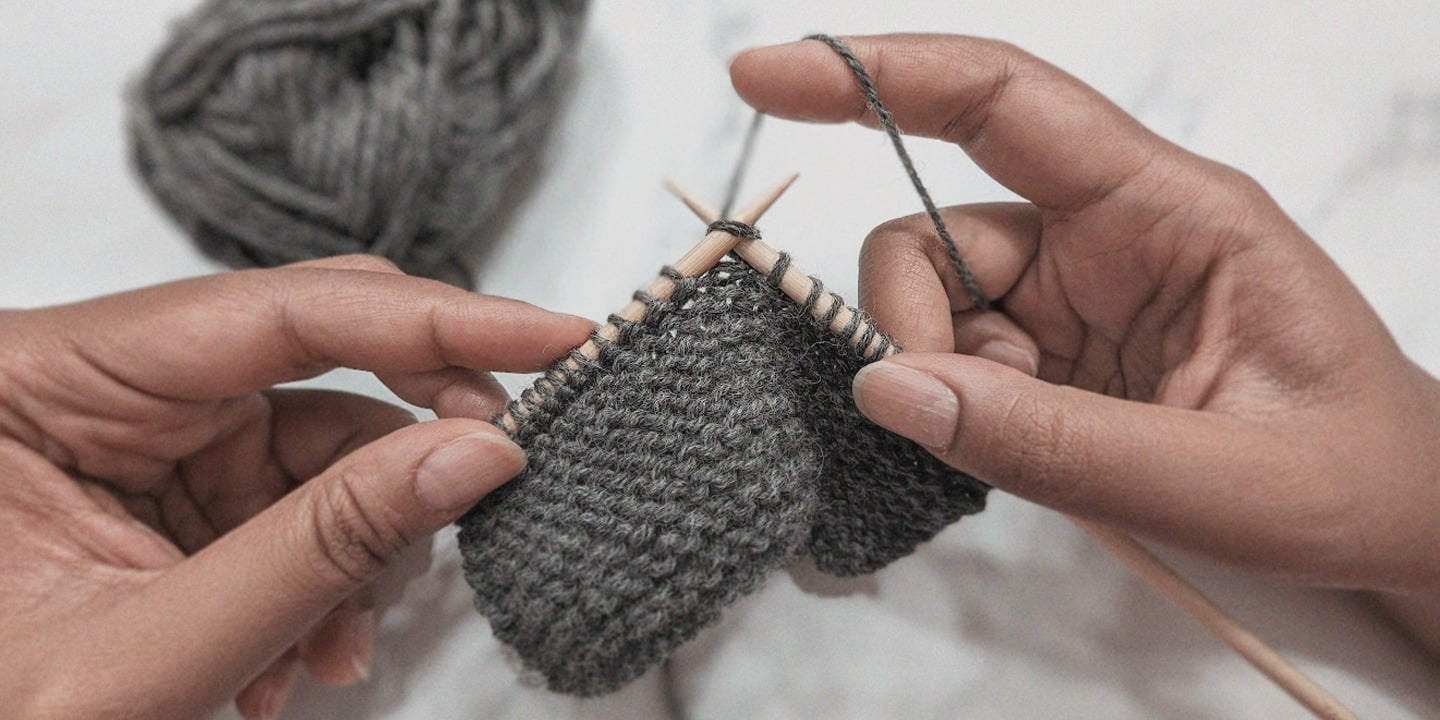
The knit stitch is the very heart of this wonderful craft we call knitting. It is the seed from which all stitch patterns grow. And the best part of it is – it’s not that difficult to make. This is where the fun really starts, guys! Once you’ve wrapped your mind around how to work a knit stitch, you’ll be well on your way to creating an infinite variety of fabrics.
So, enough chit-chat – let’s get started!
english vs. continental knitting
Before we get into exactly how to create a knit stitch, let’s take a look at the two most popular knitting styles – English (AKA ‘Throwing’) and Continental (AKA ‘Picking). Although there are many more unique ways you can go about holding your yarn and needles, these two methods are by far the most widely used.
When you’re just starting out at this knitting game, your main aim is to get comfortable holding your yarn and needles. So, although you may hear some back and forth about why one method may be ‘better’ than the other, for now I would say – just ignore it all. Really, the most important thing when you’re a beginner is that you work with the style that comes most naturally to you.
There’s plenty of time to learn both styles – and there are actually some pretty cool advantages to doing so. But if you’re reading this article, I’m assuming you’re just starting out, so I’d certainly recommend picking the style that will yield the least amount of frustration and the most amount of joy.
english style (aka 'throwing')
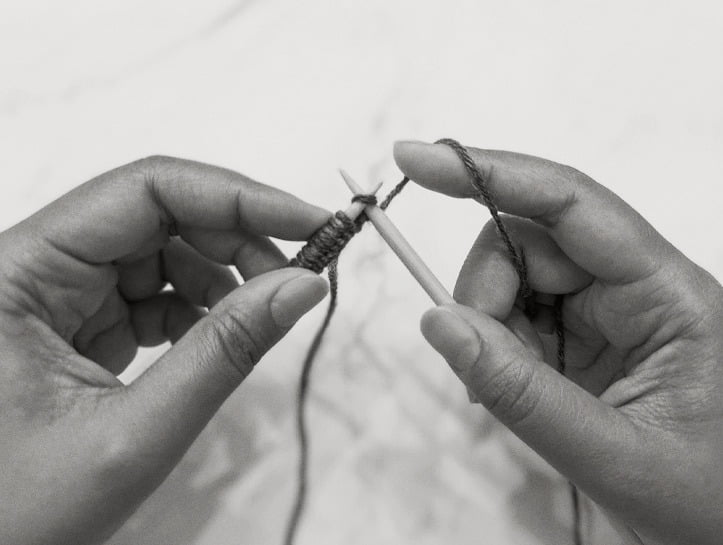
English knitting is basically a style of knitting that has you controlling the tension of your yarn with your righthand. It’s also known as ‘throwing’ because the motion you use to wrap the yarn around your needle (in order to create a stitch) somewhat resembles that of throwing.
Even within this one style of knitting, there are so many different ways a knitter might hold their yarn. For example, some like to wrap the yarn around their pinky or ring finger (or several fingers at once) before finally letting it rest over their index finger in order to help keep a consistent tension.
Below is how I like to hold my working yarn when I knit in this style (which is, by the way, my preferred method). But I feel it’s important to note that the way I hold my yarn may feel completely unnatural and awkward for you. If this ends up being the case, by all means – I really encourage you to experiment with it yourself! Fiddle around with it. Make sure you find a comfortable way to hold the yarn that will provide you with a consistent distribution of tension as you get into the rhythm of knitting.
continental style (aka 'picking')
Unlike English knitting, Continental knitting has you controlling the tension of your yarn with your left hand. This style is also known as ‘picking’ because when you’re creating your stitches, you’re essentially picking at your working yarn in order to create each loop.
Continental knitting tends to be a great choice for crocheters that want to learn how to knit. Since crochet is also typically done by controlling the tension of your yarn with your left hand, many crocheters find Continental knitting much more comfortable for them.
Personally, I find that when I knit Continental, my stitches often turn out much more loose and messy – but, of course, this is likely because I’m just much more well versed at English style knitting.
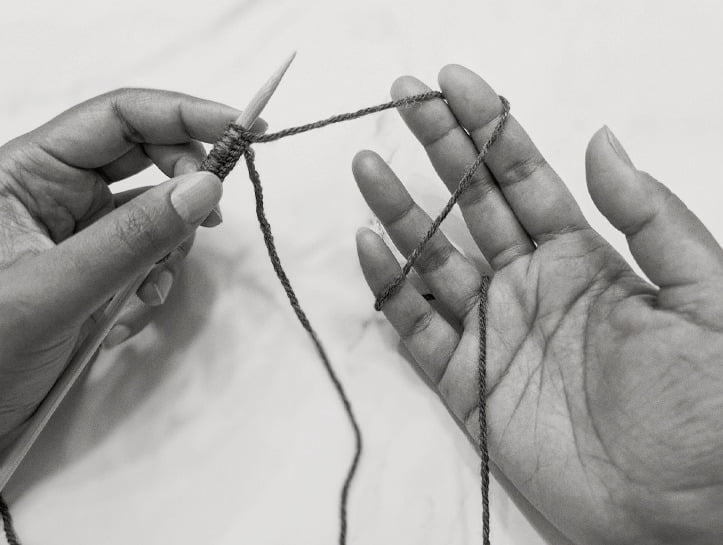
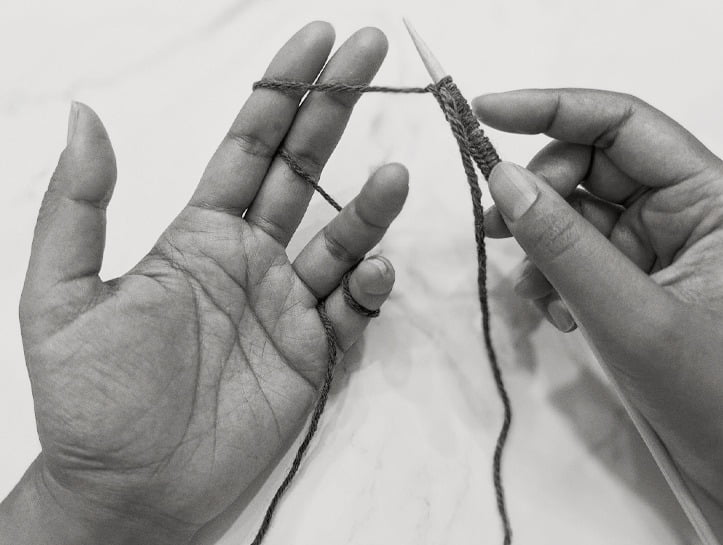
Below is how I like to hold my yarn in my left hand when knitting Continental. Once again, it’s important that you find your own way of doing this! Do whatever feels most comfortable for you.
One last thing I’d like to reiterate here, is that these two knitting styles are simply the most common styles in the knitting world – there are certainly more ways you can hold your yarn and needles. I’ve seen some pretty wild methods out there – people can really get creative with how they prefer to do this! That said, if either of these two styles does not suit you – don’t be discouraged! Just experiment with it. It’s not important that you follow a particular method. The most important thing here is that you find a method of holding your yarn that provides you with the most amount of comfort and an even amount of tension.
how to knit
Okay, now comes the fun part – learning how to knit! (Yay!) Now that we’ve familiarized ourselves with the two most popular ways to hold our yarn, let’s get right into how to create a knit stitch in either style.
You’ll probably notice that the steps for both styles are exactly the same (why wouldn’t they be?). Needless to say, the only real difference between the two is how it all looks and feels while you’re knitting the thing. Both styles will yield the same stitch in the end.
Before you go through the steps below, you’ll need to have casted on a number of stitches. If you haven’t done so yet, check out this article I’ve written on how to cast on stitches.
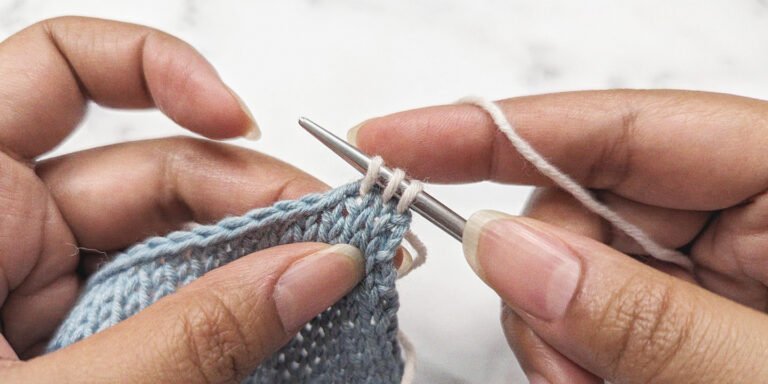
the english knit stitch
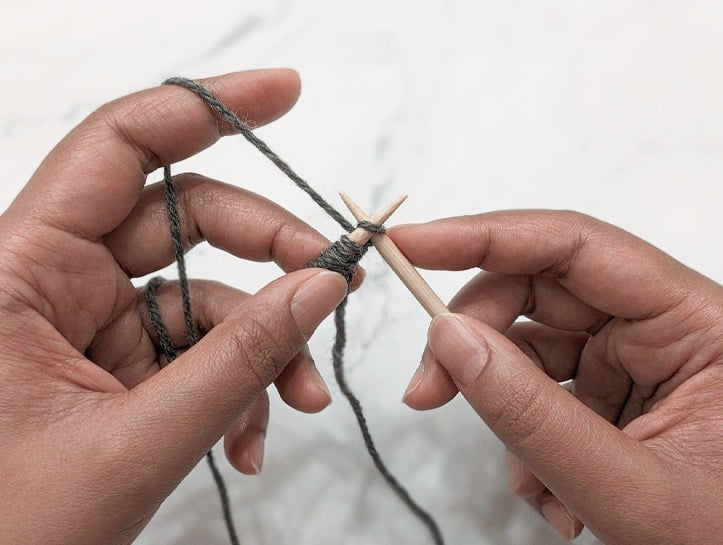
Step #1:
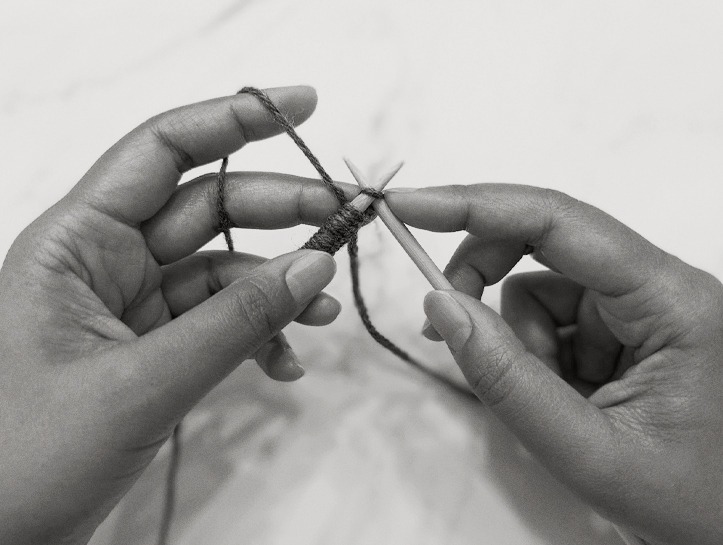
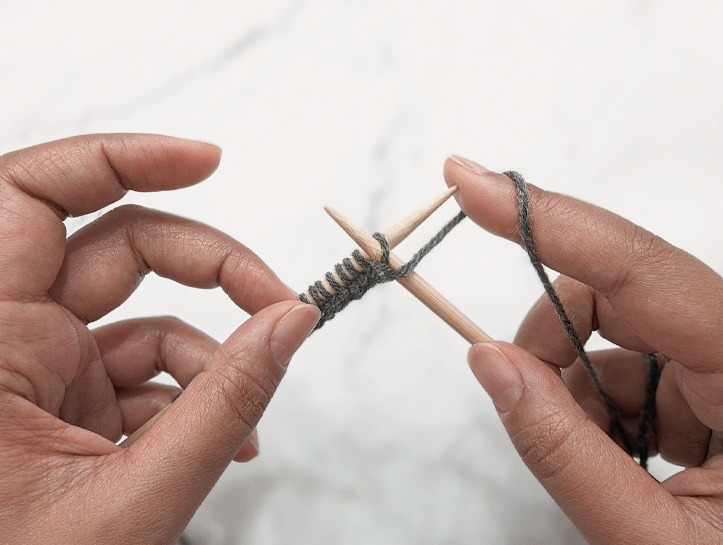
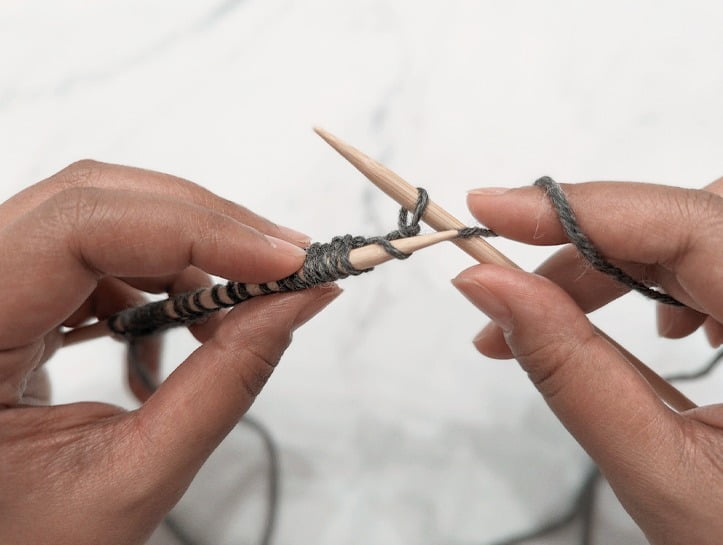
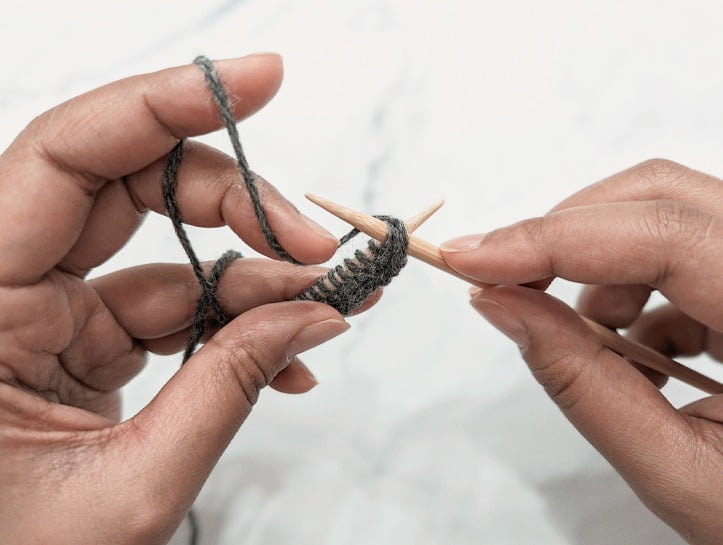
With your working yarn held at the back of your work, insert your right hand needle into the front of the first stitch on your left hand needle from left to right.
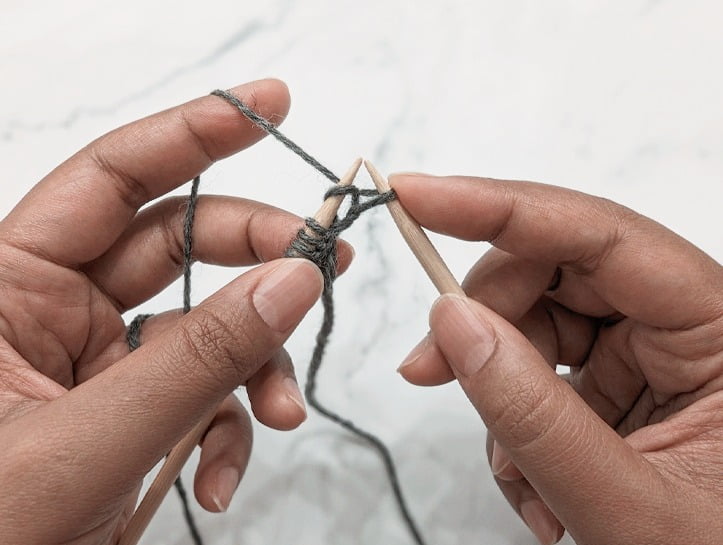
Step #2:
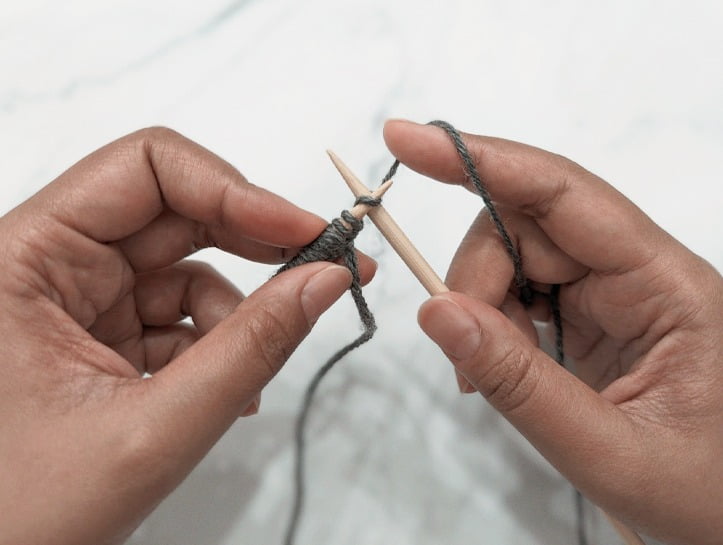
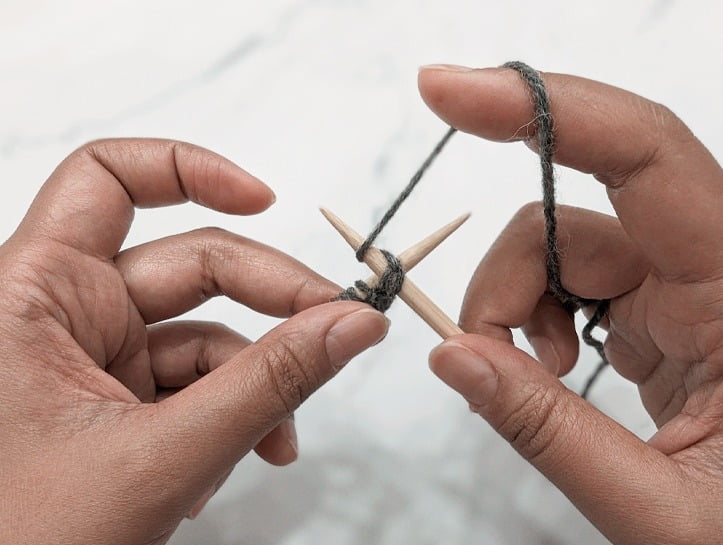
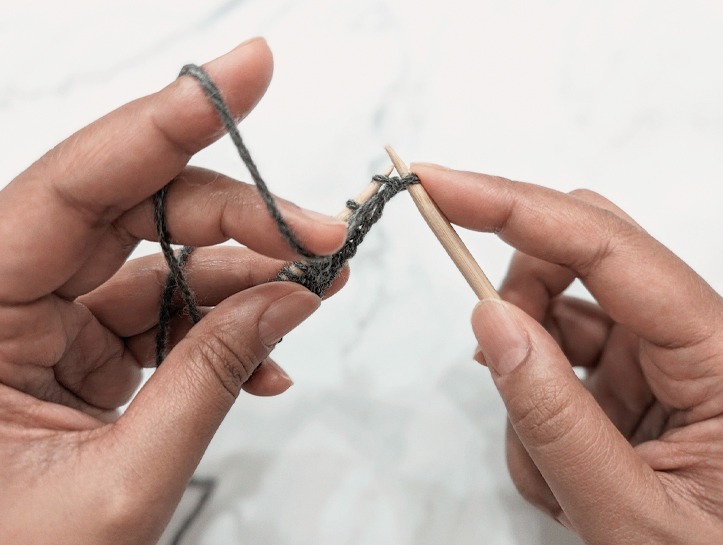
Wrap your working yarn around your right hand needle, counter-clockwise.
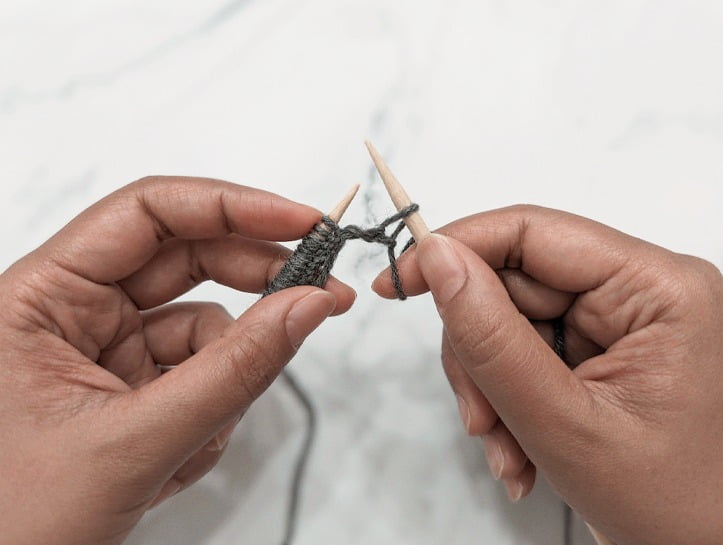
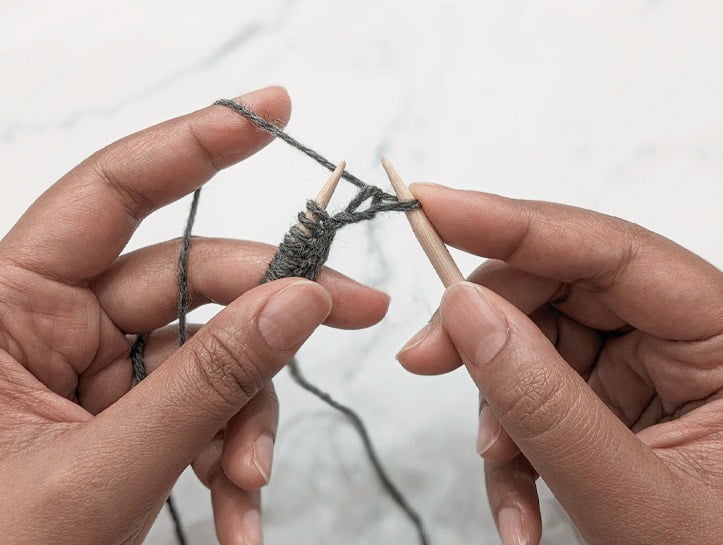
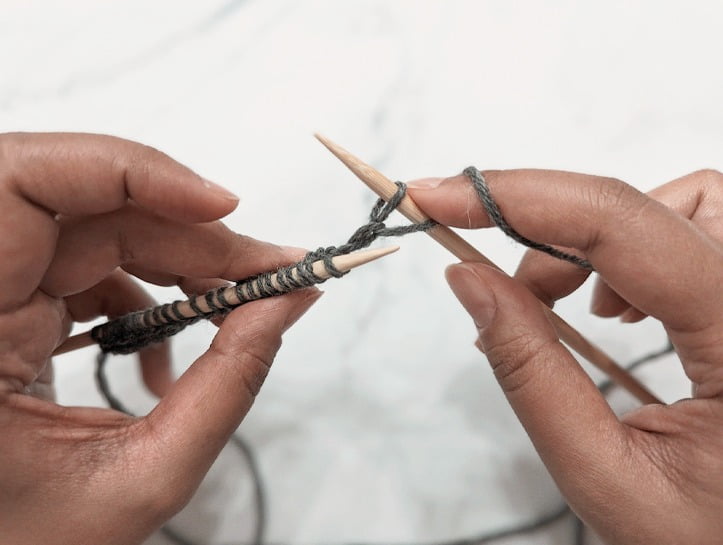
Step #3:
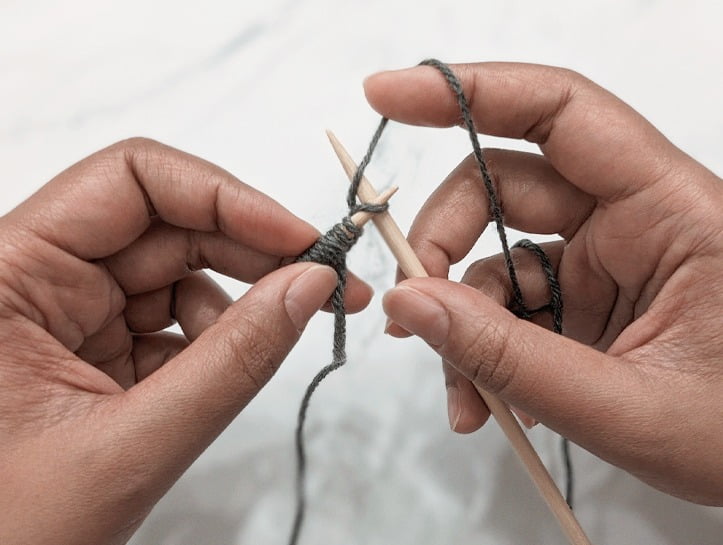
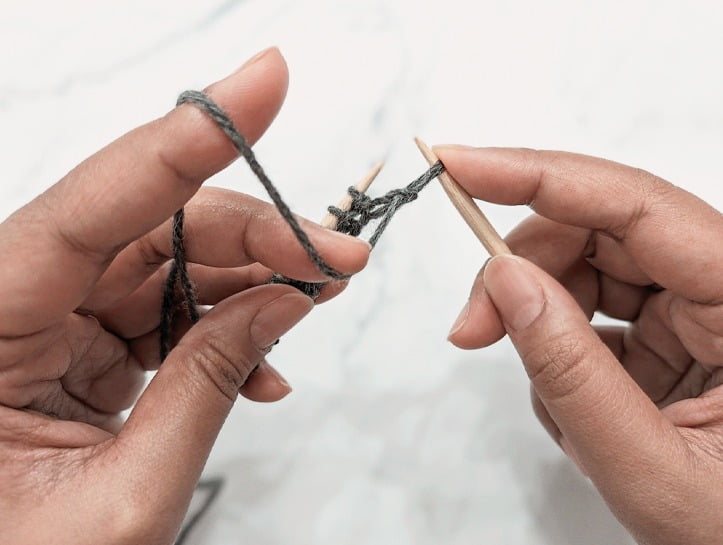
Pull the loop you just made with your working yarn through the stitch you inserted your right hand needle in.
Step #4:
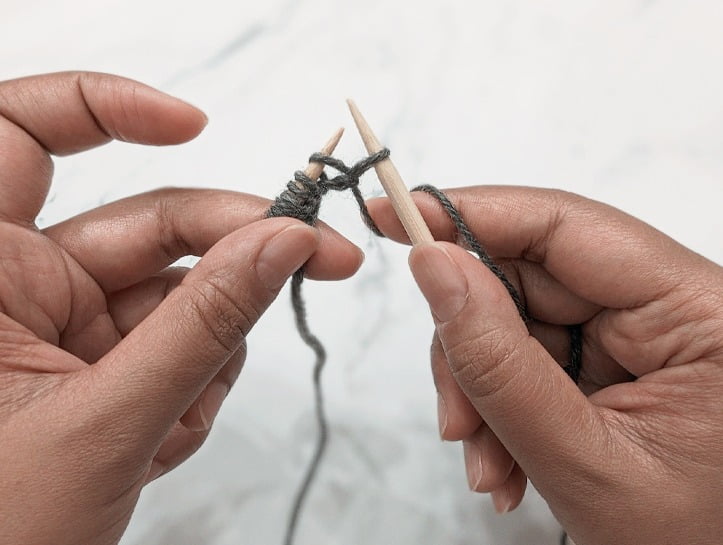
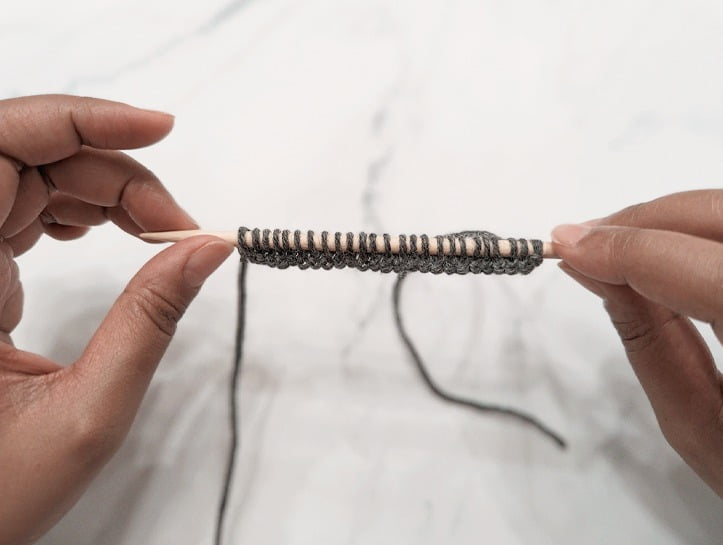
Slide the stitch off your left hand needle.
Step #5:
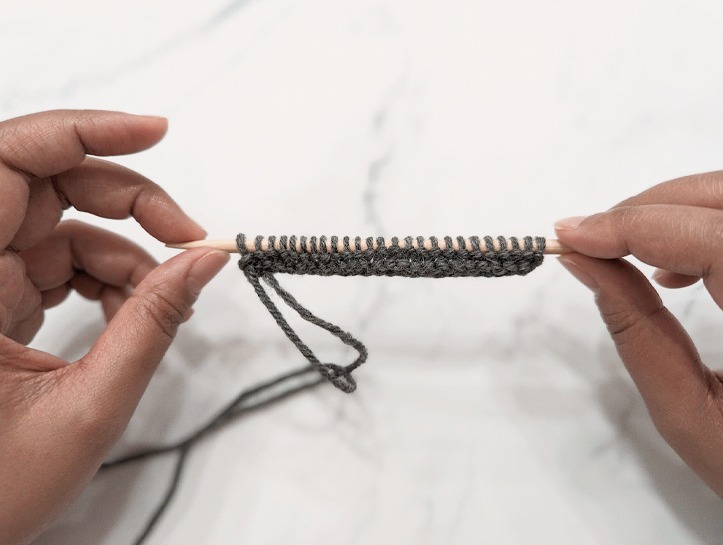
Repeat Steps 1-4 as needed.
the continental knit stitch
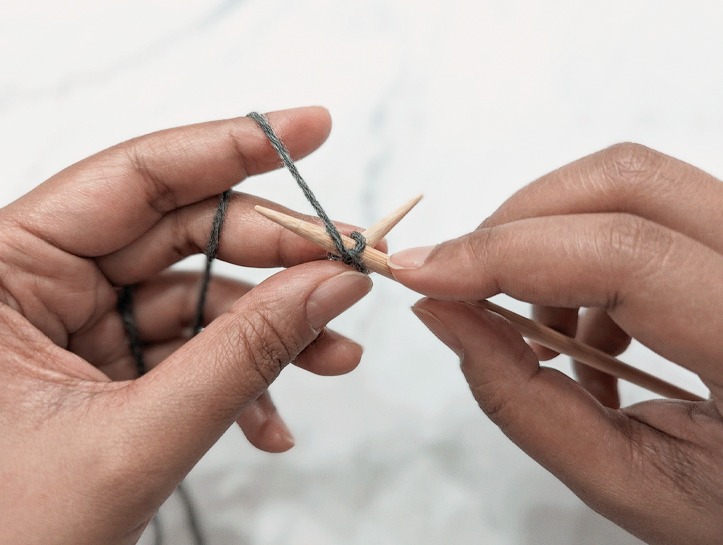
Step #1:
With your working yarn held at the back of your work, insert your right hand needle into the front of the first stitch on your left hand needle from left to right.
Step #2:
Wrap your working yarn around your right hand needle, counter-clockwise.
Step #3:
Pull the loop you just made with your working yarn through the stitch you inserted your right hand needle in.
Step #4:
Slide the stitch off your left hand needle.
Step #5:
Repeat Steps 1-4 as needed.
how to Purl
So you already know how to cast on, and have just learned how to make a knit stitch. Now comes the next step – learning how to purl! So what is a purl stitch, exactly? And why is it important to learn?
Essentially, a purl stitch is just a knit stitch viewed from the back side (aka the ‘wrong’ side). This may sound a bit confusing at first, so let me try and clarify things a bit here. Each stitch created in the world of knitting has a front side and a back side. One side will end up looking like a ‘v’ while the other side will look like a horizontal bump. When viewed from the front, a knit stitch looks like a ‘v’, whereas a purl stitch looks like a horizontal bump.
When creating a purl stitch, you’re basically creating the same stitch as a knit stitch but in reverse so that the purl side of the stitch (that horizontal bump) shows up at the front side of your work rather than at the back.
You’ll be surprised by how many stitch patterns you can create just by adding this one extra stitch to your knitting repertoire, which is why it’s so useful to know how to work it. I’ve seen many stitch patterns created by some amazing knitters out there that use only knit and purl stitches. You can really open up a whole new world of potential for creativity and imagination by learning how to purl. So without further adieu, let’s see how it’s done!
the english purl stitch
Step #1:
With your working yarn held at the front of your work, insert your right hand needle into the front of the first stitch on your left hand needle from right to left.
Step #2:
Wrap your working yarn around your right hand needle, counter-clockwise.
Step #3:
Pull the loop you just made with your working yarn through the stitch you inserted your right hand needle in.
Step #4:
Slide the stitch off your left hand needle.
Step #5:
Repeat Steps 1-4 as needed.
the continental purl stitch
Step #1:
With your working yarn held at the front of your work, insert your right hand needle into the front of the first stitch on your left hand needle from right to left.
Step #2:
Wrap your working yarn around your right hand needle, counter-clockwise.
Step #3:
Pull the loop you just made with your working yarn through the stitch you inserted your right hand needle in.
Step #4:
Slide the stitch off your left hand needle.
Step #5:
Repeat Steps 1-4 as needed.
BASIC KNITTED FABRICS
Now that you’ve learned how to work the two most basic stitches in all of knitting, let’s take a look at some of the most common beginner friendly fabrics you can create with these two stitches alone.
As you delve deeper into the world of knitting, you’ll eventually notice that many patterns will reference these stitch patterns assuming you already know what they are and how to work them. For example, you may come across instructions in a knitting pattern that read something like ‘work __ rows in garter stitch’, without giving you any indication on exactly how to do so.
For this reason, it’s a good idea to familiarize yourself with these basic knitted fabrics, so that when you run into them at some point in your knitting journey, you’ll know exactly what they are and how to work them.
Below, I’ve included instructions on how to work these stitch patterns both flat and in the round.
garter stitch
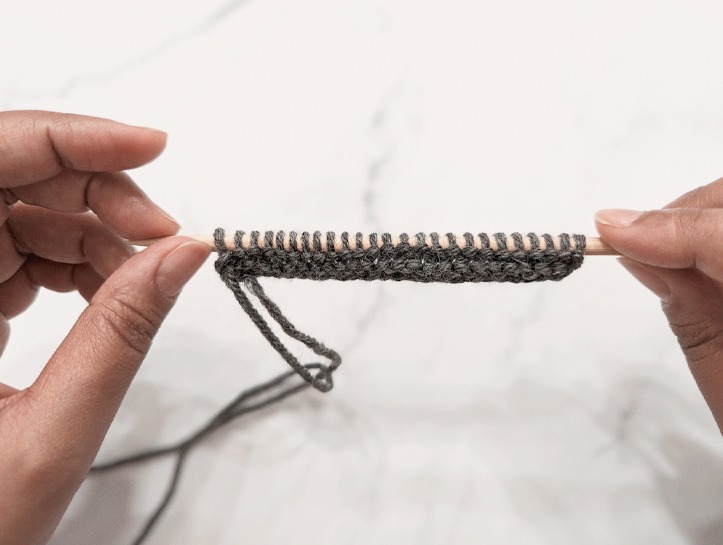
So what do we end up with if we just keep layering rows and rows of knit stitches on top of one another? Well, we get a fabric that looks like the image below. This type of fabric is referred to as ‘Garter Stitch’ in the knitting world, and it is often the very first fabric a newbie knitter will ever make.
When worked flat, garter stitch is created by knitting every stitch on every row. When worked in the round, you’ll simply alternate between knit rounds and purl rounds. In either case, the result is a completely reversible, stable fabric that stays flat and looks exactly the same on both sides.
worked flat
Cast on any number of stitches.
Row 1: knit.
Repeat Row 1 for your desired length.
worked in the round
Cast on any number of stitches.
Round 1: knit. Round 2: purl.
Repeat Rounds 1 & 2 for your desired length.
Stockinette (aka 'stocking') stitch
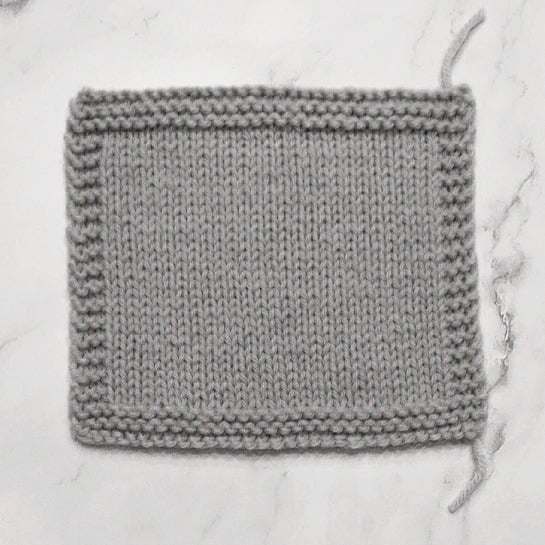
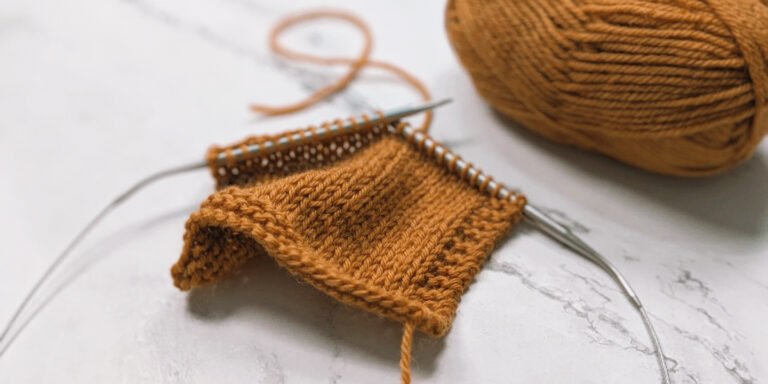
Stockinette is by far the most commonly used stitch pattern in all of knitting, and rightfully so. You just can’t beat the beauty in its simplicity! On the ‘right side’ of the fabric, you’ll see a sea of knit stitches, and on the ‘wrong side’, a sea of purls.
Because of the way stockinette stitch is constructed, it has a tendency to curl up at the edges. When worked flat, this fabric is created by alternating knit rows with purl rows. When worked in the round, you’ll simply knit all rounds.
worked flat
Cast on any number of stitches.
Row 1 (RS): knit. Row 2 (WS): purl.
Repeat Rows 1 & 2 for your desired length.
worked in the round
Cast on any number of stitches.
Round 1: knit.
Repeat Round 1 for your desired length.
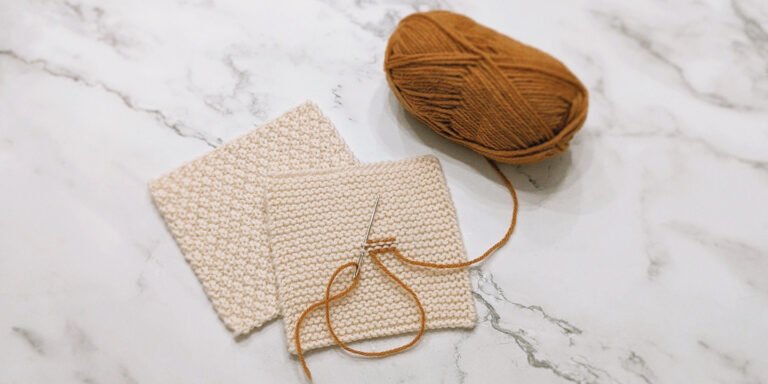
seed stitch
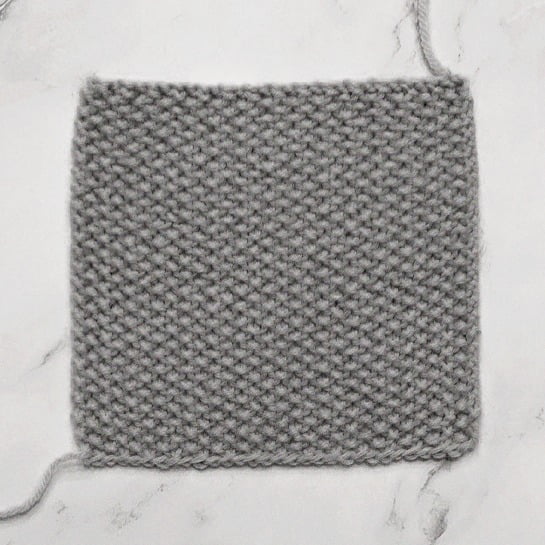
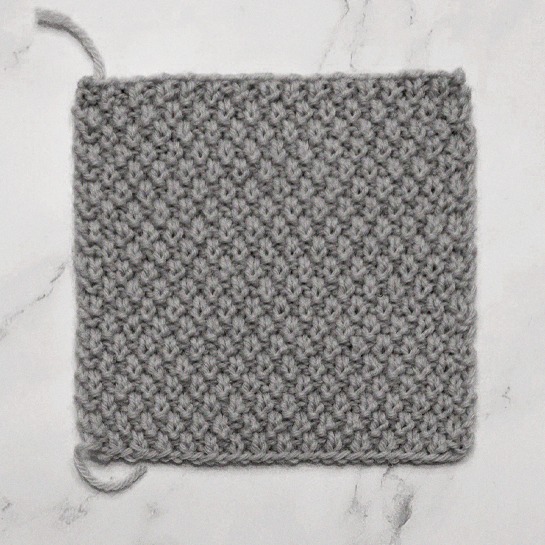
Seed (or Moss) stitch fabric is created by alternating between knit and purl stitches over the span of your row (or round). The next row (or round) is worked so that a purl stitch is above a knit stitch in the previous row and vice versa. This creates a lovely textured fabric that can stand beautifully on its own or as a compliment to other textured stitch patterns.
You’ll often come across a variation of Seed stitch fabric called Double Seed (or Double Moss), which is created in virtually the same manner – the only difference being that you’ll end up alternating between two rows of k1,p1 with two rows of p1, k1.
(Single) Seed Stitch
Double Seed Stitch
worked flat
Cast on a multiple of 2.
Row 1 (RS): k1, p1. Row 2 (WS): k1, p1.
Repeat Rows 1-2 for your desired length.
worked in the round
Cast on a multiple of 2.
Rnd 1: k1, p1. Rnd 2: p1, k1.
Repeat Rows 1-2 for your desired length.
worked flat
Cast on a multiple of 2.
Row 1 (RS): k1, p1. Row 2 (WS): p1, k1.
Row 3 (RS): p1, k1. Row 4 (WS): k1, p1.
Repeat Rows 1-4 for your desired length.
worked in the round
Cast on a multiple of 2.
Round 1: k1, p1. Round 2: k1, p1.
Round 3: p1, k1. Round 4: p1, k1.
Repeat Rounds 1-4 for your desired length.
(Single) Seed Stitch
worked flat
Cast on a multiple of 2.
Row 1 (RS): k1, p1. Row 2 (WS): k1, p1.
Repeat Rows 1-2 for your desired length.
worked in the round
Cast on a multiple of 2.
Rnd 1: k1, p1. Rnd 2: p1, k1.
Repeat Rows 1-2 for your desired length.
Double Seed Stitch
worked flat
Cast on a multiple of 2.
Row 1 (RS): k1, p1. Row 2 (WS): p1, k1.
Row 3 (RS): p1, k1. Row 4 (WS): k1, p1.
Repeat Rows 1-4 for your desired length.
worked in the round
Cast on a multiple of 2.
Round 1: k1, p1. Round 2: k1, p1.
Round 3: p1, k1. Round 4: p1, k1.
Repeat Rounds 1-4 for your desired length.
rib stitch
Similar to Seed stitch in its construction, 1×1 Rib is created by alternating between knit and purl stitches. The difference here is that you’ll be maintaining a knit column followed by a purl column of stitches all throughout the length of your fabric. This alternating dance between knit and purl columns creates a very stretchy fabric most commonly found at the hem, cuff, and neckband of a sweater, the rim of a hat, or the cuff of a sock.
An alternative to 1×1 Ribbing, 2×2 Rib is yet another fabric that offers a lot of stretch. It’s used in pretty much the exact same instances as above (as for 1×1 Rib) and is created in essentially the same manner – only this time you’ll alternate 2 columns of knits with 2 columns of purls.
1x1 Rib
2x2 Rib
worked flat
Cast on a multiple of 2.
Row 1 (RS): k1,p1. Row 2 (WS): p1, k1.
Repeat Rows 1 & 2 for your desired length.
worked in the round
Cast on a multiple of 2.
Round 1: k1,p1.
Repeat Round 1 for your desired length.
worked flat
Cast on a multiple of 4.
Row 1 (RS): k2, p2. Row 2 (WS): p2, k2.
Repeat Rows 1 & 2 for your desired length.
worked in the round
Cast on a multiple of 4.
Round 1: k2, p2.
Repeat Round 1 for your desired length.
1x1 Rib
worked flat
Cast on a multiple of 2.
Row 1 (RS): k1,p1. Row 2 (WS): p1, k1.
Repeat Rows 1 & 2 for your desired length.
worked in the round
Cast on a multiple of 2.
Round 1: k1,p1.
Repeat Round 1 for your desired length.
2x2 Rib
worked flat
Cast on a multiple of 4.
Row 1 (RS): k2, p2. Row 2 (WS): p2, k2.
Repeat Rows 1 & 2 for your desired length.
worked in the round
Cast on a multiple of 4.
Round 1: k2, p2.
Repeat Round 1 for your desired length.
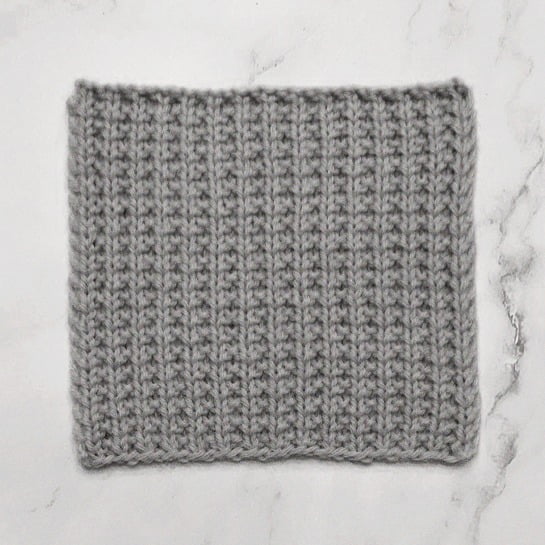
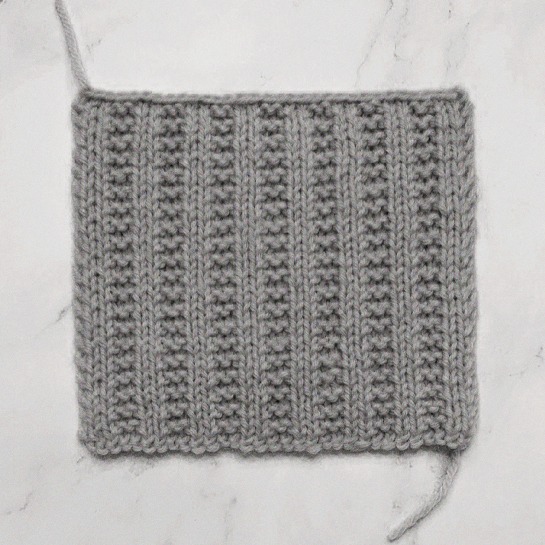
Broken Rib Stitch
Broken Rib Stitch is essentially ribbing that alternates between knit columns and garter columns, rather than knit columns and purl columns (as it is with standard ribbing). Because we’re using garter columns instead of purl columns here, the resulting fabric is much less stretchy and more ‘stable’ than that of your standard ribbing.
For this reason, Broken Rib is a great choice for when you want an all over ribbing pattern without the stretch. Below, I’ve demonstrated what 1×1 and 2×2 Broken Rib variations would look like, but you can do any variation you like here (i.e., 2×1, 1×2, 3×2, 2×3, 3×3, and the list goes on and on.) This is a timeless stitch pattern guys! And it’s one of my all time favourites – you just can’t go wrong with the Broken Rib Stitch.
1x1 Broken Rib
2x2 Broken Rib
worked flat
Cast on a multiple of 2.
Row 1 (WS): k1,p1. Row 2 (RS): knit all sts.
Repeat Rows 1 & 2 for your desired length.
worked in the round
Cast on a multiple of 2.
Round 1: k1,p1. Round 2: knit.
Repeat Round 1 for your desired length.
worked flat
Cast on a multiple of 4.
Row 1 (WS): k2, p2. Row 2 (RS): knit all sts.
Repeat Rows 1 & 2 for your desired length.
worked in the round
Cast on a multiple of 4.
Round 1: k2, p2. Round 2: knit.
Repeat Round 1 for your desired length.
1x1 Broken Rib
worked flat
Cast on a multiple of 2.
Row 1 (WS): k1,p1. Row 2 (RS): knit all sts.
Repeat Rows 1 & 2 for your desired length.
worked in the round
Cast on a multiple of 2.
Round 1: k1,p1. Round 2: knit.
Repeat Round 1 for your desired length.
2x2 Broken Rib
worked flat
Cast on a multiple of 4.
Row 1 (WS): k2, p2. Row 2 (RS): knit all sts.
Repeat Rows 1 & 2 for your desired length.
worked in the round
Cast on a multiple of 4.
Round 1: k2, p2. Round 2: knit.
Repeat Round 1 for your desired length.
your next steps...
And that’s it – you’ve learned how to knit and purl! Pat yourself on the back my friend, you can officially call yourself a knitter!
As you begin to familiarize yourself with more and more stitch patterns, you’ll soon come to realize that we haven’t even scratched the surface with what can be done here.
Throughout my knitting journey, I’ve seen some incredibly beautiful and intricate stitch patterns created by working only knit and purl stitches. There’s really an infinite array of possibilities when it comes to creating knitted fabrics – and once you start throwing yarn overs and cable knitting into the mix, you’ll be absolutely blown away by what you can do!
If you’re now wondering how to get those stitches off your needles, take a look at this article here, where I go over everything you need to know about binding off your knitting.
And as always, if you have any questions at all, I’m always happy to help! Don’t hesitate to ask in the comments below. Until next time, happy knitting!