Affiliate Disclaimer: This post may contain affiliate links. This means that I may earn a commission if you make a purchase through these links. I only recommend products and services that I personally use and believe will add value to my readers. Your support helps keep this blog running and is greatly appreciated. Thank you!
Picking up stitches is a finishing technique used in both seamless and seamed knitting, although you’ll see it significantly more in the former than in the latter.
For example, when knitting a sweater up in pieces (for later seaming), picking up stitches generally occurs primarily around the neckband, after you’ve blocked each piece separately and seamed it all together. When knitting a sweater seamlessly, you’ll typically use this technique not only at the neckband, but – depending on the construction method – at the shoulder slopes and around each armhole.
How many stitches you need to pick up along an edge really depends on two things – the direction of the edge you’re picking up from, and the gauge of your stitch pattern. If you’re picking up stitches along a horizontal edge, much of the time it’s really quite straight forward – you’ll be picking up and knitting at a rate of 1:1. All other edge directions will nearly always vary in their pick up rate, and this will primarily be determined by your stitch pattern’s gauge.
pick up & knit along a horizontal edge
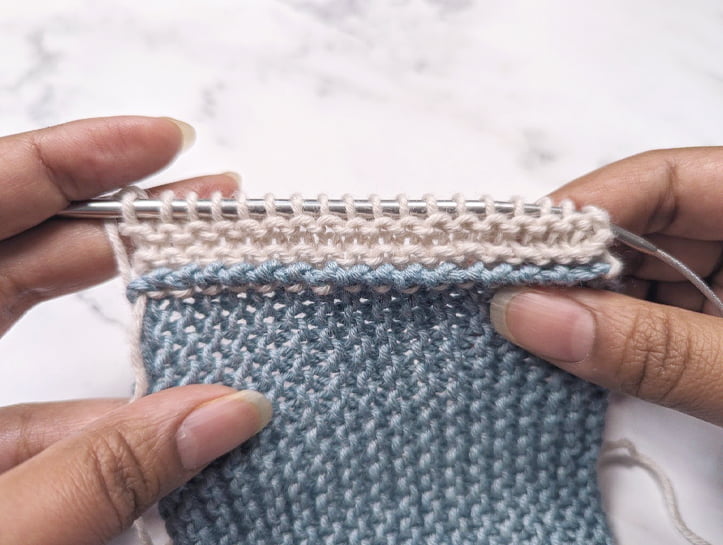
Whether it’s a cast-on edge or a bind-off edge, horizontal edges are the easiest to pick up stitches from. The main thing to take note of here is exactly where you’re inserting your working needle. You’ll need to take care to insert your needle into the center of each stitch, and not in between them (unless otherwise stated in the pattern you’re following).
Although you can (and sometimes may need to) pick up stitches with the wrong side of your fabric facing you (sometimes referred to as ‘pick up and purl’), picking up stitches typically occurs with the right side facing you. You’ll insert your needle from front to back into a single stitch, wrap your working yarn around your needle (just as you would when knitting a new stitch), and pull that newly created loop through. Simply repeat this process all across your horizontal edge.
As I briefly mentioned in the introduction, picking up stitches along a horizontal edge typically occurs at a rate of 1:1 – meaning, you’ll be picking up 1 stitch for every stitch along that edge.
picking up stitches along a bind-off edge
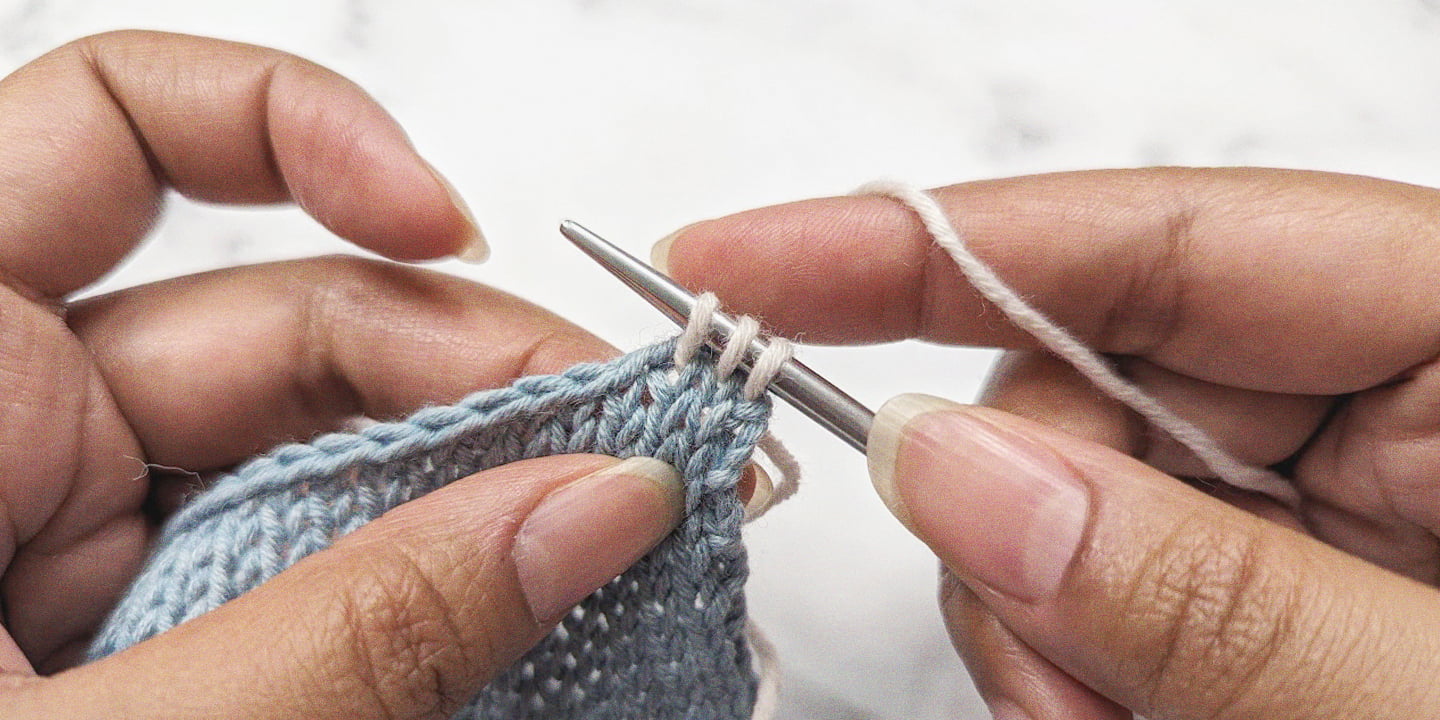
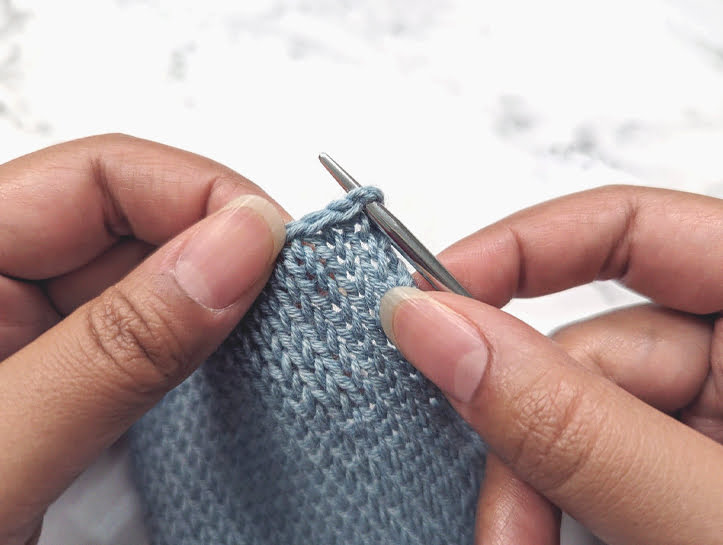
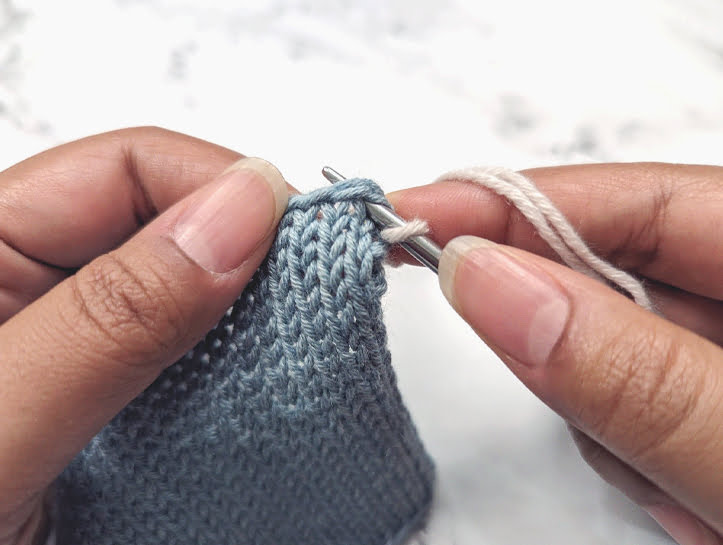
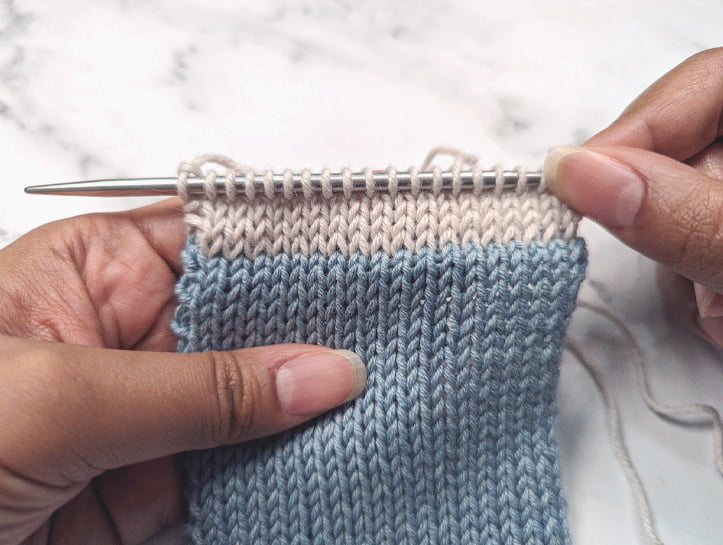
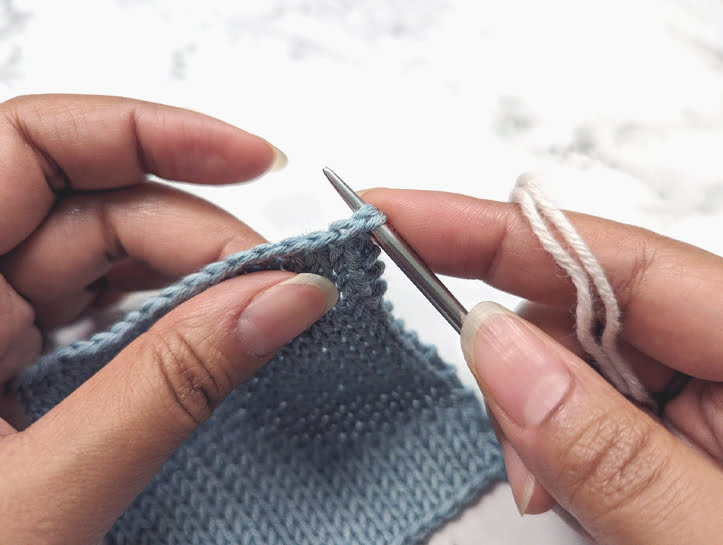
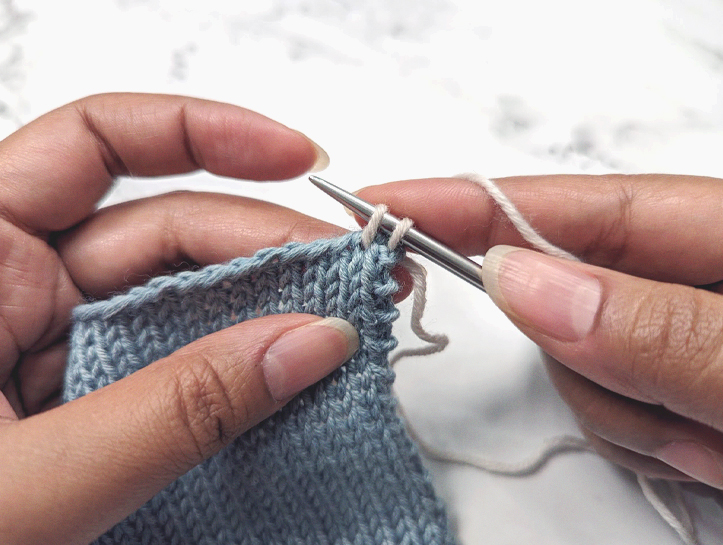
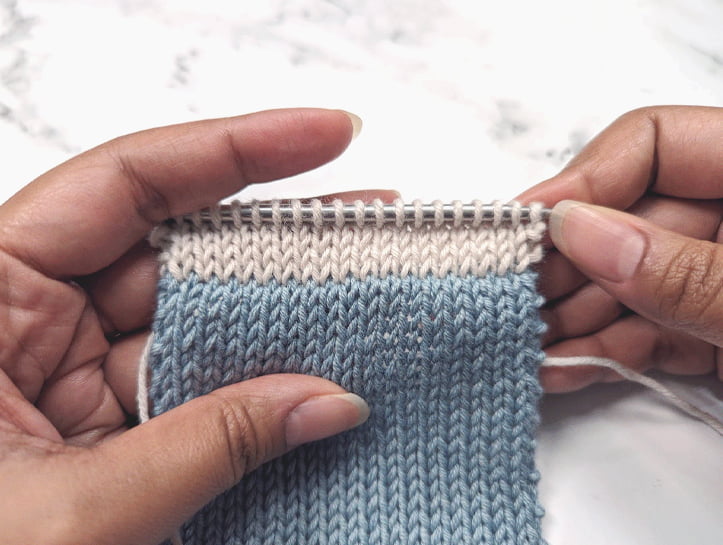
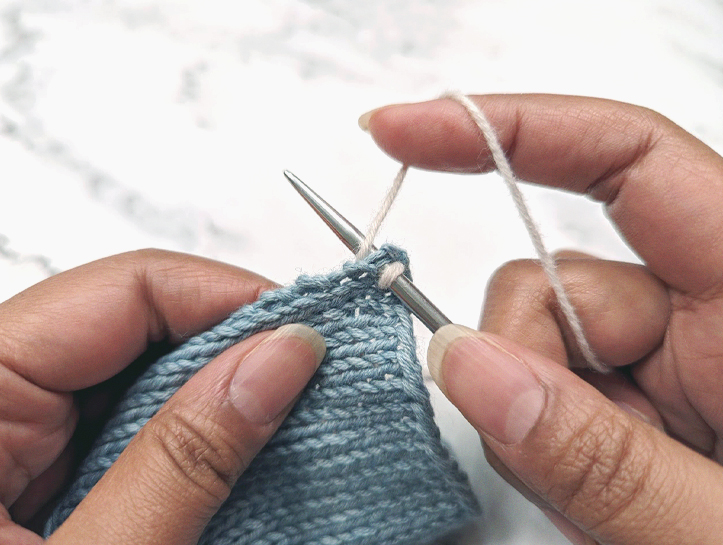
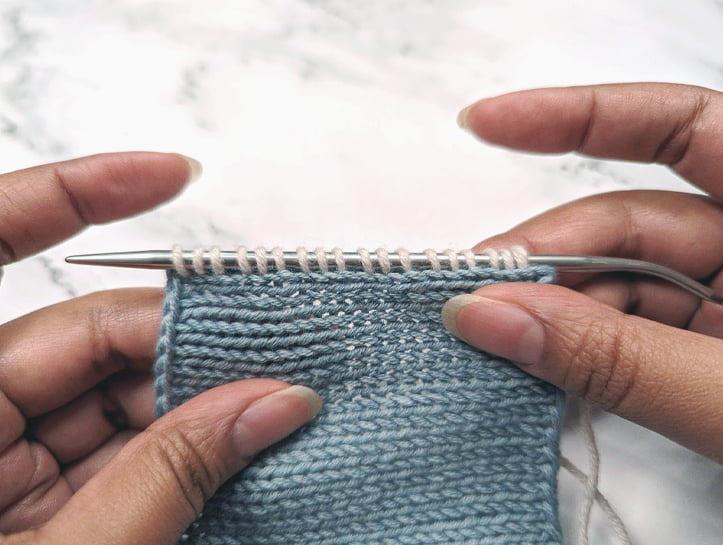
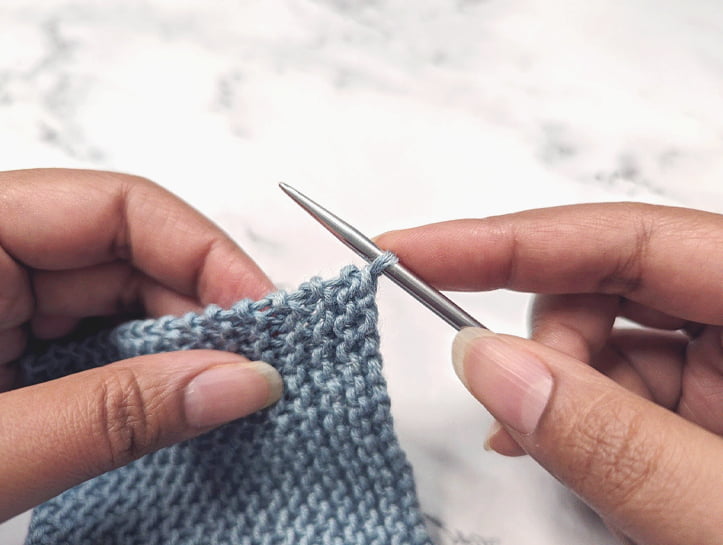
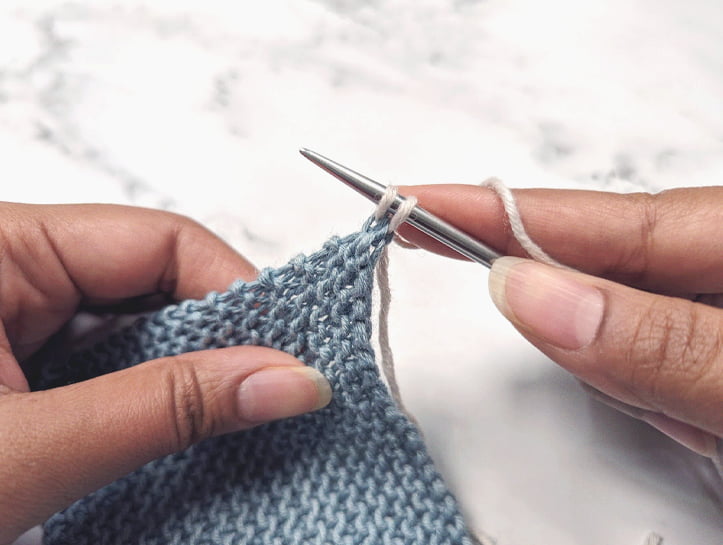
When picking up and knitting inside the stitches of a bind-off edge, you’re essentially going to be inserting your needle into each ‘V’ along the entire row. As you will soon see in the final image below, your resulting fabric is worked in the same direction as the fabric from which you picked up stitches from. The work ends up looking continuous.
Step #1:
Insert your needle into the middle of the very first stitch of your bind-off edge.
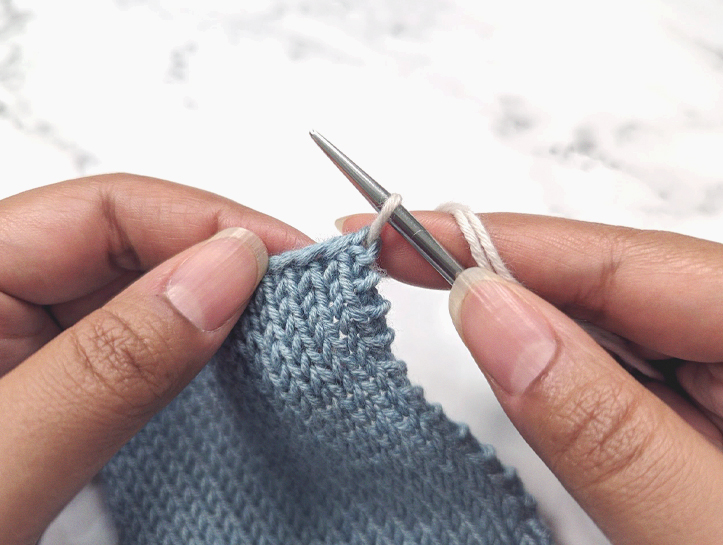
Step #2:
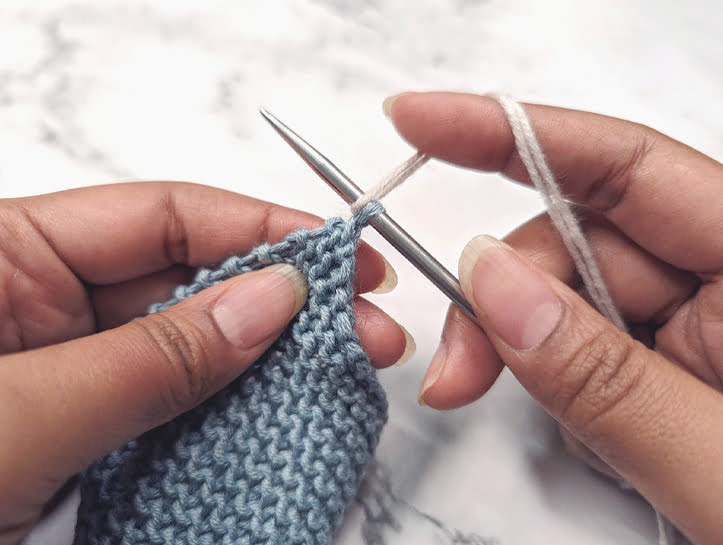
Grab your working yarn and wrap it around your right hand needle, with the working end at the front and the tail end at the back.
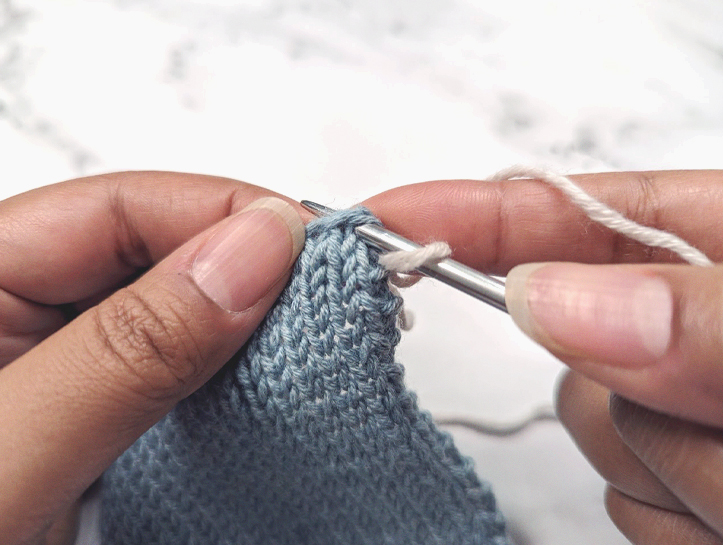
Step #3:
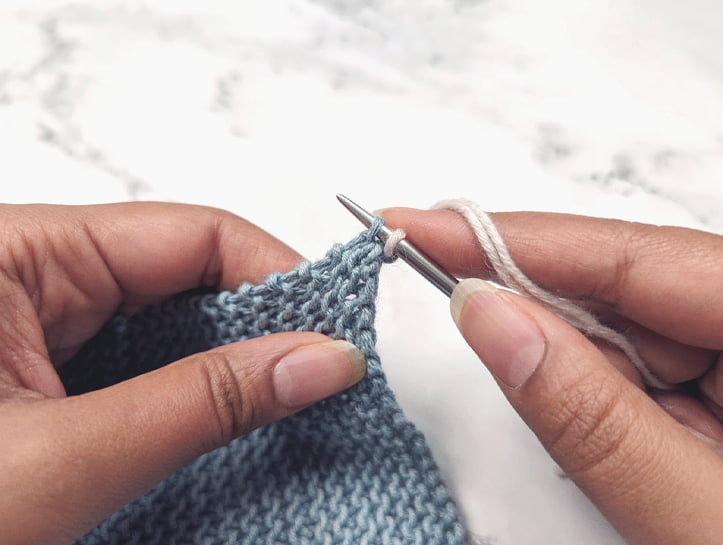
Pull the loop through the stitch you inserted your needle into.
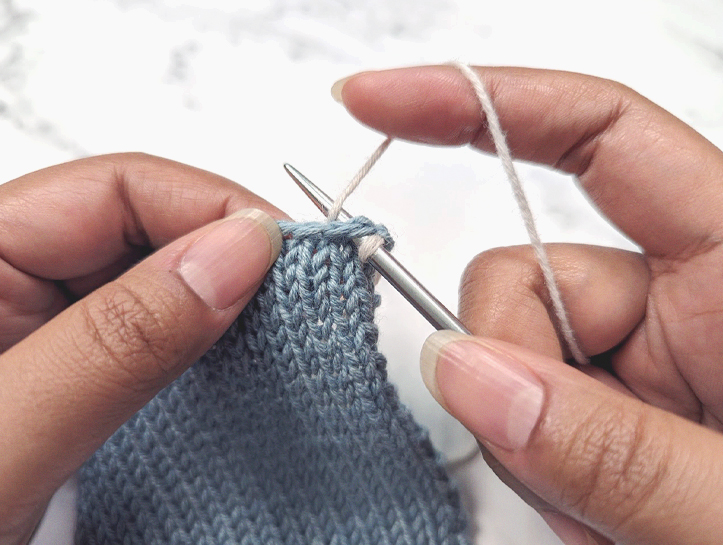
Step #4:
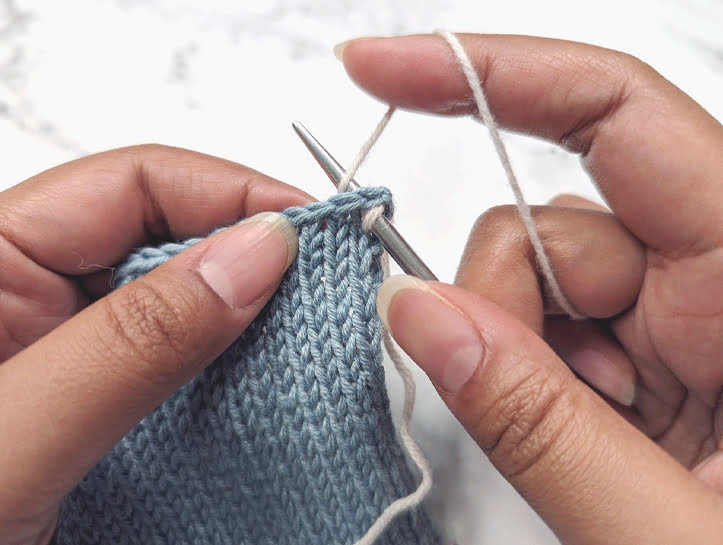
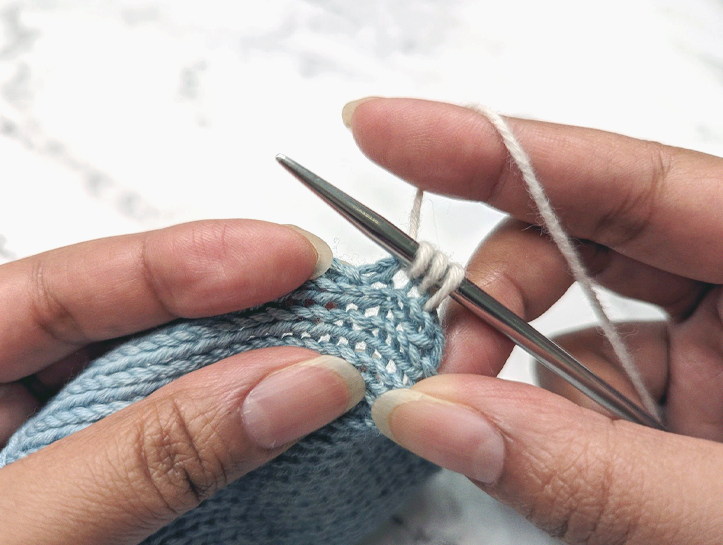
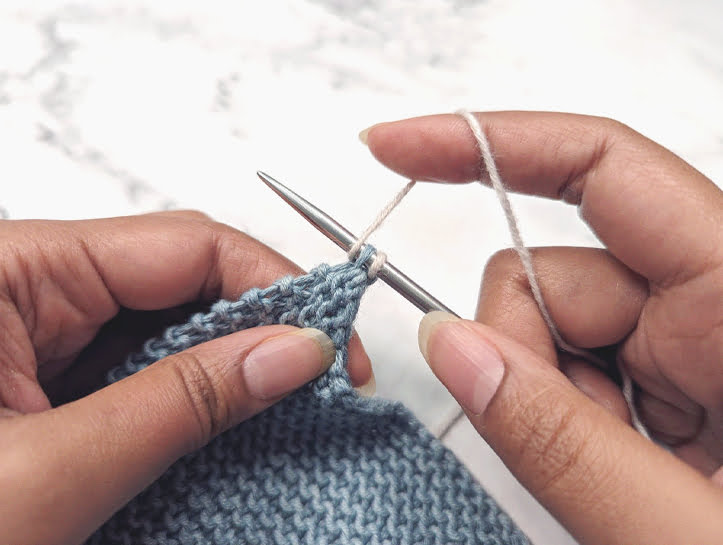
Insert your needle into the middle of the next ‘V’ (the next stitch).
Step #5:
Wrap the working end of your yarn around your right hand needle.
Step #6:
Pull the loop through the stitch you inserted your needle into.
Step #7:
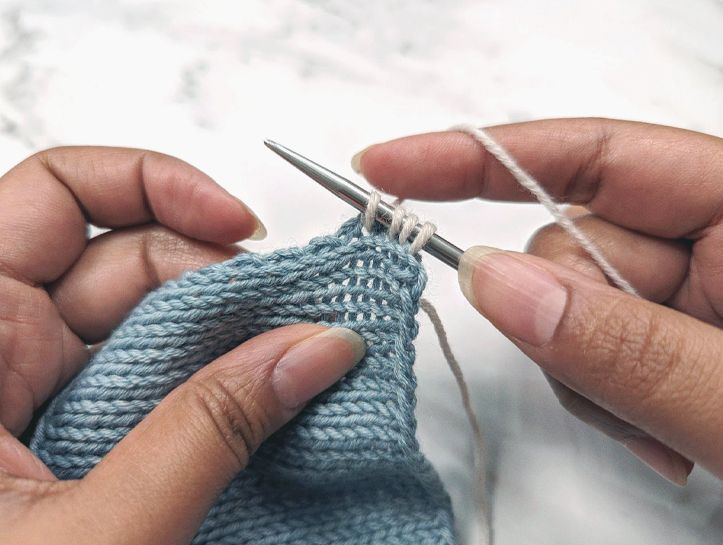
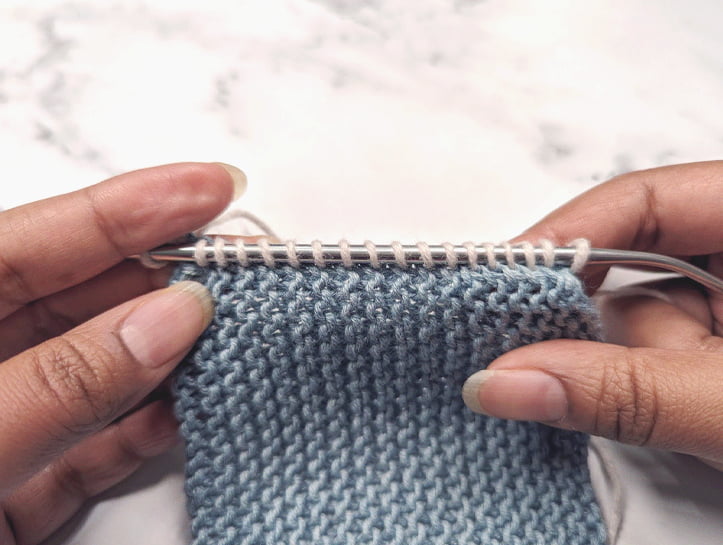
Repeat Steps 4 to 6 until all stitches have been picked up along the bind-off edge.
Step #8:
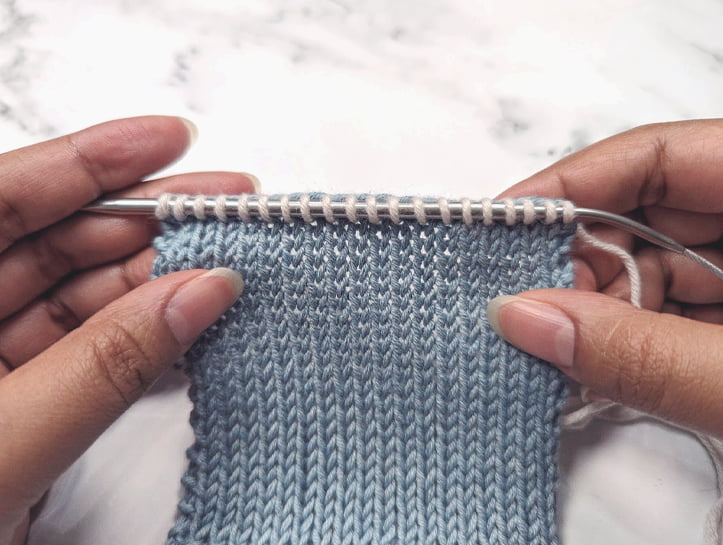
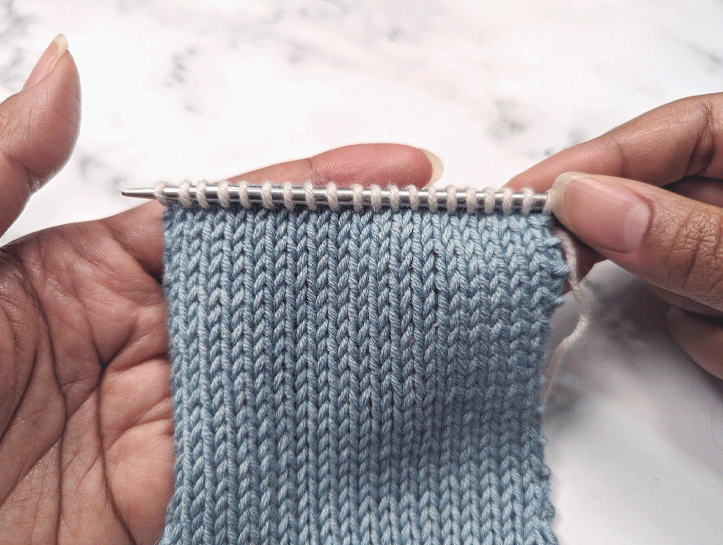
Begin working back and forth across all picked up stitches.
picking up stitches along a cast-on edge
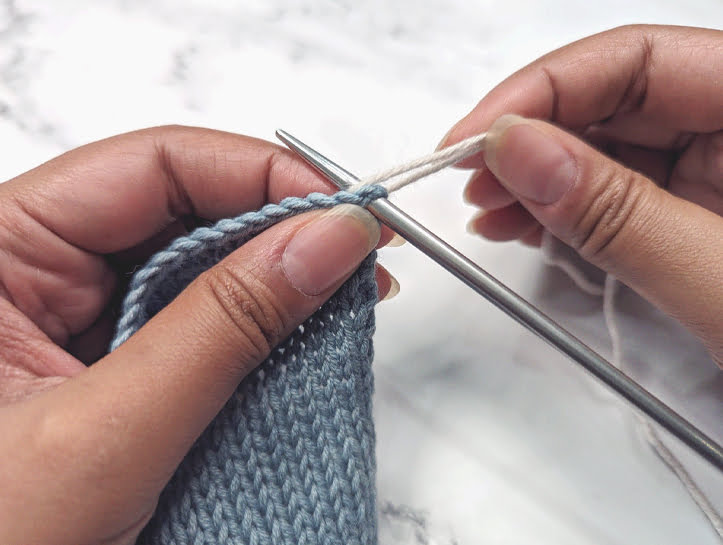
Picking up and knitting inside a stitch along a cast-on edge is going to look slightly different from that of a bind-off edge. Why is that, you ask? Well, since we’re going to be flipping our fabric upside-down in order to pick up along the edge from which we started our knitting, that means all of our stitches are going to be upside-down as well. Therefore, instead of inserting our needle into a right-side-up ‘V’ (as we would along a bind-off edge), we’ll be inserting our needle into an upside-down ‘V’. Let’s see what this looks like:
Step #1:
Insert your needle into the very first stitch along your cast-on edge.
Step #2:
Grab your working yarn and wrap it around your right hand needle, with the working end at the front and the tail end at the back.
Step #3:
Pull the loop through the stitch you inserted your needle into.
Step #4:
Insert your needle into the middle of the next upside-down ‘V’ (the next stitch).
Step #5:
Wrap the working end of your yarn around your right hand needle.
Step #6:
Pull the loop through the stitch you inserted your needle into.
Step #7:
Repeat Steps 4 to 6 until all stitches have been picked up along the cast-on edge.
Step #8:
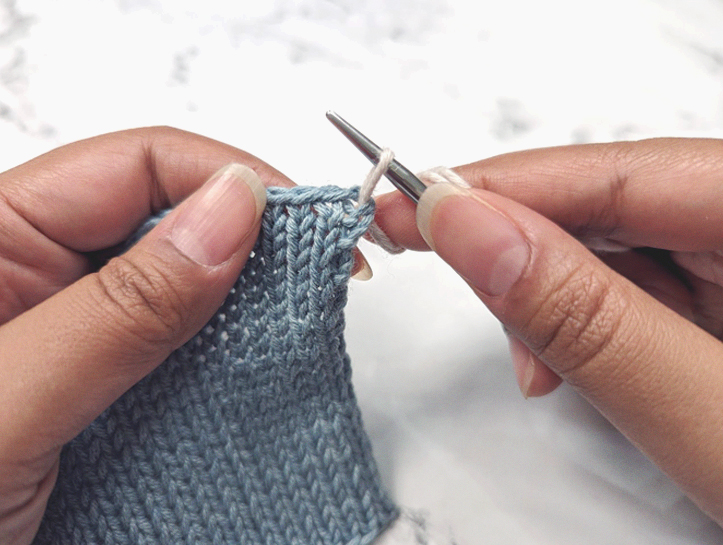
Begin working back and forth across all picked up stitches.
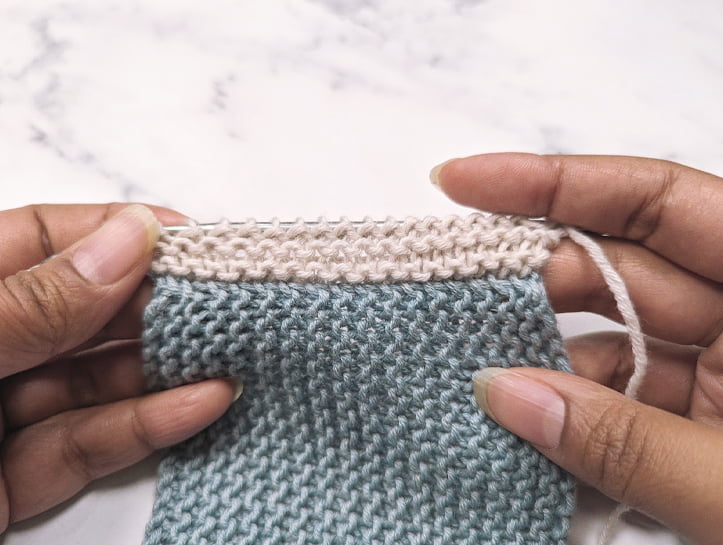
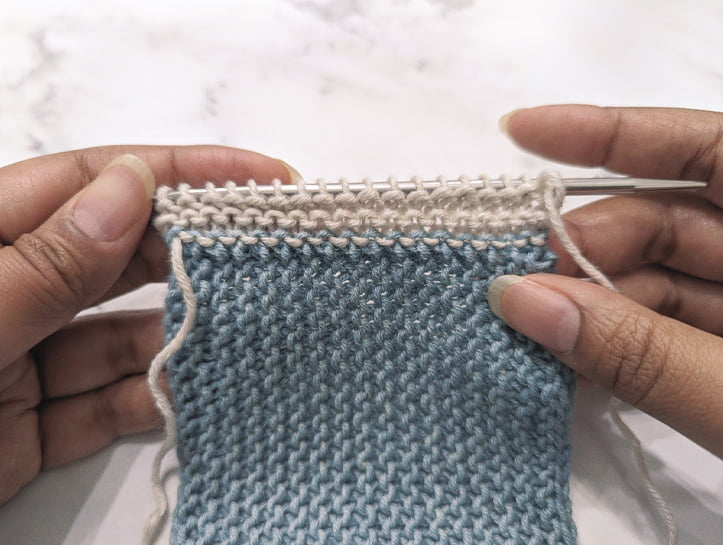
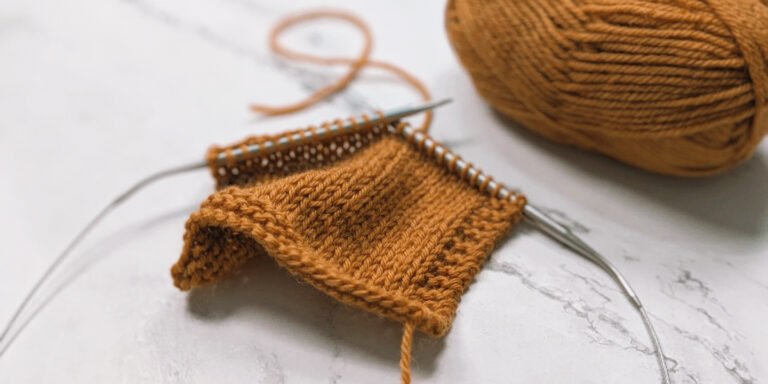
As you can see in the final image above, picking up and knitting inside the stitches of a cast-on edge results in a fabric that is worked in the opposite direction of the fabric you picked up stitches from. You’ll often see this in top-down garment knitting, particularly at the shoulder ‘seams’.
pick up & knit along a vertical edge
Picking up stitches along a vertical edge is slightly more complex compared to that of a horizontal edge. Because stitches tend to be wider than they are long, we have to account for that discrepancy in size when picking up stitches along an edge consisting of rows (vertical edge) rather than stitches (horizontal edge). If we picked up every row along a vertical edge using the same stitch gauge as the rest of the pattern, we would end up with a fabric that puckers here and there – and of course, we very likely don’t want that.
So how do we fix this? Well, that’s where gauge comes in. Along a vertical edge, you’ll simply pick up at a ratio closest to that of your gauge. For example, if your gauge is 18 stitches and 24 rows, your pick up rate would be 3 stitches for every 4 rows (18 stitches/24 rows = 3 stitches/4 rows). For a fabric worked at this gauge, you would simply pick up 3 stitches inside 3 rows, skip a row, pick up another 3 stitches, and so on and so forth.
You’re basically trying to break down your gauge to its smallest ratio to figure out how many stitches can fit within the smallest number of rows. Let’s try another example. Say our pattern’s gauge is 16 stitches and 24 rows. A gauge like this would give us a pick up rate of 2 stitches for every 3 rows – 16/24 = 2/3. Do you see what we’re doing here? With this gauge, we would pick up 2 stitches along 2 rows, skip a row, rinse and repeat – easy, right?
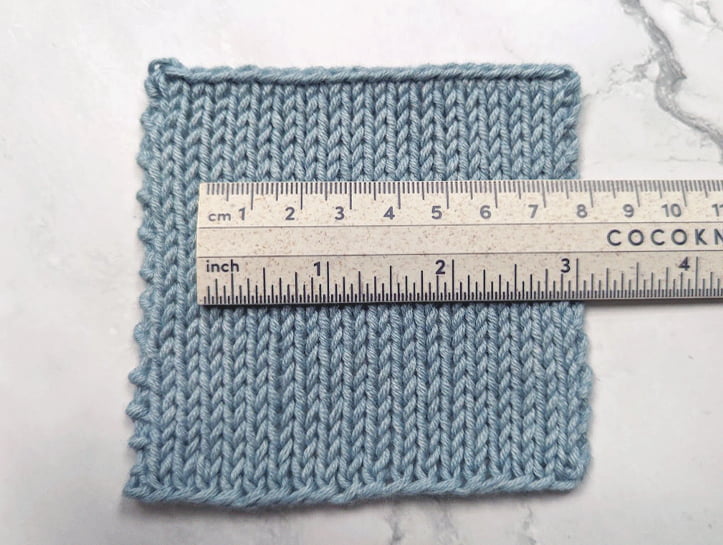
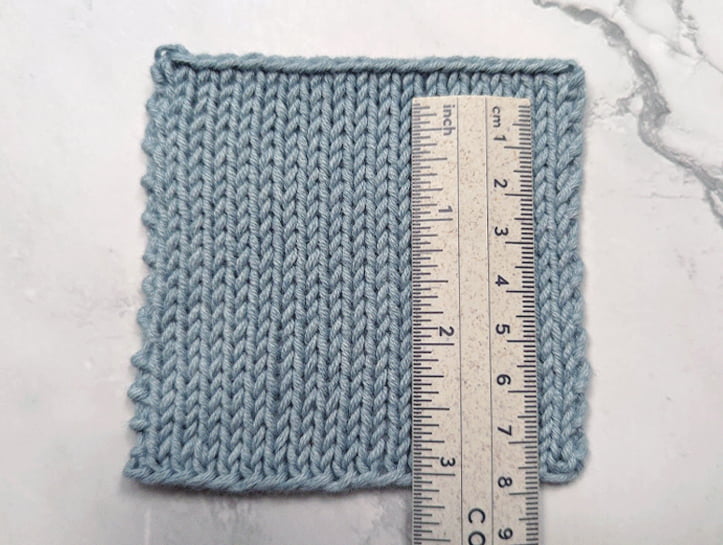
So, let’s see what this would look like on my little sample swatch. As you can see in the photos above, I’ve got approximately 10.5 stitches within 2 inches – which would give me a stitch gauge of approximately 5.25 stitches per inch. As for my row gauge, I’ve got approximately 14 rows within 2 inches – which would give me a row gauge of approximately 7 rows per inch. Breaking this down into its smallest ratio would look like this: 5.25/7 = 3/4. So my stitch to row gauge breaks down to 3 stitches for every 4 rows.
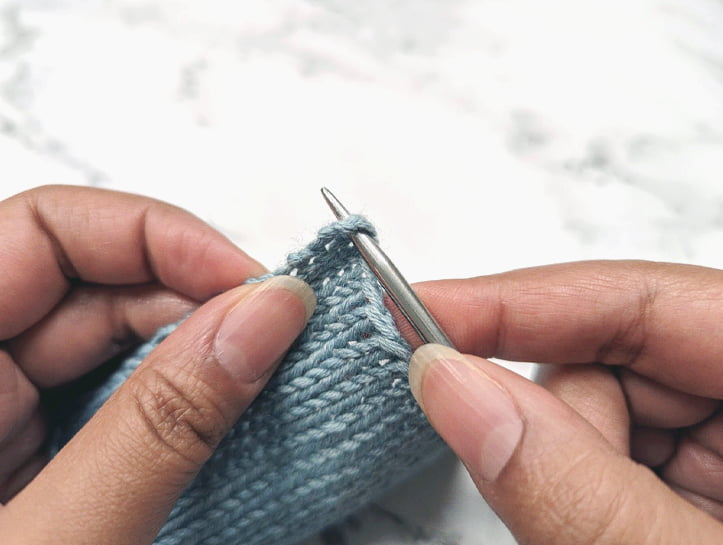
Now, let’s get a good visual for how it’s done. Let’s begin by first locating the horizontal bars between the last two columns of stitches, as seen in the image below. You will be inserting your needle in between these horizontal bars.
Locating the Horizontal Bars
Step #1:
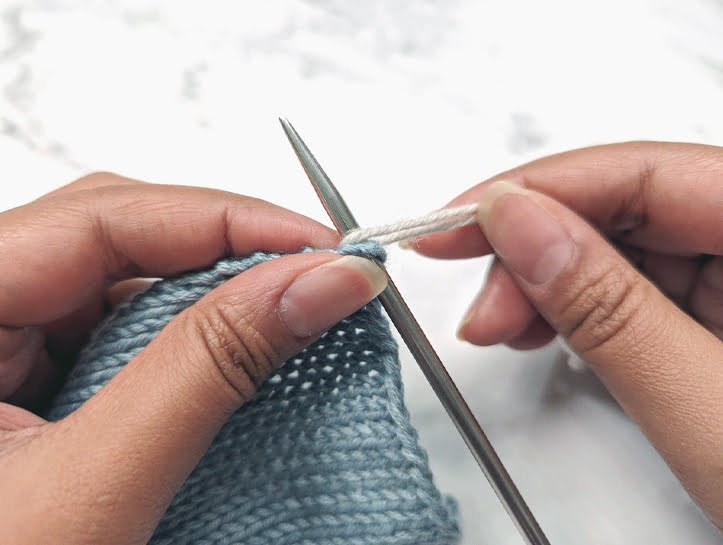
Insert your right hand needle into the the space between the first row and your cast-on edge (just before the very first horizontal bar).
Step #2:
Grab your working yarn and wrap it around your right hand needle, with the tail end at back and the working end at front. Pull the loop through.
Step #3:
Locate the next gap between the horizontal bars and insert your right hand needle into it.
Step #4:
Wrap the working end of your yarn around your right hand needle from back to front.
Step #5:
Pull the loop through.
Step #6:
Repeat Steps 3 to 5 until you’ve picked up 3 stitches.
Step #7:
Skip the next gap, and pick up and knit into the gap after the one you skipped.
Step #8:
Repeat this process, picking up 3 stitches for every 4 rows until you’ve completed working all the way up/down the vertical edge.
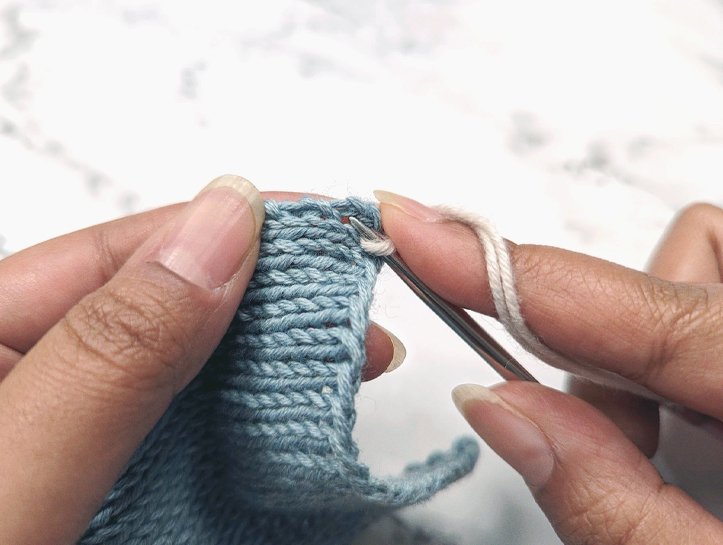
Picking Up Stitches Along a Vertical Edge
Of course, our pattern’s gauge won’t always break down into such a straightforward pick up rate. Sometimes we’ll have to settle for the closest rate to that of our gauge. For example, a gauge of 21 stitches and 26 rows doesn’t break down any further – and we can’t simply pick up 21 stitches, skip 5, pick up another 21, skip another 5 and call it a day here – if only things were that simple! The easiest thing to do here, rather, is to just go with the closest pick up rate that will allow us to skip just one row at a time.
So using the example gauge above, how do we go about doing this? Well it’s pretty simple, actually. All we need to do here is divide our stitch count by our row count – 21/26 = ~ 0.80769. The closest pick up rate to this fraction that would allow us to skip just one row at a time is 4/5 (4/5 = 0.8). So, for a gauge like this, we would simply pick up 4 stitches within every 5 rows.
The nice thing about knitted fabrics is that things don’t really ever have to be perfect – there’s plenty of room for flexibility. As long as you can get close enough to your gauge ratio, picking up a couple more or less stitches overall will likely not have any noticeable negative effect on the resulting fabric.
pick up & knit along a vertical garter edge
When it comes to picking up stitches along a vertical edge in garter stitch, your pick up rate will typically be 1 stitch for every 2 rows. Because each stitch in garter is about twice as wide as it is long (due to the way the fabric is constructed), you would essentially be picking up 1 stitch every other row.
This gives us a unique opportunity when working with garter fabric in particular. That is, you can pick up stitches inside each garter knot, rather than in between the horizontal bars. Picking up stitches in this manner results in a smoother transition between edge types, particularly on the wrong side of the fabric.
Step #1:
Insert your right hand needle into the outermost purl bump from bottom to top. It will look like a downward arc (or a ‘frown’).
Step #2:
Grab your working yarn and wrap it around your right hand needle, with the tail end at back and the working end at front.
Step #3:
Pull the yarn through.
Step #4:
Insert your needle into the next purl bump, from bottom to top.
Step #5:
Wrap the working yarn around your right hand needle from back to front.
Step #6:
Pull the yarn through.
Step #7:
Repeat Steps 4 to 6 until you’ve worked across all rows.
Right Side
Wrong Side - Inside the Purl Bumps
Wrong Side - Between Horizontal Bars
As you can see in the images above, picking up stitches inside the purl bumps of a garter edge (rather than between the horizontal bars) results in a much neater looking wrong side that lays nice and flat, without any unnecessary bulk. This makes it much more ideal option for reversible garter knits!
Some final words...
And there you have it – the bare bones basics of picking up stitches. I hope you enjoyed this tutorial – and as usual if there’s anything you’re feeling stumped by, let me know in the comments below and I’ll do my best to help you out!